Hydrangeas are one of my favorite flowers. Granted, I have lots of “favorites” when it comes to flowers, but hydrangeas are certainly high on that list! I find I’m drawn the most to the blue and bluish-purple hydrangea varieties.
A couple of years ago I made some Hydrangea Cupcakes and I’ve been wanting to make a set of pretty Hydrangea Cookies to match ever since! I’ve actually made hydrangea decorated cookies a few times, but was never really happy with them. I just couldn’t quite settle on a design I loved.
Last week, my incredibly talented friend Maryann (aka Cookie Artisan) shared a beautiful set of hydrangea cookies on her Flickr page. As soon as I saw them, I instantly knew they were the exact inspiration I’d been needing! Maryann graciously gave me the go-ahead to make a set of hydrangea cookies inspired by hers.
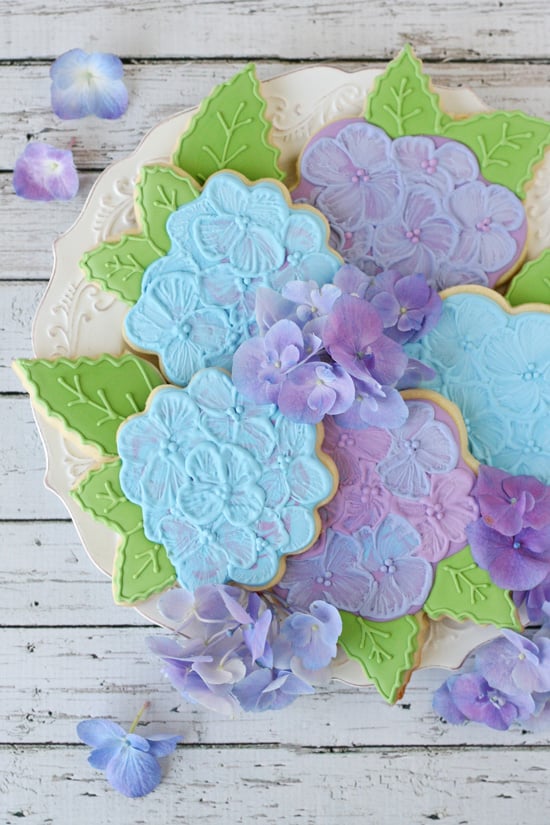
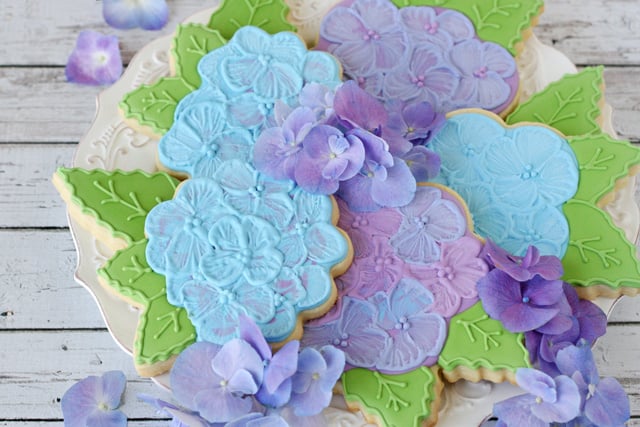
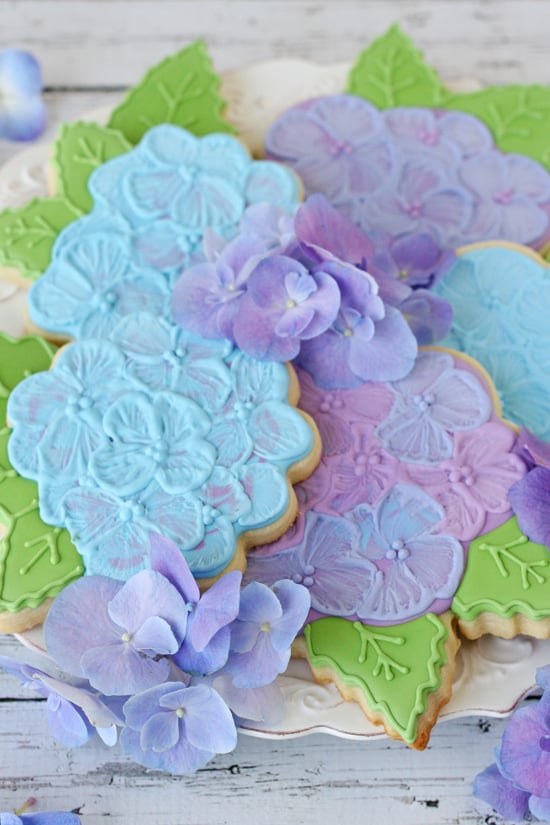
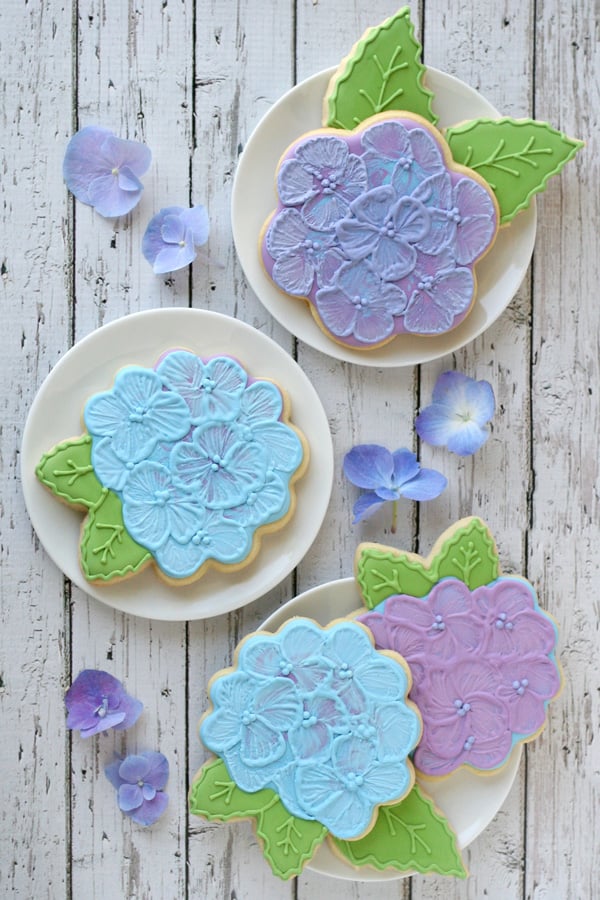
I got right to work, and I’m very happy with how this set of hydrangea cookies turned out. I think these could be perfect for Mother’s Day or a special gift anytime!
How to make Hydrangea Cookies –
Begin with a batch of cookies using my Sugar Cookie Recipe.
While the cookies bake you can prepare the icing using my Royal Icing Recipe.
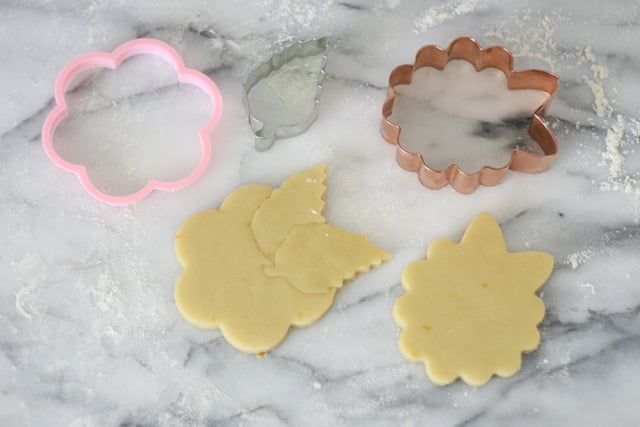
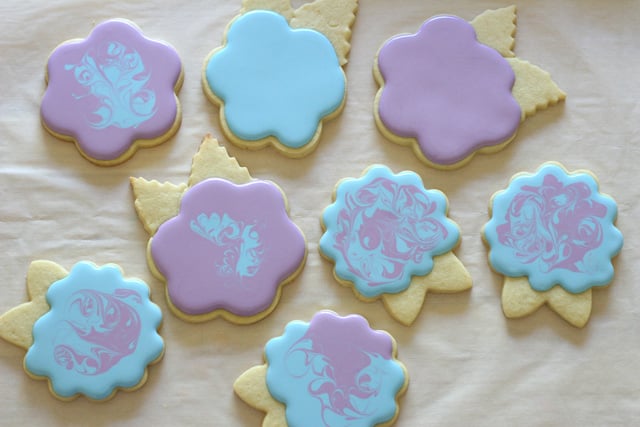
As you can see below, I cut out the hydrangea flower shape using two different techniques (and cutters). I have a nice copper cutter (from Copper Gifts), and I also experimented with using a large flower cutter along with a leaf cutter.
I prepared my royal icing in shades of blue and purple (I used Americolor gels and used regal purple with electric purple, and sky blue with royal blue, then added a bit of the purple icing to the blue, and vice versa, so the shades work well together).
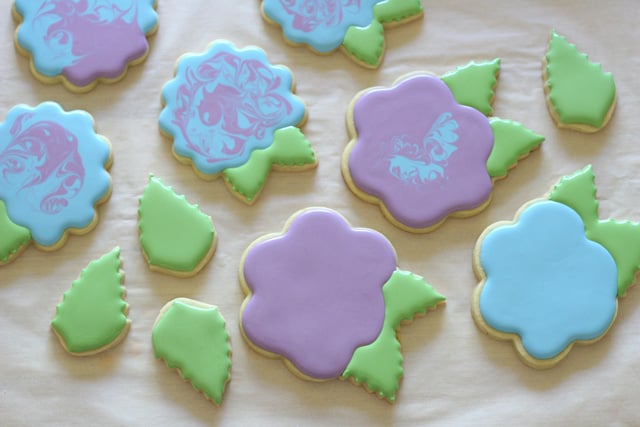
I outlined and flooded the flowers (as shown below). I experimented with blending the colors a bit and I really liked the two tone ones best. To create the two tone effect, outline and beginning filling in your cookie with one color (such as blue), then add sections of the other color (purple), and use a toothpick to blend the two colors just a bit.
Once the flowers are outlined and flooded, allow to set up a bit (at least 30 minutes), then add the leaves (I mixed Americolor avocado and mint).
Once the flowers and leaves are filled in, allow the icing to dry well, until the surface is dry to the touch (at least 4 hours).
Once the base icing is dry, prepare to add the final texture, using a technique called brush embroidery. I have done a bit of brush embroidery before (including on these spring cookies), but sometimes I forget how beautiful it can be! My friend Ali of Ali Bee’s Bakeshop is a master at brush embroidery and shares her tips on it HERE, and HERE.
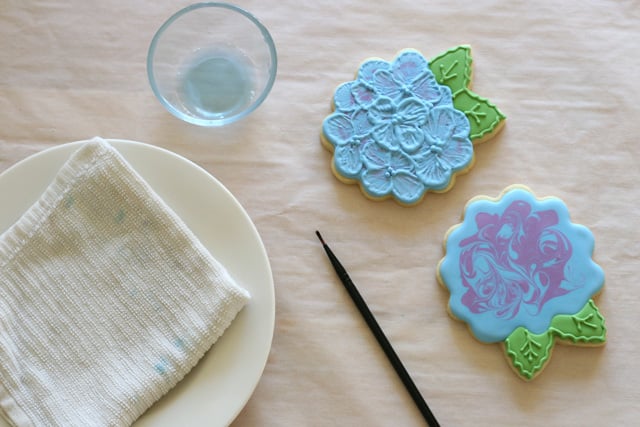
To get started, you’ll need a small paintbrush (shown above), a moist dish cloth, and a small dish of water. Brush embroidery is much like any art in that each artist has a little different way of doing it. Once you get started, you’ll be able to experiment with the look you like best. In general, I actually like using a brush slightly wider than the one shown, but I couldn’t find it, so I used what I had!
You want to use icing that is a thick consistency (about the consistency of toothpaste), and you’ll want to keep your brush moist (but not wet), using either the dish of water (then wipe the excess on the dish cloth, or by just wiping the brush on the moist cloth.
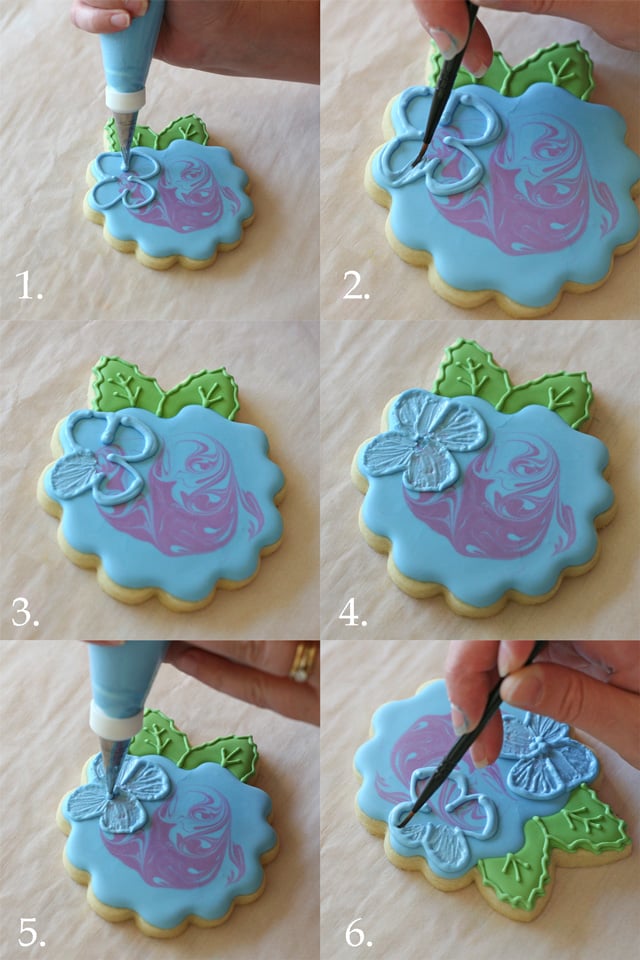
How to do brush embroidery on hydrangea cookies – (pictured above)
1. Pipe a four petal flower (very simply, it does not need to be perfect).
2. Use the moist (but not wet) brush to brush the icing from the edge of the flower, toward the middle (as shown). Do not completely eliminate that outside edge of the loose flower shape.
3. Continue brushing from the outside, toward the center, working on one petal at a time. Wipe off your brush onto the moist towel, as needed.
4. Continue the same technique with the other 3 flower petals.
5. Add 1 or more small dots of icing to the center of the flower (this can be done now, or after you have created all the small flowers on the hydrangea).
6. Continue filing in the hydrangea with small flowers, using the same steps as above. As you fill in the hydrangea you will need to make some full and some partial flowers.
A few notes on brush embroidery….
If you can not see the (desired) brush marks, you are likely either using too much moisture (on your brush), or your icing it not thick enough.
Brush embroidery takes some time, especially on a large cookie (such as these). I would not recommend trying to make a hundred cookies like these (unless you have help).
Below you can see some of the variations of color on the different cookies. Feel free to play around with colors you like.
Do you love hydrangeas too? Which colors are your favorite?
Beautiful, absolutely beautiful
that is real artistry. (cupped hands over mouth, making crowd cheering noise)
Do you sell these cookies? Can I order them?
You truly are an artist, Lucy. I’m blown away by your creative cookies. And I don’t even like to bake. LOL 🙂