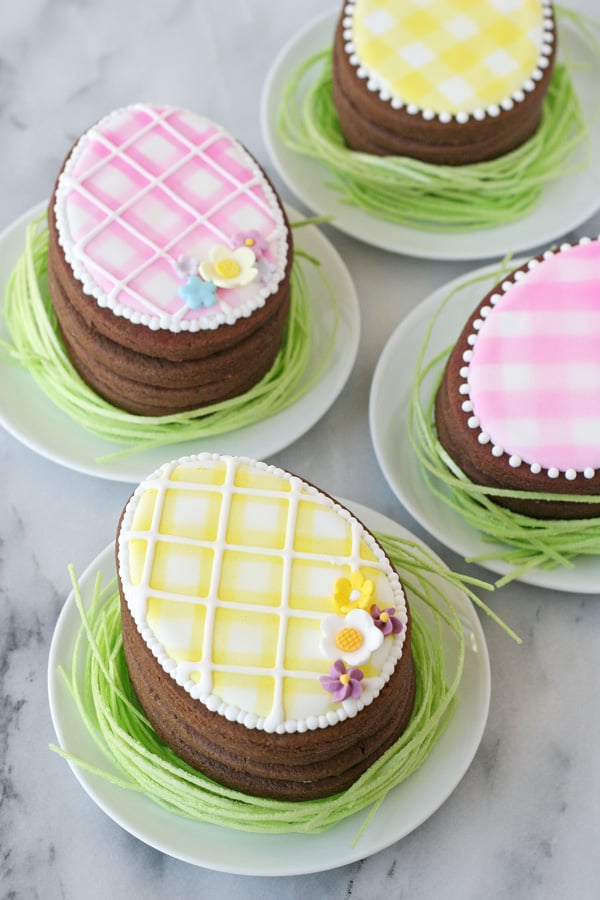
I’ve been dreaming of making these Easter Egg Cookie Boxes since last spring and I just couldn’t let another year pass without bring them to life!
Every once in a great while an idea actually comes together the way I planned… this is one of those rare occasions!
These Easter Egg Cookie Boxes will join the little “family” of cookie boxes I’ve created, starting with these 3-D Pumpkin Cookies, then Christmas Drums and Valentine’s Hearts.
These are not your everyday, “just whipped them up” kind of cookies… these are special occasion cookies that do take a bit of preparation. But I’m quite sure that presenting one of these pretty cookie boxes to your Easter guests will elicit rave reviews! I mean they’re cookies, filled with candy… how could anyone resist? =)
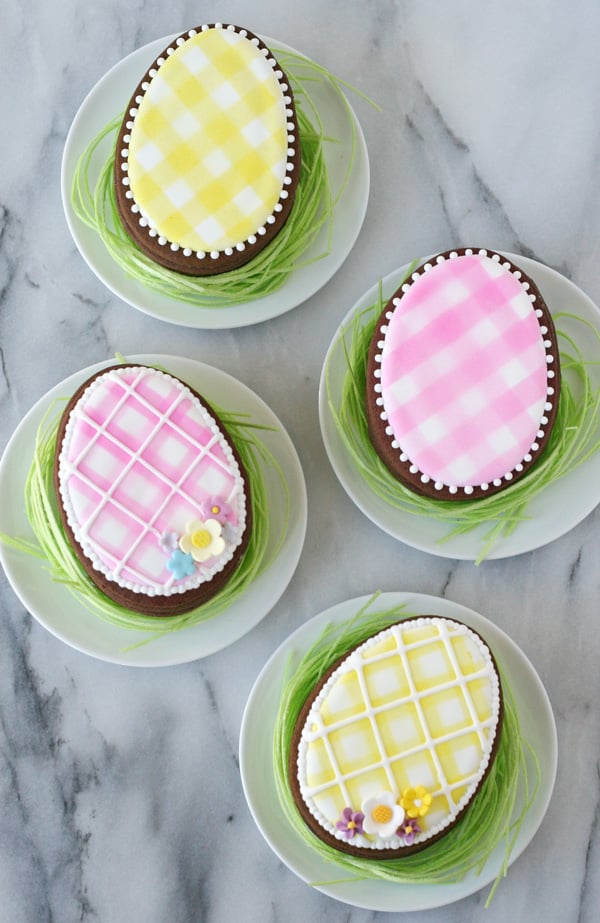
The options are endless for the design you could add to the top cookie. I planned for a simple gingham pattern, as I first created for these Gingham Cookies (<– click for full tutorial), but then I wanted to dress them up a bit more. You can see I left a couple with just the gingham pattern and a simple border, and then for a couple I added some extra dimension with icing on top of the gingham pattern, as well as some small fondant flowers. I have a full post on creating fondant flowers <–here.
To create these Easter Egg Cookie Boxes you’ll need…
*A batch of cookies made with my Chocolate Rolled Cookie Recipe.
*A batch of Royal Icing.
*Two egg shaped cookie cutters, one about 1″ smaller than the other.
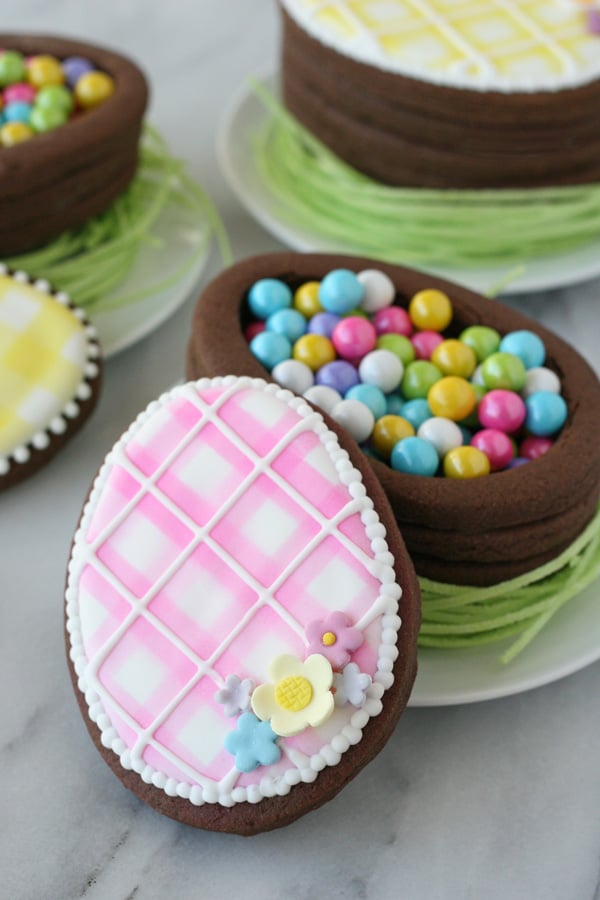
*Small candies to fill the “boxes”. I filled mine with pretty pastel Sixlets from Sweet Works.
Directions –
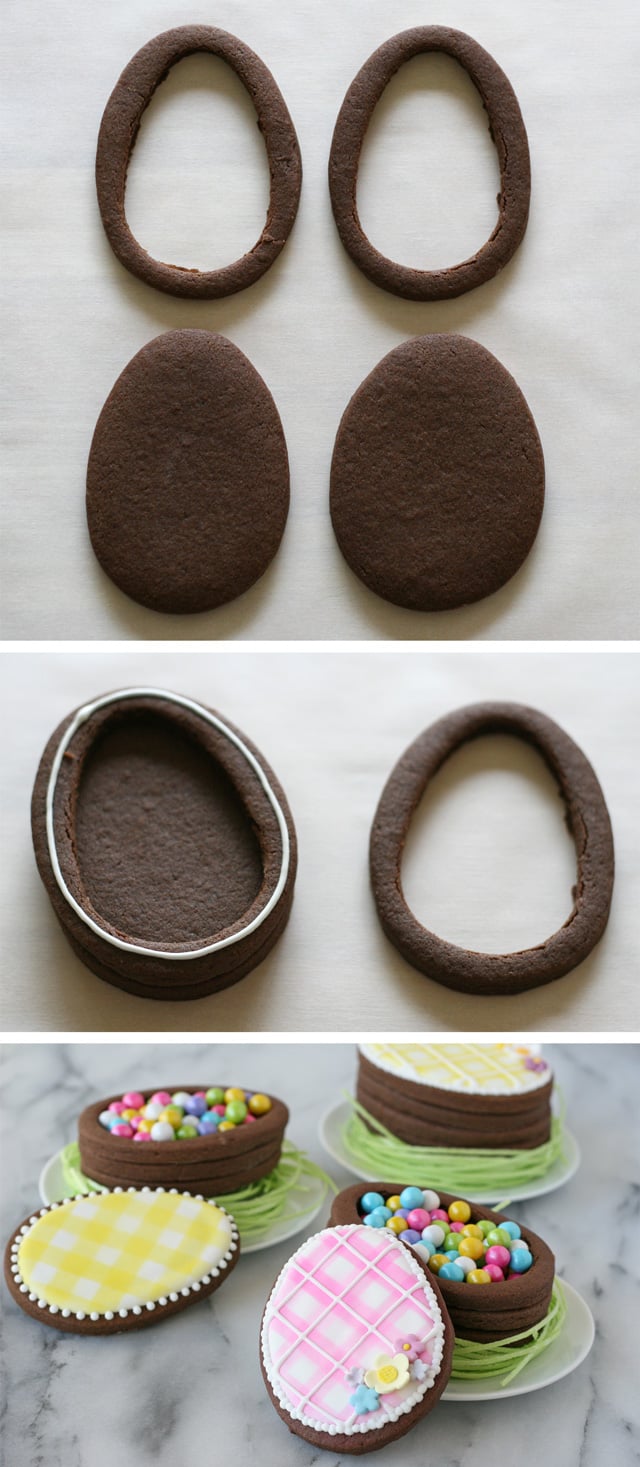
1. Prepare dough and cutout cookies with the larger of two egg shaped cookie cutters. Cut out and bake only large cookies. If you remove the center “cutout” before baking and bake just “outer rings” the “rings” will bake up larger than the large cookies that they need to be later matched to.
2. When the cookies are baked, allow to cool a few minutes on the baking sheet, then for half of the cookies, use the smaller cookie cutter to cut out the center of cookies. The cookies are quite delicate when they are warm. I would suggest pressing the smaller cutter into the baked cookies, but leave the center cutout intact until the cookies fully cool. Carefully move the cookies to a cooling rack and allow the cookies to cool fully before removing the center cutout. If the outer “ring” breaks when removing the cutout, simply press back together and it can still be used. You can use a bit of royal icing to “glue” it together for use.
I suppose there may be the question “what do you do with the inner cookie cutout?” Well, in our house with spread a bit of Nutella on them and they “disappeared” =)
3. For each “cookie box” you will need two full cookies (large) and two cookie “rings” (large cookies that have had a the centers cut out).
4. Prepare royal icing. For the design shown I only made white icing. Feel free to prepare any colors you like. If you are concerned about the icing showing between the cookie layers, feel free to prepare some dark brown icing (although I had very little problem with the icing showing). If desired, you could also use melted chocolate to “glue” the layers together.
5. Assemble the boxes by piping a thin “ring” of icing onto one of the large, full cookies. Add one cookie ring, then another line of icing and the second cookie “ring”. This completes the base of the “box”.
6. Decorate the box “lid” (one full, large cookie) as desired. I decorated the tops of the cookies with a gingham pattern, just as I did with these Gingham Cookies. Hop over to that post for a full tutorial on the gingham pattern. I used Wilton Color Mist food coloring spray (available from most craft stores), but if you have an airbrush that would work just as well, or better. You can make a homemade stencil as I first did when I invented this technique, or now you can purchase stencils that are great to use again and again! This time around I used a stencil from The Cookie Countess (I used the “wide stripe”).
7. Simply place the decorated lid on top of the “box” and you’re done! Feel free to add a ribbon around the stack of cookies to hold the lid in place, if desired. If you’re extra observant you may notice that in a few of the photos (in this post) the candies are piled above the edge of the cookie “box”. This is just for the photos. In order to have the lid sit flat on the box, make sure all of the treats inside are below the rim.
I think these special cookie boxes would make gorgeous place settings for Easter Dinner. Feel free to add names to the tops, or decorate them in countless different ways!
I’d love to see the results if you give these a try! Feel free to share your work on the Glorious Treats facebook page.
Happy decorating!

oh, very cute gift packs and boxes. Thank you for adding this. Please add some links for buying this product
Hello, how are you? I had feature your delicious recipe in my blog (www.myhousetucasa.com/en) , I hope you don’t mind. Have a nice day!
Adorable! I’m going to try these this Easter and custom fill with each recipient’s favourite tiny candy treat. Thank you!
Hello, Glory!
See how my cookies were decorated and I did.
Thanks for the lovely suggestion!
http://www.nacozinhabrasil.com/2014/04/como-decorar-biscoitos.html
Hi Gina, Yours are beautiful, thanks for sharing them! So glad you were inspired to give this a try!