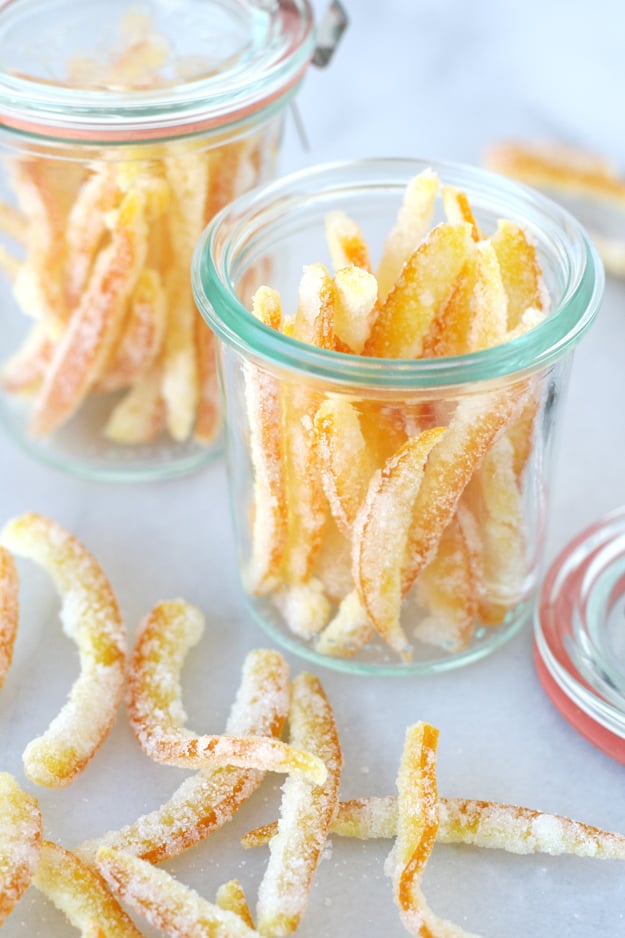
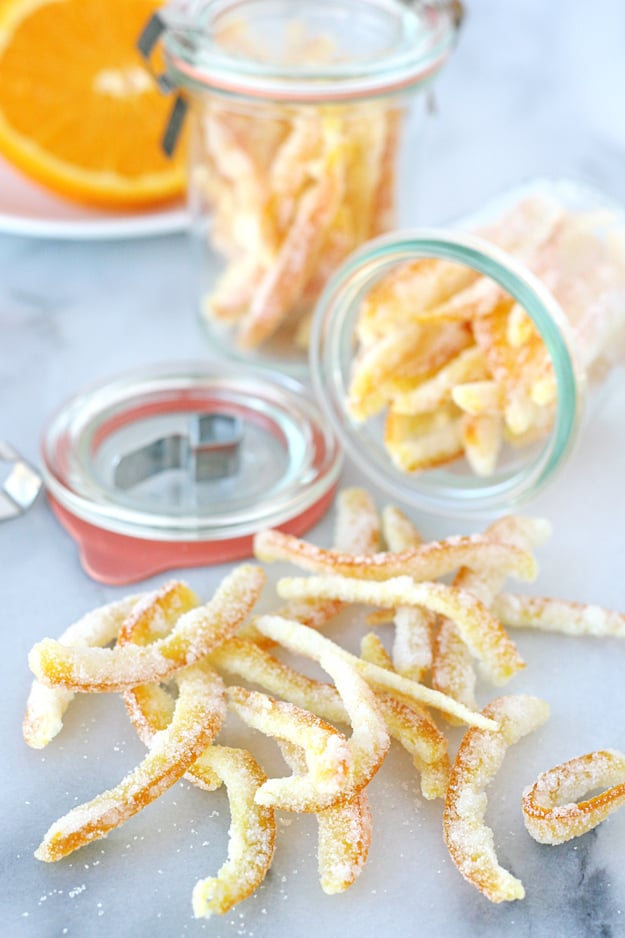
This recipe for Candied Orange Peel produces a sweet, crisp, flavorful treat perfect for adding to muffins, cookies, cakes, or enjoying just as is!
Candied orange peel is a perfect foodie gift for the holidays, just be sure to keep a jar for yourself too!
This makes a gorgeous garnish for cakes (I just *might* have an idea to share on that soon), it can be chopped up as an addition to muffins, scones and cookies and it’s quite tasty as is!
I was inspired to try making this candied peel after a recent trip to the Florida Space Coast. My visit to Florida included lots of delicious food, some fun beach time, and hanging out with this beautiful group of bloggers. One of the stops on our visit was to Backwater Cafe, where I shared an amazing Citrus Waffle with Lindsay of Love and Olive Oil. I’ve seen candied orange peel used as a very small garnish before, but this waffle was topped with a really generous portion of candied lemon and orange peel. I was surprised by how crisp, flavorful and delicious they were!
When I returned home, I really wanted to recreate that delicious candied zest and I realized I could just go back to the source… Backwater Cafe. I called the restaurant and the chef generously shared his recipe and techniques with me. I hope you give this recipe a try and are inspired to add this delicious little pop of flavor one of your favorite recipes!
One of the distinct features of the candied peel I enjoyed at the Backwater Cafe was that the peel was nice and crisp. After speaking with the chef at Backwater Cafe I learned that the two steps that make their peel so nice and crisp is, first, cutting the peel VERY thin (it should be cut to about 1/8″ thick) and also, allowing the candied peel to dry for two full days before packaging it to store.
How to make Candied Orange Peel
(Note- I’ve written out the instructions here, along with photos, and also included a recipe in an easily printable format at the end of the post. Of course you can also just highlight and print the text and photos directly from the post, as is.)
1. Cut off the ends of an orange (as pictured below), then cut into the peel, creating 6-7 sections, while making sure not to cut too far into the orange itself.
2. Pull off the sections of peel, then press flat onto a cutting board and use a sharp knife to cut very thin (about 1/8″ thick) slices of peel. If desired, before cutting into small strips, you may want to trim off some of the white (pith) from the underside of the peel. I did not trim mine (and the finished results were still delicious), but when I looked back at the picture of the Backwater Cafe waffle I think they may trim it a bit at the restaurant.
3. In a large pot, heat equal parts water and sugar and stir gently until the sugar dissolves.
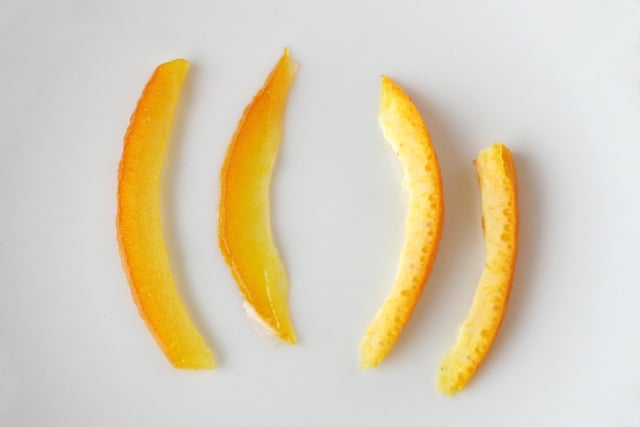
4. Add the strips of peel and cook over medium to medium-low heat (keeping a slow simmer) until the peel becomes translucent, this will take 45-60 minutes. Use the photo below for reference, the peel on the left is fully cooked, the peel on the right is fresh off the orange (uncooked).
5. When the peel is quite flexible (limp) and translucent, drain the peel from the cooking liquid. If desired, use the sugar syrup to sweeten iced tea.
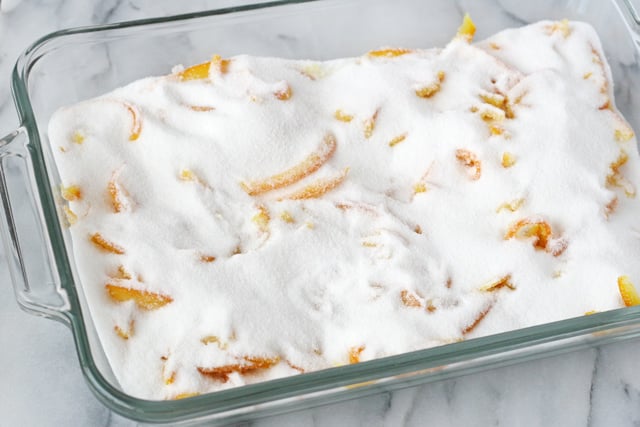
6. Prepare a large dish (such as a 9″x 13″ casserole dish) by adding about a cup of sugar to the dish. Add the drained orange peel, then layer with an additional cup or more of sugar until the peel is full covered. Allow the peel to sit, covered in sugar for 15 minutes or so (see photo below).
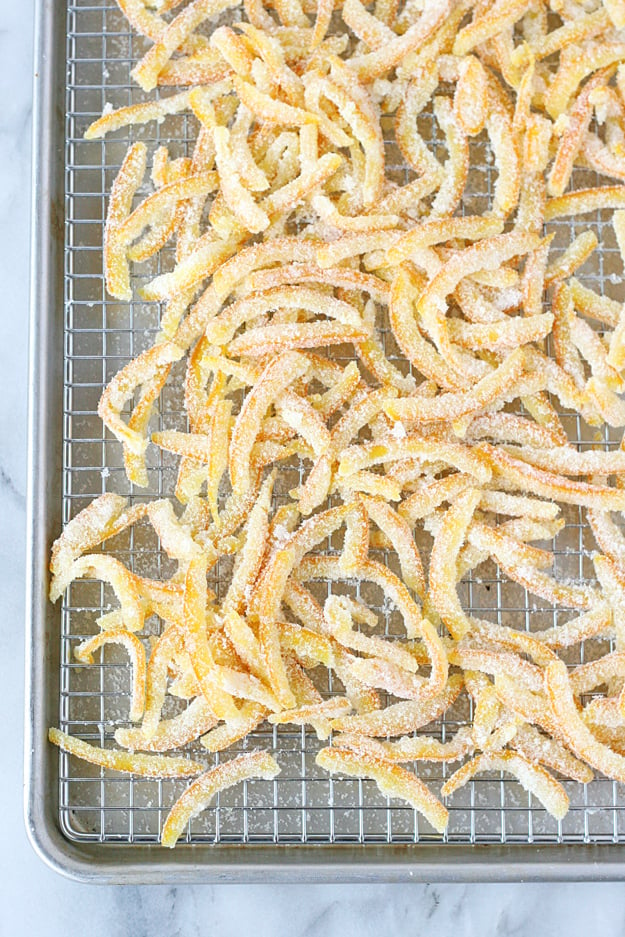
7. Remove orange peel from sugar and lay on a large cooling rack (with a baking sheet under to avoid a big mess). Feel free to save the sugar remaining in the dish, I added mine right back into my sugar canister (any remaining essence of orange would only enhance most recipes). Spread out the peel as much as possible so there is good air flow. Allow peel to sit out (at room temperature) for 48 hours. A couple times during the drying time, mix the peel around a bit, so that each piece is being exposed to air.
8. Once fully dry, the orange peel will be nice and crisp and can be stored in an airtight container of your choice and stored at room temperature. The candied peel will last many months.
The finished candied peel is sweet, both crisp and chewy, with a slight bitter undertone. To me, it’s the adult version of those orange slice candies.
I’m looking forward to adding some of this delicious candied orange peel to my holiday recipes!
Happy holiday baking and treat making! =)
You can read more about the adventures our blogger group had on the Florida Space Coast over on the always adorable, Cake Spy site.
How to Make Candied Orange Peel

Candied Orange Peel
Ingredients
- 3 large oranges peel only
- 3 cups water
- 3 cups sugar
- 2-3 cups sugar additional, for coating
Instructions
- Cut off the ends of an orange, then cut into the peel, creating 6-7 sections (as pictured above), while making sure not to cut too far into the orange itself.
- Pull off the sections of peel, then press flat onto a cutting board and use a sharp knife to cut very thin (about 1/8" thick) slices of peel. If desired, before cutting into small strips, you may want to trim off some of the white (pith) from the underside of the peel. I did not trim mine (and the finished results were still delicious), but when I looked back at the picture of the Backwater Cafe waffle I think they may trim it a bit at the restaurant.
- In a large pot, heat the water and sugar and stir gently until the sugar dissolves.
- Add the strips of peel and cook over medium to medium-low heat (keeping a slow simmer) until the peel becomes translucent, this will take 45-60 minutes. (See photos above, in blog post, for reference)
- When the peel is quite flexible (limp) and translucent, drain the peel from the cooking liquid. If desired, use the sugar syrup to sweeten iced tea.
- Prepare a large dish (such as a 9"x 13" casserole dish) by adding about a cup of sugar to the dish. Add the drained orange peel, then layer with an additional cup or more of sugar until the peel is full covered. Allow the peel to sit, covered in sugar for 15 minutes or so (see photo below).
- Remove orange peel from sugar and lay on a large cooling rack (with a baking sheet under to avoid a big mess). Feel free to save the sugar remaining in the dish, I added mine right back into my sugar canister (any remaining essence of orange would only enhance most recipes). Spread out the peel as much as possible so there is good air flow. Allow peel to sit out (at room temperature) for 48 hours. A couple times during the drying time, mix the peel around a bit, so that each piece is being exposed to air.
- Once fully dry, the orange peel will be nice and crisp and can be stored in an airtight container of your choice and stored at room temperature. The dried, candied peel will last many months.






YUMMY! A little time consuming, but worth it. I did about ten oranges so I would have plenty. Time saving tip, to get more of the pith off use a melon baller to scrape the pith, works like a charm. Do this before you cut peel into strips. I used the candied peel in a chocolate, dark chocolate chip cookie and it is so tasty.
I seriously need the recipe for those cookies!
I’m making this recipe right now. I’m curious about the purpose of letting the drained pieces sit in sugar for 15 minutes other than just allowing sugar granules to adhere to the pieces. If you want a slightly less sugary product, is that step necessary? Thanks!
These turned out so beautifully! And, I used the remaining syrup from the oranges for grapefruit peel the next day! Took longer for the grapefruit to turn translucent. You taste the sweet and then very tart. Will use the resulting syrup for drinks.
These sound great, but I’m going to try grapefruit next, wow.