Several months ago, I was chatting with a cookie friend (hi Trinette!) and we were talking about inspiring cookies we had seen recently. THESE creative pinata cookies came up. As we continued chatting, our conversation shifted to cookie designs we might like to try for the coming seasons (Fall and Christmas). Suddenly… an idea hit me! I blurted out my idea excitedly and my friend laughed to think that might be the way I react any time I get a fun idea =)
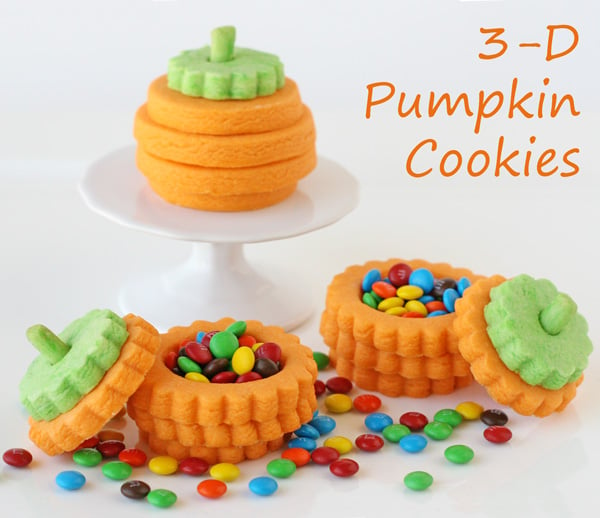
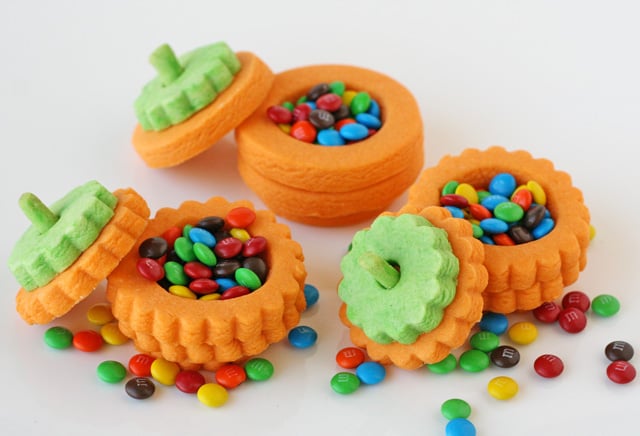
My fun (and oh so exciting!) idea was to take inspiration from the Pinata Cookies by Project Denneler (as featured on She Knows), along with inspiration from some adorable 3D cupcake cookies by Sweet Sugar Belle, mash them together… add a twist for fall, and ta-da… 3D Pumpkin Cookies!
Aren’t they cute?
Of course the extra fun feature is not just the 3D shape, but the little treasure inside!
Want to make some?
To start, you’ll need a batch of sugar cookie dough using my Sugar Cookie Recipe.
After you’ve mixed up the dough, grab a small ball (about a baseball sized) amount of dough and kneed green food coloring into the dough (I used Americolor mint green and leaf green). Once the green color is fully worked into the dough, put the dough in a plastic bag and place in the refrigerator (about 30 minutes). With the remaining dough, add orange food coloring (I used Americolor orange and electric orange), and kneed the coloring into the dough until desired color is achieved. Place orange dough in a plastic bag and refrigerate (about 30 minutes). When the dough has chilled, baked according to recipe directions (using the cutter sizes listed below).
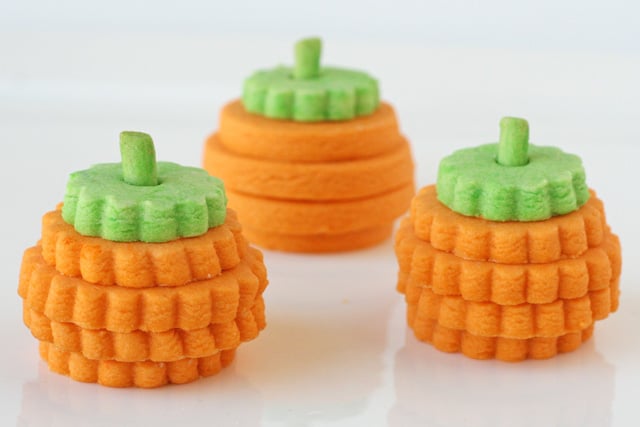
As you’ll notice in the finished photos, I made a few pumpkins using scalloped circle cutters, and a few pumpkins using regular circle cutters. Feel free to use either shape you prefer, or the cutters you have on hand. For the scalloped circles I used THIS SET (from Karen’s Cookies) (this set is double use, and will cut plain round circles also).
For each 3D pumpkin you’ll need…
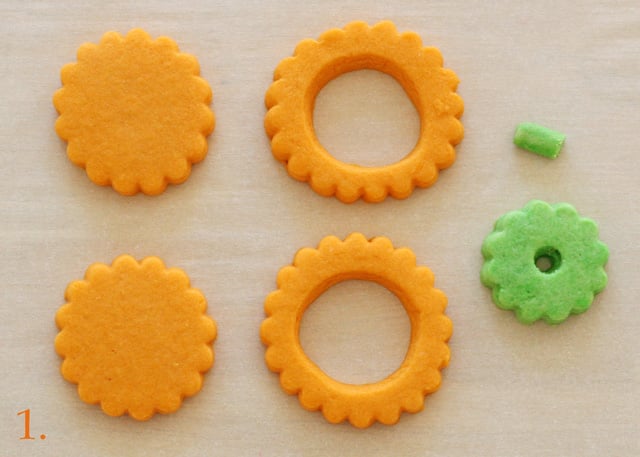
(2) Orange scalloped circle cookies 1 7/8″ diameter
(2) Orange scalloped circle cookies 2 1/4″ diameter with a 1 1/4″ or 1 1/2″ circle cutout.
(1) Green scalloped circle 1 1/4″ or 1 1/2″ diameter, with a hole cutout in the center using a straw.
(1) Green stem, made from rolling a small amount of green dough into a “snake”, and cutting it into pieces about 3/4″ long, then bake.
Note- Feel free to adjust the sizes a bit based on the cutters you have, or the finished size you desire.
When your cookies are baked, and you’re ready to assemble, prepare a batch of royal icing using my Royal Icing Recipe.
Time to assemble the pumpkins….
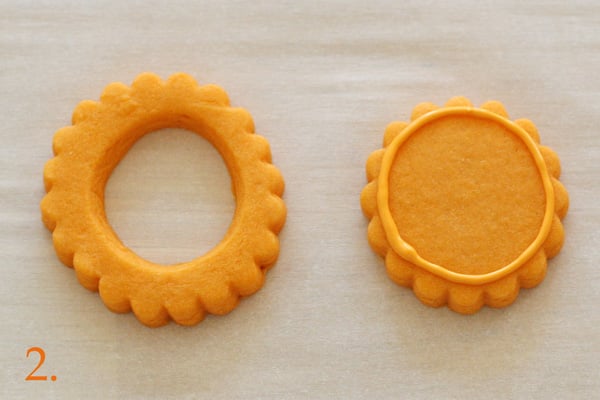
(Step 2) Start with one of the solid circles and one cutout circle. Add a line of royal icing onto the solid circle, then place cookie “ring” on top.
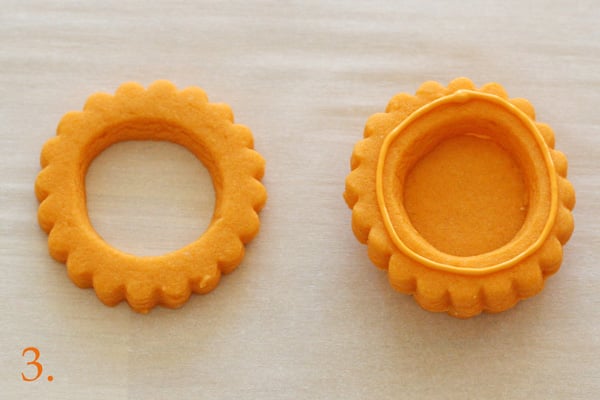
(Step 3) Add a line of royal icing onto the first cookie “ring” (which you just attached to a base in step 2). Add the second cookie “ring”.
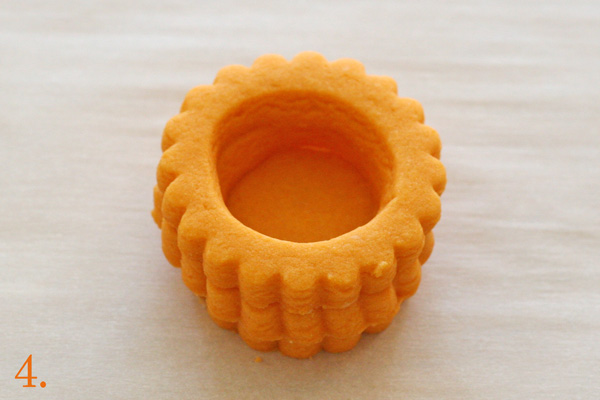
(Step 4) The base of your pumpkin is complete.
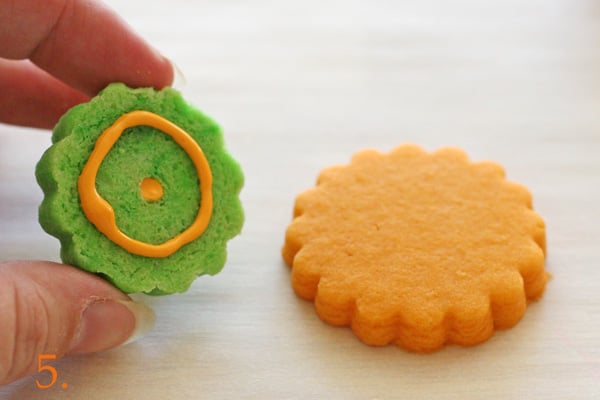
(Step 5) Assemble the pumpkin top by first attaching the small green stem to the green circle (using a bit of royal icing). Then add a line of royal icing onto the bottom of the green circle (as shown), and place the green circle on top of a solid orange circle.
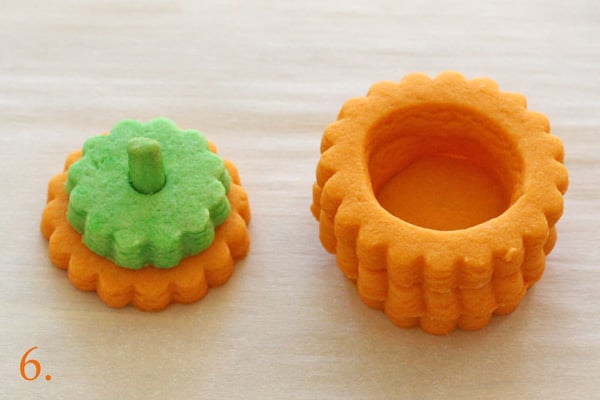
(Step 6) Allow the pumpkin top (left) and pumpkin base (right) to dry fully (at least 1-2 hours). Fill pumpkin cavity with small candy (I used mini M&Ms), place top, and share with family and friends!
These cute 3D Pumpkin Treasure Cookies would make great party favors, or special treats for a Fall or Halloween party.
Happy treat making!
I’ve linked up this post to Tidy Mom’s- I’m lovin’ It post.
These are adorable! I’m sending the link to my younger sister who might just have some time to makes some for the family 🙂
I’d love for you to link up to our Finished Friday blog party.
These are so cute! You always have such clever ideas!! Thanks for sharing!!
Super cute and so much fun! Love the bright colors and the surprise inside!!
I used my own recipe which is essentially the same as yours. I did tweak it a bit because I was about 1/4 cup short on the butter so I put in cream cheese and then added some pumpkin pie spice and cinnamon. They turned out great! Once recipe is definitely enough for a dozen. I had a bit of dough leftover and I colored a portion of it brown and made some marbled leaf cookies! I’ll post a pic on Instagram so you can see 🙂 Thanks again! They will be an awesome treat this weekend as we celebrate Thanksgiving here in Canada.
Perfect, thanks for the update!
I just finished making a dozen of these. They are so adorable an SUPER easy to make. Love them! Thanks for the inspiration.
Awesome! So glad you gave them a try! Did you use my cookie recipe? Were you able to make a dozen with one batch of dough? I didn’t make that many, and I had another reader asking how many a batch of dough would make =)
I am speechless! Your ideas are always fantastic.
Could you please post a tried and tested blue velvet cake recipe, using no premixes, plz??
These are fantastic. Such a genius idea.
I want to make these pumpkins too! 🙂 Could you tell me app. how many of them did you get from one bunch of dough? Thanks!
I only made four, and had a bunch of dough left over, but I would guess you could make about 7-8 if you used the same cutters I did.
Update- I had another reader say she used a very similar recipe to mine and was able to make 12 cookie pumpkins.
This is such a fabulous idea! Can anyone tell me where I can buy the cookie cutters? Thanks so much! ☺
Sherri- I have a link to the cutter set I used (listed just below the image with the #1 on it).
Absolutely LOVE this!! Definitely going to try them out for my daughters First Birthday next month :0) Love your site!!