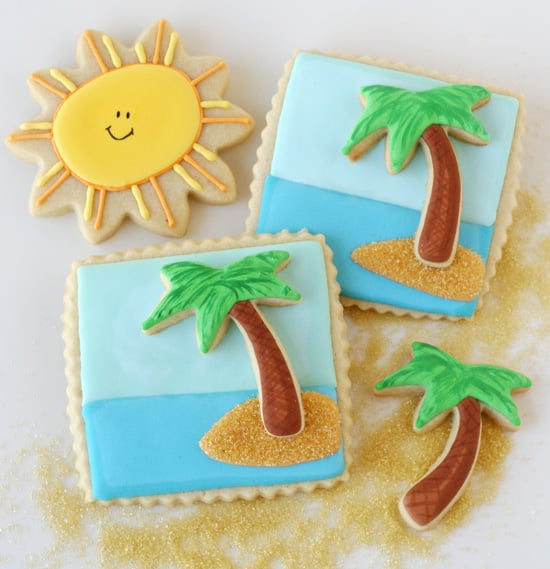
A few weeks ago I was chatting with a long time friend (hi Cecilia!) who mentioned her oldest daughter’s birthday was coming up. Since I love my friends, and I love making cookies… birthdays are the perfect opportunity to make special treats! The birthday was going to be held right at the beach (gotta’ love California!) and I was given full reign to make any design I thought appropriate. I would be shipping the cookies, so I knew I wanted a design that would hold up to a bit of handling. I’ve made quite a few beach and luau type cookies before (shells, starfish, hibiscus flowers, sunshine) and wanted to do something totally different. I settled on a simple beach scene, with some added dimension as a special effect. I love the pretty blues, and the simple yet fun, final design. I heard they were a hit, and it makes me feel so good to be a part of a special occasion even from the other end of the state.
This general design is quite simple, and could easily be adjusted to include a sunset, waves, fish… or whatever you can imagine!
Ready for a mini vacation? Let’s head to the beach!
You’ll need a batch of cookies made with my Sugar Cookie Recipe.
Also, prepare a batch of Royal Icing.
I prepared 5 colors of icing (light blue, medium/aqua blue, green, brown, and golden tan) each in a medium consistency (just thin enough to settle flat, but not so thin it runs off the cookie). When making the icing… if you run a spoon through the bowl, the line the spoon made should fill in after 12-15 seconds.
For each final cookie, I used two separate cookies, a large (about 4″) square, and a small palm tree.
Let’s decorate!
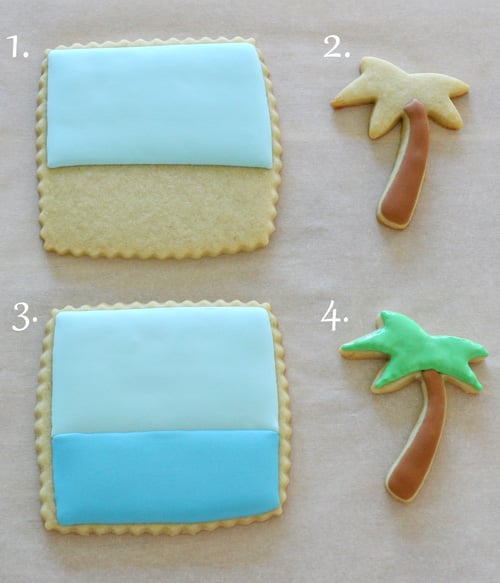
1. Outline and fill in the light blue “sky” area.
2. While the sky sets up, outline and fill in the trunk of the palm trees.
3. When the sky area has set a bit (about 1 hour), outline and fill in the lower “ocean” area.
4. When the tree trunks have set up (about 1 hour), outline and fill the green “palm leaves”.
Allow both cookie designs to dry fully (6-8 hours).
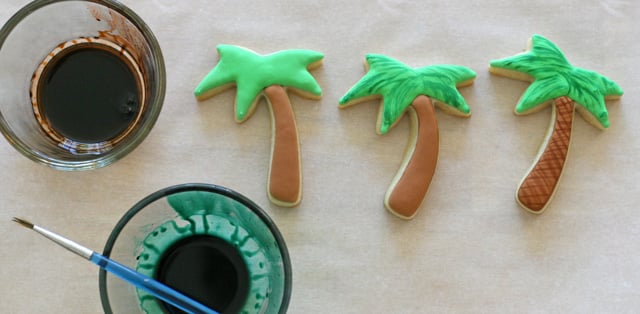
Add detail to the palm trees-
When the icing on the trees is fully dry, add details by “painting” with a small (new) paintbrush. Create your “paint” by adding a drop or two of concentrated color (such as Americolor) to a tiny bowl with a teaspoon or so of clear vanilla extract, or a clear alcohol such as vodka (the alcohol evaporates fully as the color dries).
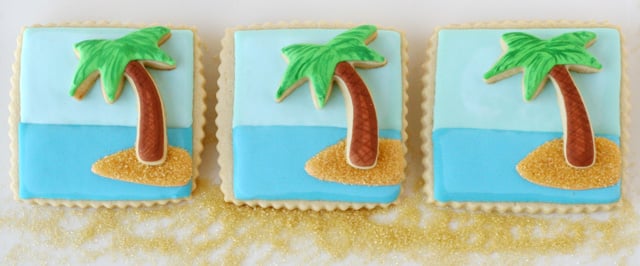
Assemble the cookies-
When the detailing on the palm trees is dry (at least 1 hour), add an “island” onto the large square cookie (as shown below). Pipe a bit of icing onto the back of the palm tree and set it on the (still wet) island. While the icing on the island is still wet, sprinkle the island fully with gold/sand colored sanding sugar. Shake off any excess sanding sugar (or brush off gently with a clean, dry paintbrush).
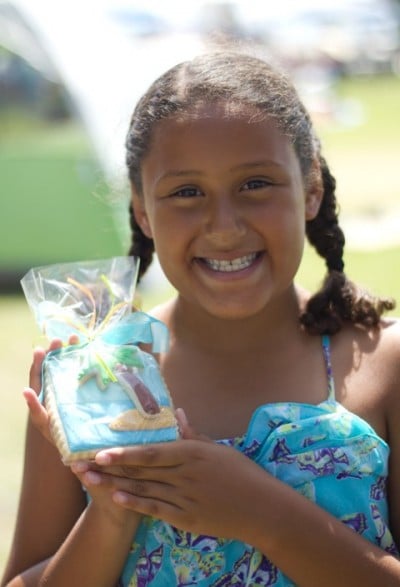
And here’s my favorite photo of this post… the beautiful birthday girl with her cookie!
This is the cutest design! Thanks for sharing 🙂
Such a cute idea and it looks like the birthday girl is thrilled!
These are so adorable! My goodness, you are TALENTED!
Thank you again Glory! They were a hit! Love you!
~Cecilia
Love thus design, very creative.
These are so creative and pretty. Any child would love to have one – or more.
Love these you are so clever Where do you get your cookie cutters both for this and the shells etc.?
Sorry, but I’m not sure where I bought either cutter. I have a full post here, https://www.glorioustreats.com/my-cookie-cutter-collection/ with links to where I buy most of my cutters.
These are just perfect. I have been dying to use my palm tree cutter anyway and these are just pushing me over the edge!
I absolutely love these!!!
Love the clean, polished look that all your cookies have! And just look at that smiley sun and the colored sugar “sand”…so sweet!