Today I’ll begin a series of posts that will cover (most) all of the basics of making cupcakes. A pretty cupcake is always a welcome sight at parties, or as a special treat. Before we can frost or decorate, we need a nice cupcake to start with, so let’s get baking!
First, you need a good recipe. I rely on my favorite Chocolate Cupcake Recipe and Vanilla Cupcake Recipe the most often, but I have several other delicious options on the Cupcakes page. You are certainly welcome to use a box mix, or other recipes as well, most of the tips below will apply to any recipe or mix you use.
1. Follow directions. I know… I’m sorry I have to say it, but it’s true! Recipes are written using certain techniques, each for a reason. If you don’t measure your ingredients properly, or omit ingredients, or over or under mix your batter, you should expect less than desirable results.
2. Preheat your oven. Don’t place your cupcakes in the oven until it is fully pre-heated. The heating element in your oven is extra intense as it is pre-heating, if you put your cupcakes in while pre-heating, the cupcake bottoms may over bake.
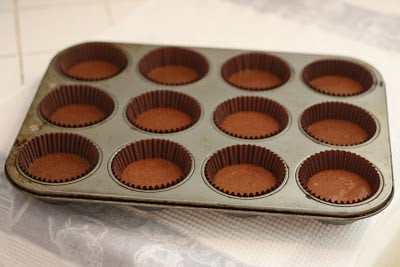
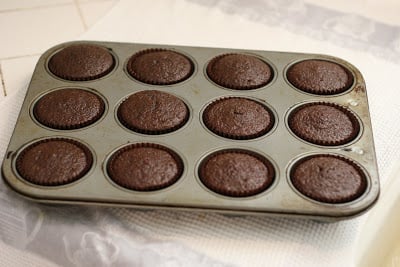
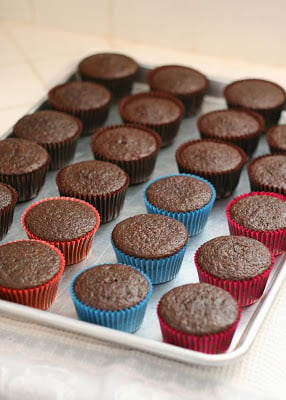
3. Don’t over fill the liners. Most cupcake batters need the structure of the sides of the liners to rise properly. Overfilling your batter will cause the batter to spill over the edges of the liners as it rises, often resulting in flat or mis-shaped cupcakes, and a big mess. Follow the instructions for the recipe or mix you’re using, most recommend filling the batter about 2/3 full.
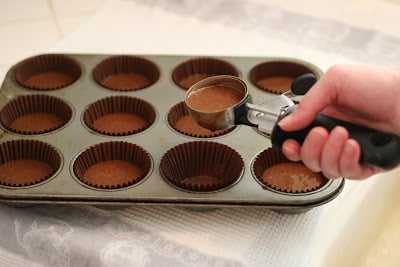
(above) This is how high I fill the liners for most recipes (or box mixes), probably a bit less than 2/3
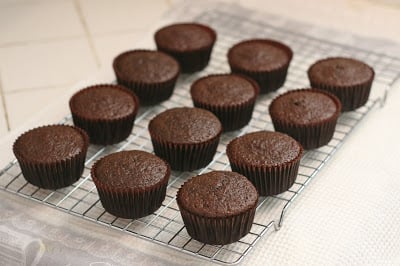
(below) You can see the baked results.
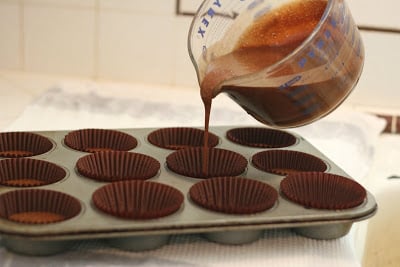
4. Divide the batter evenly among the liners. It’s impossible to get exact same amount of batter in each liner, but if they can be reasonably even, the cupcakes will bake evenly as well. For thinner batters, I use a large measuring cup with a pouring spout (shown below) to pour batter into the liners, doing my best to fill them about 2/3 full. For thicker batters, a large cookie or ice cream scoop works great. I have a scoop that holds about 3 tablespoons of batter, and it works great for dividing the batter.
5. Check the cupcakes at the minimum baking time. If the recommended baking time is 18-22 minutes, check them at 17 or 18 minutes (just a quick peek, make sure not to let too much heat out of the oven). If the tops are rounded and no long appear wet, they may be done. Pull out the pan and use a toothpick to check for doneness if you’re unsure. A toothpick inserted into a cupcake should come out with a few moist crumbs, but no wet batter. Over-baking the cupcakes, by even a few minutes, can cause them to be dry. Be carefully not to under-bake them either, the cakes need time to develop the structure to hold together. Cupcakes removed from the oven too early may never properly rise, or will sink in the center as they cool.
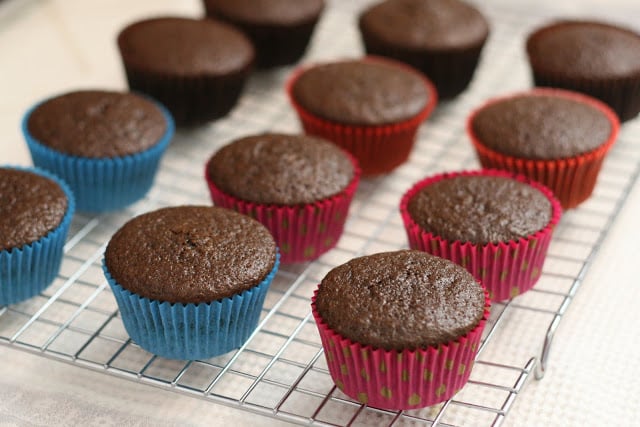
6. Cool cupcakes on a wire cooling rack, not in the cupcake pan. When you remove the cupcakes from the oven, allow to cool only a minute or so in the cupcake pan. Then use a potholder to hold the pan, and tilt it so you can remove the cupcakes and place them on a cooling rack. If you leave the cupcakes in the pan, they will continue to bake from the heat of the pan, and can dry out.
7. Store the cupcakes properly. Once the cakes have cooled, frost or cover right away. Cupcakes made from box mixes can be stored loosely covered, since they tend to get a bit sticky if stored airtight. Most cakes made from scratch can be covered with plastic wrap, or in a tupperware type container. Most cupcakes are best if eaten the day they are made. If needed, store the cupcakes up to 1 full day at room temperature, or freeze (wrapped well) until ready to use (defrost at room temperature).
8. With cupcakes, as with life… there are no guarantees. These tips will hopefully help you bake beautiful, delicious cupcakes, but much of baking is experimentation. I have made my share of over-baked, dry, ugly or otherwise sad cupcakes. I don’t have the answer to every possible baking dilemma… your oven, the weather, your ingredients… all play a part in the end results. In many cases, a swirl of icing and some sprinkles can cover quite a bit!
Happy Baking!
thanks for all the info. i love when you share tips and tricks. it helps newbies like me understand baking a little bit better.
Love this go-to recipe for cupcakes. Now how about one for frosting?
Wonderful post! I love having all the tips together like this. Simple baking hints make such a difference!
Excellent advice!
I cant for the life of me find a good vanilla cupcake recipe, I am going to have to try yours!
Thank you SO much for really explaining WHY we need to do things like not putting the cupcakes in while the oven is preheating. I've heard it a thousand times but never understood why, so I didn't always do it. Now I get it! I love your blog and your treats so much!
Simple yet straight to the point…I like it! In my own blog I try to offer tips and explain the science behind its necessary to do things a certain way…check it out sometime 🙂
bakeblogging.blogspot.com
Thanks for sharing!! Can never get enough tips and how to's : )
All excellent advice!
Happy Baking, Katie from
http://www.westiejulep.blogspot.com
Thank you! I bake lots and I've often found that the simplest hints are the ones that make all the difference. I love your blog!
Great tips! I have one to add that works with MOST cupcake recipes. In order to get a nice dome shaped cupcake, I bake my cupcakes at 400 for the first 5 minutes, and then I turn the oven temperature down to about 350 for the remainder of the baking time. I've had perfectly shaped cupcakes every time!