Happy February friends!
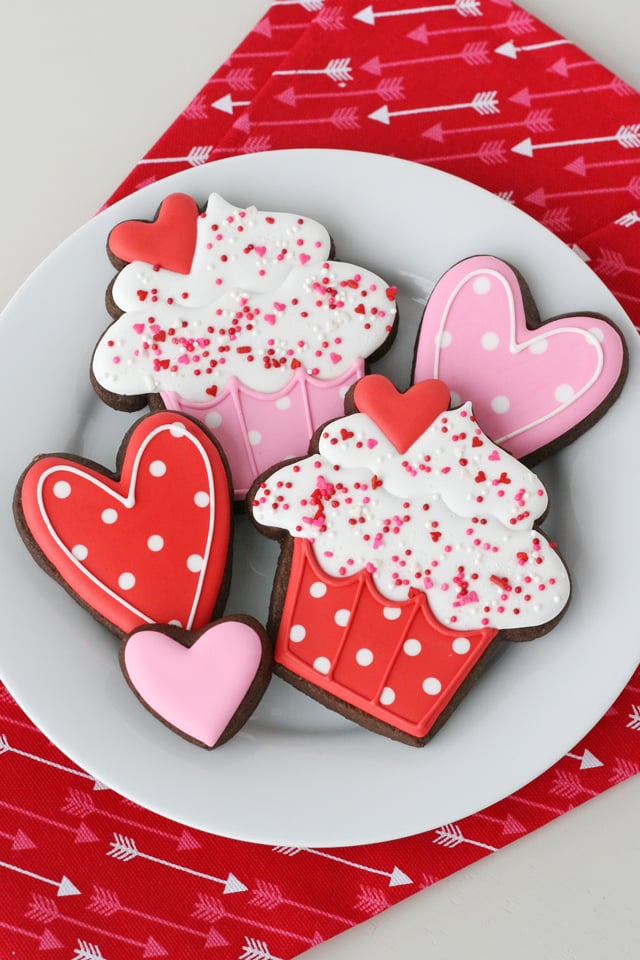
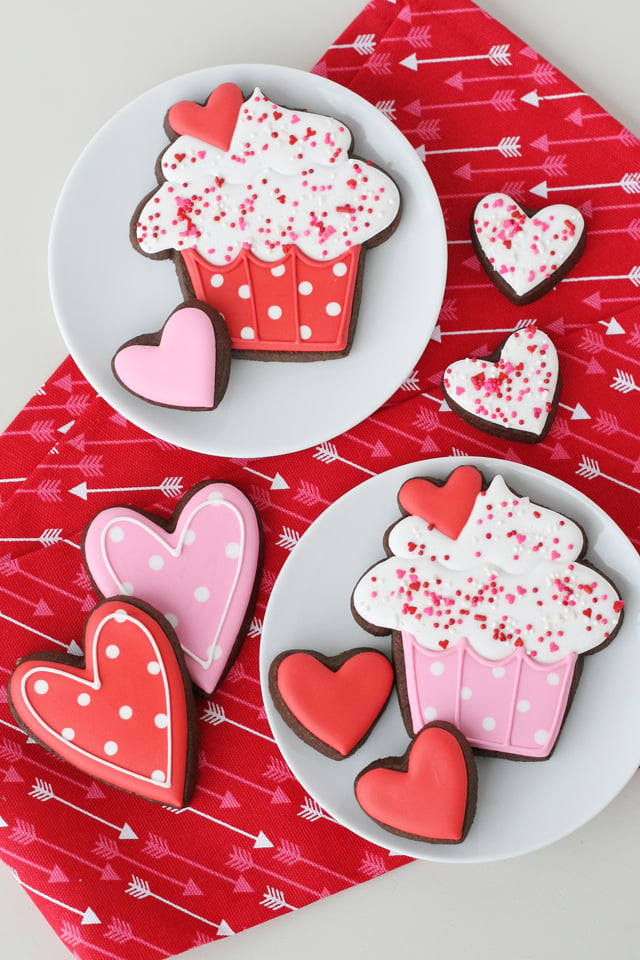
Let’s celebrate the month of love with these sweet Cupcake Decorated Cookies!
Cookies shaped as cupcakes… what could be cuter? =)
Add sprinkles, hearts and polka-dots and you have all of my favorite design elements in one!
PIN IT NOW to save for later!
In my recent cookie post featuring these –> Winter Wonderland Cookies, I included my first step-by-step cookie decorating video and so many of you said how much you loved it!
So I have a second video tutorial for you in today’s post!
I always love to hear your feedback, so keep it coming! =)
I’ll still talk you through the decorating steps and include all the recipe info you need, so let’s get started!
For these Cupcake Decorated Cookies you’ll need…
A batch of cookies using either my Perfect Sugar Cookie Recipe or my Chocolate Sugar Cookie Recipe (as pictured).
A batch of Royal Icing <– this post also includes a beginners guide to decorating cookies with royal icing.
You’ll also need a cupcake shaped cookie cutter.
The cutter shown (with the heart accent) is one I designed and my friends at Sweetleigh Printed brought to life.
I actually have quite a collection of cupcake shaped cookie cutters… they’re just so cute! Here’s a sweet option from Ann Clark Cutters and I love this cute set of cupcake cookie cutters.
How to decorate Cupcake Shaped Cookies…
For this set I mixed up just the three classic Valentine’s Day colors… red, pink and white.
For each color I prepared one bag of piping consistency with a number 1.5 PME tip and one bag of flood consistency with a number 2 tip.
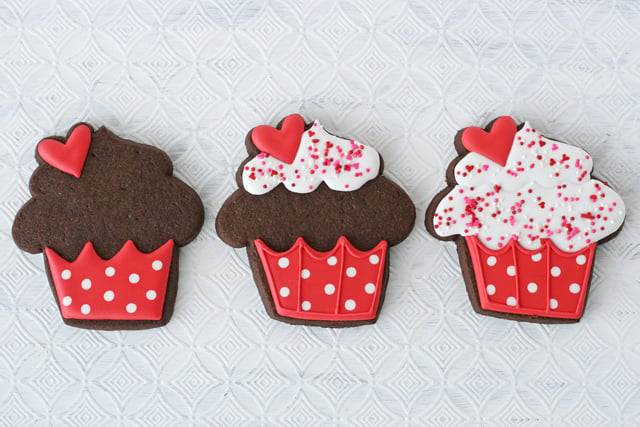
Outline, the immediately fill in/flood one section of the cookie at a time. Allow the section to dry (at least 1 hour) before adding icing to an adjoining section.
In the video below, each time I take the cookie out of view (and then bring it back) that represents drying time.
The only exception would be when I flood the white (cupcake icing) sections, then I immediately add sprinkles while the icing is still wet. But you do want to allow the first section of icing (in this case, the top section) to set up (at least 1 hour) before adding the lower section, to create some dimension.
Notes especially for beginner decorators-
Outline/piping consistency icing should be about the consistency of toothpaste (thick enough to stay in place when piped on the cookie, but not so thick that it hurts your hand to squeeze from the bag).
Flood icing should be about the consistency or shampoo or corn syrup (just thin enough to fill in on it’s own and lay flat when piped onto a cookie).
Watch the video below (in this post) and you’ll see see what each consistency looks like.
Read through my post with the Royal Icing recipe (same post linked above, with the recipe list). This post includes a basic decorating tutorial.
Allow cookies to dry fully (generally 8 hours or overnight) before packaging.
Here’s the step-by-step video tutorial for these cute Cupcake Decorated Cookies…
PIN IT NOW to save for later!
Happy decorating!
Disclosure – Amazon affiliate links added for your convenience.


Wow these look amazing! Gotta try them!
Hi I’m trying to view your royal icing recipe but the link goes to a flower cookie recipe instead. I’d love your royal icing recipe please
Hi Melissa,
You have to have a little more faith… just scroll down further in that post. –> https://www.glorioustreats.com/spring-cupcakes-with-cookie-toppers/
Hi Glory,
I’m usually pretty good at computer things, but the link to the video isn’t on the page for me. I’m using chrome for a browser. Can you send me the link?
I suspect you already know how I feel about these cookies. I feel real, real, REAL good about them!
Virtual hug! (((( YOU ))))
So sweet! These are perfect for Valentine’s Day!
Oh my, what perfectly decorated cookies. Just gorgeous!