I spent most of my twenties working in flower shops. I began by spending a summer cleaning flower buckets and delivering flowers, and after several design courses and lots of in-shop experience I was able to enjoy several years making arrangements for elaborate weddings and events, professional basketball players and a past President’s daughter. I will always have a deep love for flowers, and quietly take pride in naming off (in my head) any flowers I see at the grocery store, or in an arrangement I pass.
Although I do still play with real flowers from time to time (mostly in my own garden)… now I “play” with different kinds of flowers… edible ones!
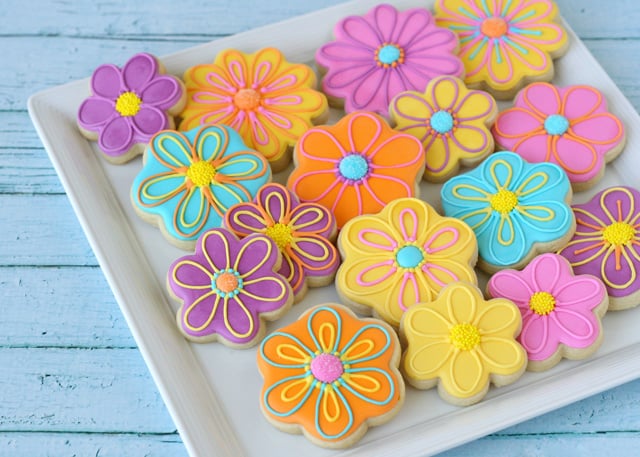
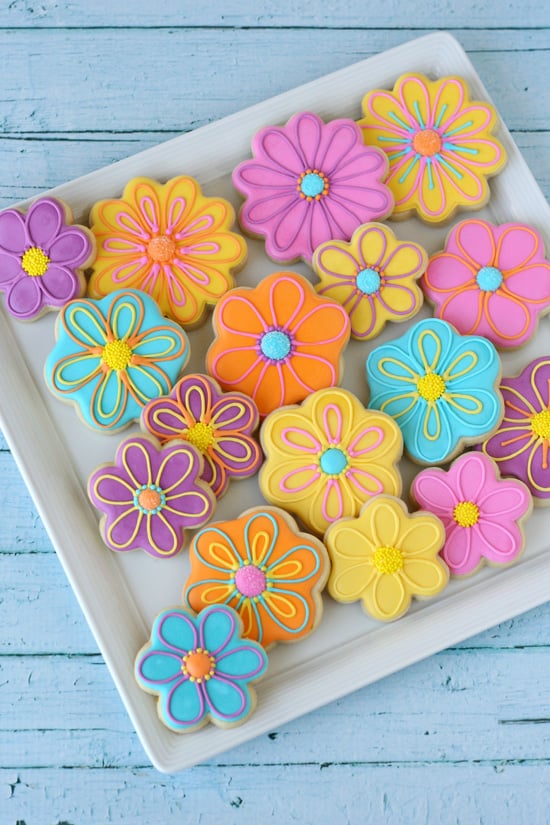
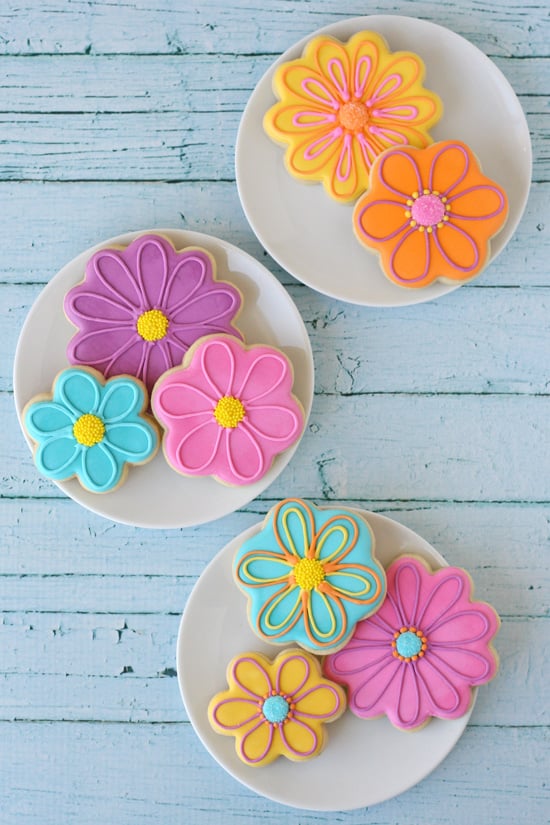
Flower cookies are fun to make because the color and design options are endless! These bright Summer Flower Decorated Cookies are what I like to call “fantasy flowers”… meaning they don’t really represent any flowers in nature.
How to make flower decorated cookies –
Start with a batch of cookies using my Sugar Cookie Recipe.
Prepare a batch of Royal Icing, and color as desired (I use Americolor gels).
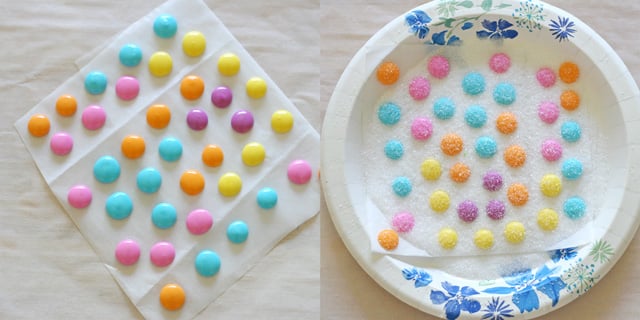
For these Summer Flower Cookies I pre-made some royal icing flower centers (pictured above). Preparing these little guys ahead of time saves lots of time when decorating, and create instant texture.
To make the flower centers, simply pipe a large dot of royal icing onto a piece of parchment paper or waxed paper. The icing should be a medium consistency, I would say just a bit thicker than the consistency of shampoo. It should be thick enough to not flow all over the place, but just thin enough that it does not leave (much of) a peak in the center (when you lift up the piping tip). For these colorful flower centers, you can chose to let them dry as is (just as a simple dot), or sprinkle the (still wet) dots with sanding sugar (as shown) or nonpareils (sprinkles). Allow the flower centers to dry at least 8 hours before removing from the parchment paper. These flower centers can be made far in advance, and stored in a small tupperware type container (away from excess heat and light).
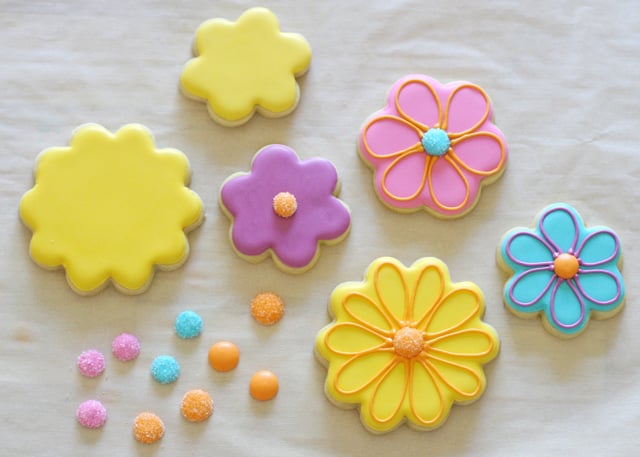
Once you’re ready to decorate, outline and fill in each cookie with the color of your choice. Allow the icing to set up (at least 1 hour), then use a small dot of icing to attach the pre-made flower center. Once you’ve added the flower center, chose a accent color to outline the shape of flower petals (as shown above). If desired, you can let the detail icing dry a bit, then add additional details such as extra dots around the flower center, or another row of flower petals (as shown below).
Love flowers and cookies? Here are a few more flower decorated cookies…
Sunflower Cookies (from Sweet Sugar Belle)
Potted Violet Cookies (from Sweet Sugar Belle)
Pink Roses (from Bake at 350)
Wow, those are just awesome. An edible summer garden!
I love cookies designs that give you endless options for color and patterns. Your colors and patterns are perfect! Such a beautiful set!
These are super cute and scream of summer!
I love your choice of colors! So vibrant and summer-ish…
Love, love, love, love, love these cookies!!!!!!!!!!! Stunning, beautiful, gorgeous, amazing. Wow… love!
They look sooo cute 🙂 I love the colors!
These are super fun! If they didn’t require royal icing to make I would make some this weekend! Royal icing is not my friend, and I think I need a support group. Ha! Love you!
~Cecilia
Lovely! Which cookie cutters did you use for these? I’d like to try them!
I love the vibrant colors, they say summer. Beautiful!! 🙂
I love your colour choices for these wonderful cookies. Enjoyed reading about your work in flower shops and think it’s wonderful that you recognize and can name so many different flowers. Floral decorating is an art as is cookie decorating and you are so talented in both areas.