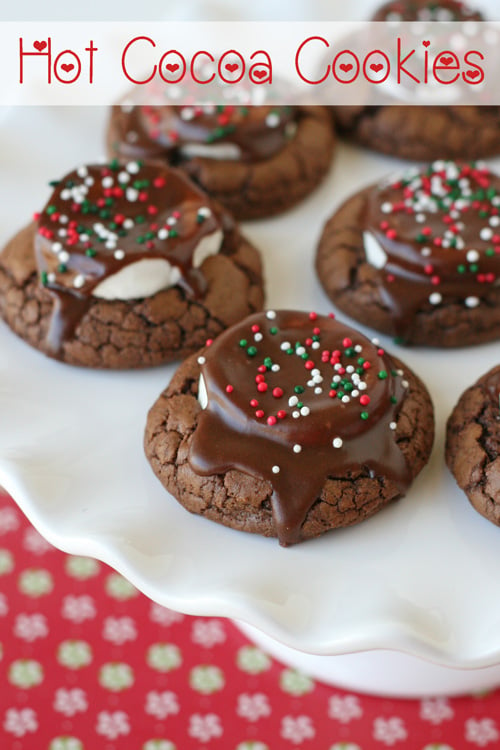
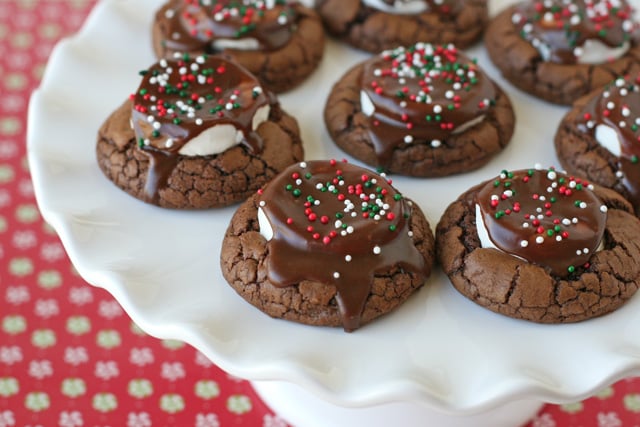
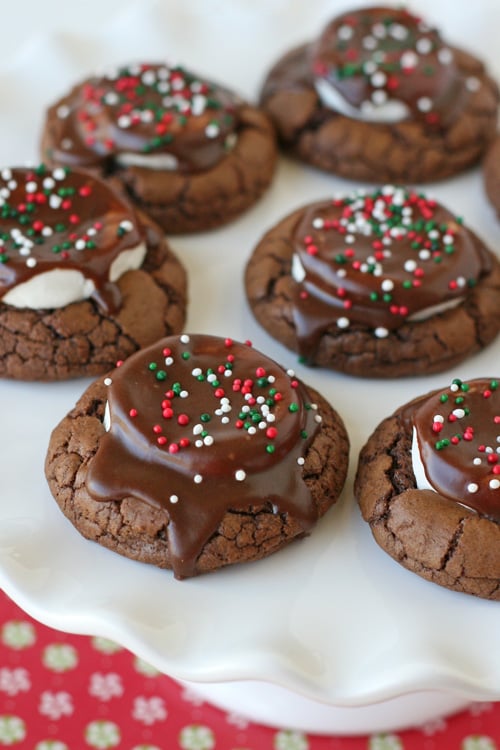
These Hot Cocoa Cookies are chewy, chocolaty and oh so delicious! These have quickly become my favorite Christmas cookie!
I created this recipe to take to a friend’s Christmas Cookie Exchange Party, and they were a huge hit!
These cookies start with a brownie-like cookie base, then get topped with a marshmallow, fudge glaze and sprinkles… what more could you want? =)
PIN IT NOW to save for later!
Earlier this week, I shared the pretty details of my friend Bethany’s Cookie Exchange Party.
Normally, if I’m invited to a cookie exchange I might make some pretty decorated cookies… but I knew Bethany had that covered.
So I baked up these Hot Cocoa Cookies, and I’m so glad I did! They’re chewy, chocolaty and oh so cute!
Feel free to use different sprinkles for different holidays, or to match a color theme… easy peasy!
How to Make Hot Cocoa Cookies

Hot Cocoa Cookies
Ingredients
For the cookies
- 1/2 cup unsalted butter 1 stick
- 12 oz semi-sweet chocolate
- 1 1/2 cups flour
- 1/4 cup unsweetened cocoa powder
- 1 1/2 teaspoons baking powder
- 1/4 teaspoon salt
- 1 1/4 cups brown sugar
- 3 eggs
- 1 1/2 teaspoons vanilla extract
- 25 large marshmallows approximately
For the icing
- 2 cups powdered sugar
- 4 tablespoons unsalted butter 1/2 stick, melted
- 1/4 cup unsweetened cocoa powder
- 1/4 cup hot water
- 1/2 teaspoon vanilla extract
- assorted sprinkles
Instructions
Make the cookies
- In a medium saucepan (or in a microwave safe bowl, using 50% power), melt the butter and chocolate, stirring frequently. Once melted, set aside to cool slightly.
- In a medium bowl, whisk together the flour, cocoa powder, baking powder and salt.
- In the bowl of an electric mixer, beat the sugar, eggs and vanilla on low speed until well combined.
- Add the cooled chocolate mixture and blend until just combined.
- While mixing, add the flour mixture slowly and blend until just combined.
- Scrape down the sides of the bowl, then cover the dough and refrigerate at least 1 hour. The dough should be firm. If making the dough a day ahead, let sit at room temperature for 30 minutes before shaping.
- Preheat oven to 325*F. and line 2 baking sheets with parchment paper or a silpat type liner. Use a tablespoon (or a tablespoon sized cookie scoop) to scoop the dough, then roll the dough in your hands to create balls. Arrange the balls about 2 inches apart on your baking sheets, then flatten slightly.
- Bake cookies about 12 minutes.
- While the cookies bake, cut the large marshmallows in half (crosswise). When the cookies have baked, remove from oven and press one marshmallow half (cut side down) into the center of each cookie. Return the cookies to the oven and bake another 2-3 minutes. Allow the pan of cookies to cool a few minutes, then transfer cookies to cooling rack.
Prepare cookie icing
- Prepare cookie icing by combining all ingredients in a medium bowl and mixing together with a whisk. Place wire cooling rack (with cookies on it) over a baking sheet (to catch any excess icing). Spoon a small amount of icing onto the top of each marshmallow, and use the back of the spoon to spread it a bit. After icing just a couple cookies, top with sprinkles before the icing dries.
- Allow icing to set up about 30 minutes before serving.
Video
Notes
Nutrition
PIN IT NOW to save for later!
This is the perfect recipe to add to your holiday cookie trays, or bring to a cookie exchange… just be sure to save a few for yourself! =)
Happy baking!
Your photos is great. I made it. It is very delicious. But I can’t be as beautiful as you. Maybe I will try again.
It look great. I will it and make when I have time. I must try it.
This recipe is amazing!! Is there anything you’d suggest to make these spring/summer-y? Maybe graham crackers and make them s’mores cookies??
The s’mores concept sounds perfect! Also, feel free to swap out the sprinkles for more spring colors.
Made this tonight to add to my cookie trays. They came out so cute and they taste great. I over baked the first batch so I would suggest 10 minutes then add the marsmellos for a total of 12 minutes
Can I make the dough a day ahead of time and refrigerate? What do I store dough in? Just a bowl with saran wrap?
Yes, you can make the dough a day in advance and store just in the bowl, wrapped well with saran wrap. You will then need to let the dough warm up to closer to room temperature just to be warm enough to roll into balls. It should still be firm enough to keep its shape. Happy baking!
Hello. I made these and they are delicious, however, I have a question. They were way to flat, I wanted them more like the picture. Doing a bit of research, I see that baking powder helps with that, but it is already in the recipe. Can you tell me what may have gone wrong?
Hi Amy, The primary reason I’ve seen people have these cookies bake up flat is that the dough was not cool enough (firm enough) before baking. The dough should be very firm before baking. If it’s not firm enough to roll into balls without making a huge mess on your hands, then it’s not firm enough and needs to chill longer. Happy baking!
These really are great cookies. I too won the Cookie Bake Off at my office’s holiday party! I think they will be our new Christmas tradition!
These were the absolute best cookies I’ve ever had! I made them for a Christmas dinner at my cousins house and they disappeared in minutes, my husband insisted that I made them for his Christmas cookie exchange so I did and he said they were an absolute hit. This will be my go to cookie recipe for Christmas!!
Just a fabulous cookie! We have used it for the last few years and distribute to friends. . Instead of sprinkles we always do crushed candy cane, but other than that I follow recipe. I like to weigh my cookies so I do .85 oz balls, bake for 10 mins before adding the marshmallows for another 2 minute bake. Thanks for the recipes!
How long will these cookies keep? How do you suggest storing them?
As listed in the notes section of the recipe, I’d suggest storing them in an airtight container for up to 2 days. Happy baking!