I’ve been working all week on some pretty desserts for a big luau party our friends host every year. I’ll have several beautiful and delicious projects to share from the luau, over the next week or so.
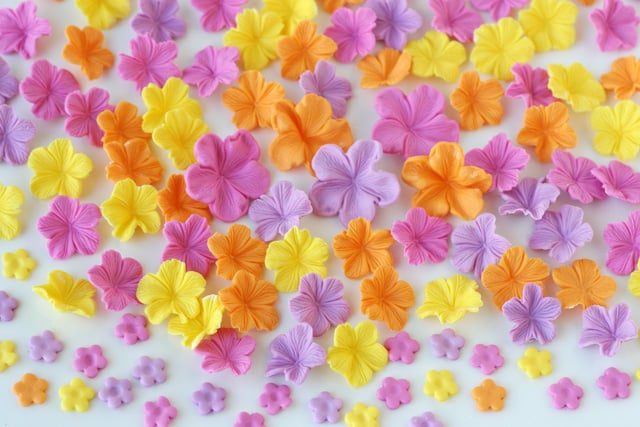
I’m incorporating colorful fondant flowers on the cookies and cupcakes for the party, so today I’ll share the basics of creating the flowers.
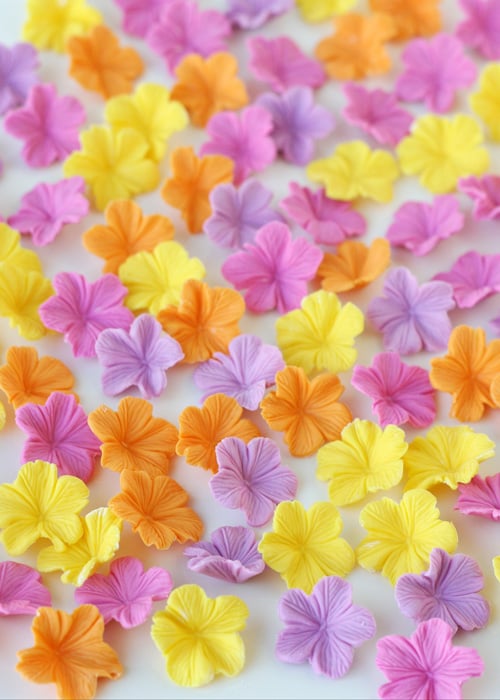
These flowers make great accents on cookies, cupcakes and cakes. The flowers can be made long in advance (up to a month or so), and stored tupperware type container. They are a nice item to have on hand to dress up any baking project.
Before getting started, you’ll want to read through my previous post, Fondant 101, which includes coloring and rolling out your fondant, as well as basic fondant tools.
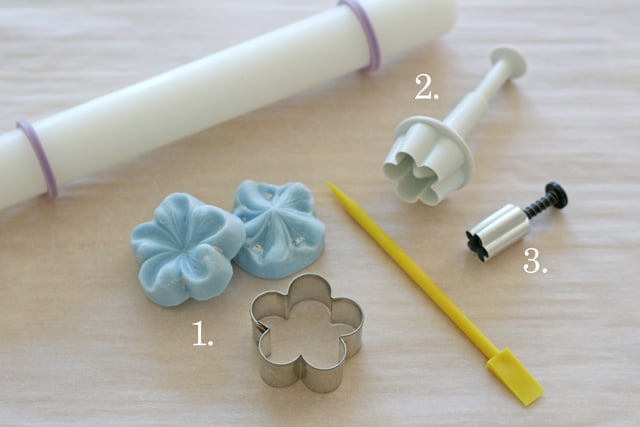
Supplies for making fondant flowers-
There are numerous kinds and sizes of fondant cutters, tools and molds available at craft stores and on-line. As far as I know, the three cutters pictured above (the cutters I used the most often) are not sold (in-store) at most major craft stores.
1. This is a three piece set that includes a flower shaped cutter as well as a top and bottom mold/veiner. The set is a bit of an investment, but I think it’s a great set to have. Available from Global Sugar Art, similar from Country Kitchen Sweetart.
2. This is a plunger/cutter (by PME). This is the 7/8″ size. Available from Country Kitchen Sweetart, Global Sugar Art and Fondant Source.
3. This is a mini plunger/cutter (by PME). This is often sold in a set of three sizes. The size pictured above is the largest in the set, the 1/2″ size. Available from Country Kitchen Sweetart and Global Sugar Art.
*Note- I am not promoting any particular vendor, I just added links to make it easy on you.
How to make fondant flowers-
1. Roll out your fondant (any questions on coloring and rolling out fondant, or basic fondant tools, see my Fondant 101 post).
2.-3. Cut the fondant with your desired cutters.
4. Using a small spatula, gently lift a flower from your work surface.
5. To add shape and texture, place the flower in one side of your impression mold (shopping info at the top of this post).
6. Top with the other side of the impression mold, and press together gently. Use a bit of corn starch on both sides of the mold, as needed, to prevent the fondant from sticking to the mold.
7. Open up the mold.
8. Use a toothpick or boo-boo stick to gently remove the flower.
9. Place the finished flower on a lint free cloth, or paper plate to dry. I find the flowers usually keep their shape best if I place them on the plate upside down to dry. Allow to air dry several hours before moving. Once firm and dry, place in a tupperware type container (away from heat, humidity and direct sunlight) and store until ready to use (a month or so).
Use flowers to decorate cookies, cakes and cupcakes. (I’ll be sharing some examples soon!)
Looking for more small fondant projects?
Fondant Ribbon Roses (Glorious Treats)
Fondant Ladybugs (Glorious Treats)
Fondant Butterflies (Glorious Treats)
Fondant Graduation Caps (Glorious Treats)
Cake Journal has several wonderful tutorials for fondant/gumpaste flowers (and other shapes).
The Decorated Cookie has lots of mini fondant projects, from simple cupcake toppers to pumpkins and cute garden bugs.


In response to some previous comments, you can store fondant flowers in Tupperware until you need to use them…they do not sweat this way, and I know because I’ve done it. It’s putting them in the fridge that would cause them to sweat. So yes, like she suggests in the blog, store them in a sealed container at room temperature.
Shared this excellent tutorial on our Cake Love post. So lovely for a luau party!
Hi, where did you purchase your cake impression mould from ?
I love the way you made fondant flower making so easy. But had a question about storage. When you say these could be stored in a tupperware / cardboard for a month, do you mean inside the refrigerator or at room temperature?
Thanks in advance
i love it. thank you so very much
beautiful flowers
stunning colours. ive only just puchased a plunger cutter..ive been having fun today using fondant and colouring marzipan. i have no idea about the stuff you dust your board or hands with tho…dont even know if we have it in the UK….lol. i use icing sugar…the fine dusty stuff..maybie called confectioners sugar, to prevent sticking…is that ok too ? x
love the was you made you cookies and the flower are so neat.
SO beautiful! What an amazing tutorial. I finally feel brave enough to tackle fondant, and can’t thank you enough! Would you be willing to share the names of the different icing colors that you used? They are perfect for a luau. You are SO TALENTED!! 🙂
I love this.. your flawless cookie decorating and fantastically beautiful bright colors.. it is so wonderful to see…