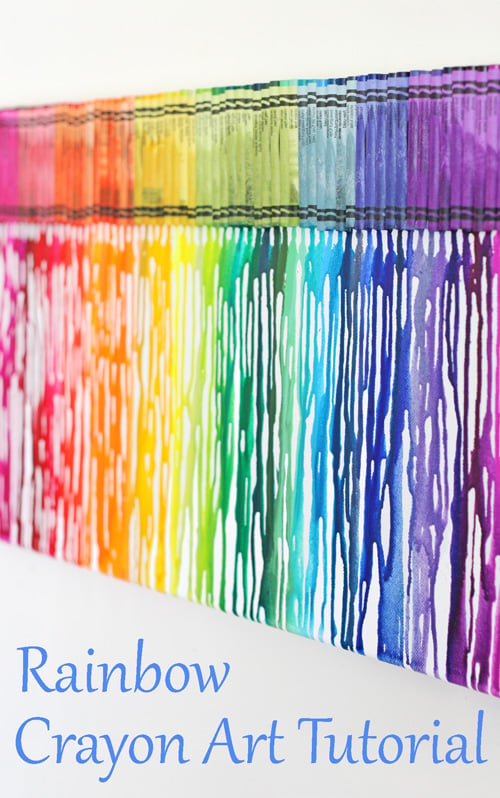
A few weeks before my daughter’s Rainbow Art Birthday Party, I prepared a set of three melted crayon canvases to act as the backdrop for the dessert/snack table. There is always something so pretty and cheerful about rainbow colors! I loved the way the canvases brought color to the table, and pulled in the art theme.
I’ve seen lots of rainbow crayon art circulating around the internet for quite some time, but this is the first time I’ve given it a try. It’s a really fun and rewarding project!
For less than the cost of a framed print to hang on a wall, you can create a custom work of art, adjusting the size and colors to your liking. The total cost of this project for me was about $35.00. That includes the canvas ($15), heat gun ($12, using a coupon), and crayons ($7). I am not counting the cost of the glue gun, since I already owned one, and most of you likely do as well.
Here’s how to make one…
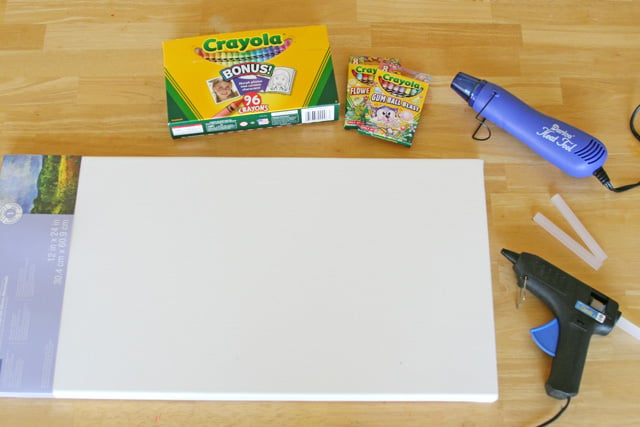
Gather your supplies…
You’ll need a canvas (the one shown is 24″x12″)
a hot glue gun (and extra glue)
crayons (for this 24″ wide canvas I used most of the colors from a 96 crayon pack, as well as two 8 crayon packs- buy more than you think you’ll need)
a heat gun (available from most craft stores, sold near stamping supplies, or gift wrap/cellophane)
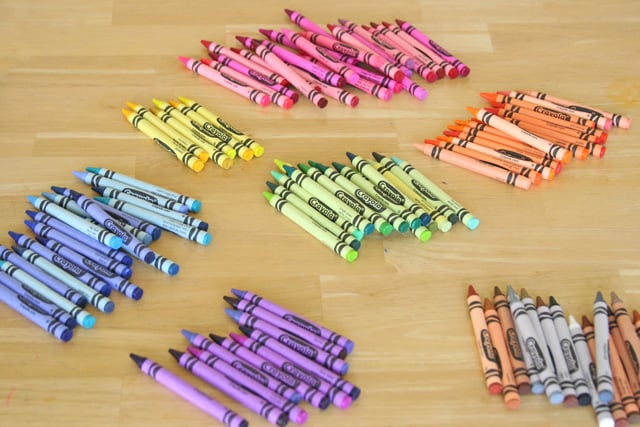
Step 1- Quickly sort the crayons by color. You will likely not want to include any browns, black or grey.
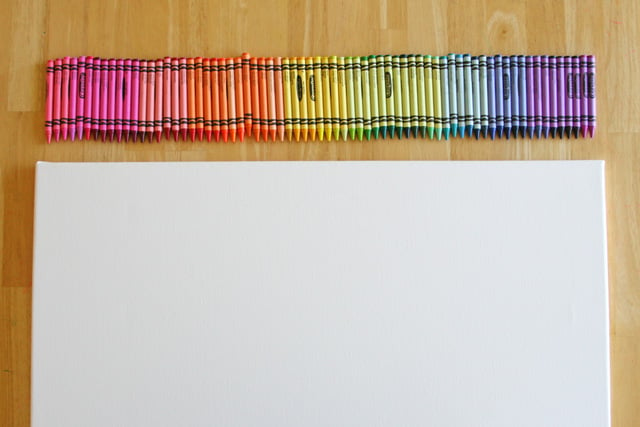
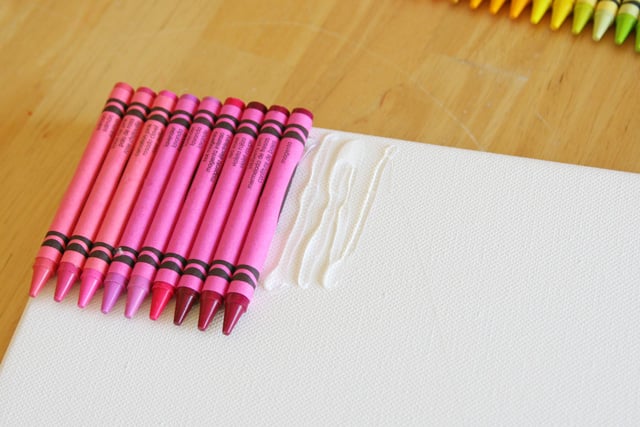
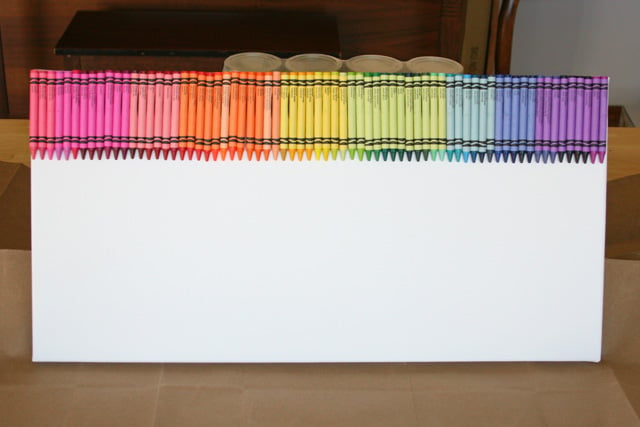
Step 2- Line up the crayons by color, then fine tune the exact order you’d like the different shades. Line up the crayons next to the canvas, so you know exactly how many you’ll need to fit the length of the canvas.
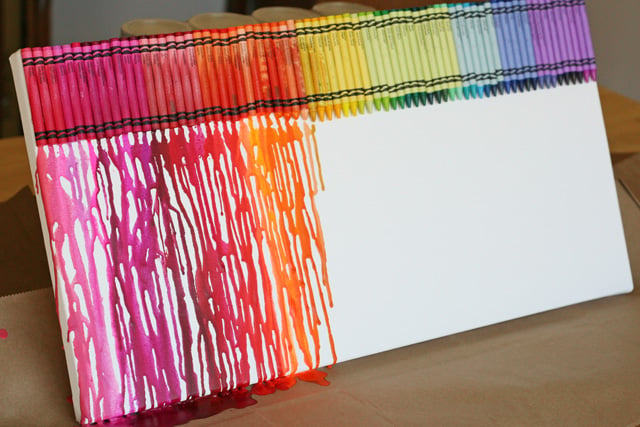
Step 3- Begin hot gluing the crayons to the canvas. I chose to lay the crayons so the name of the color was showing. Apply enough glue to attach 3 or 4 crayons, lay those crayons down, then add more glue, and so on.
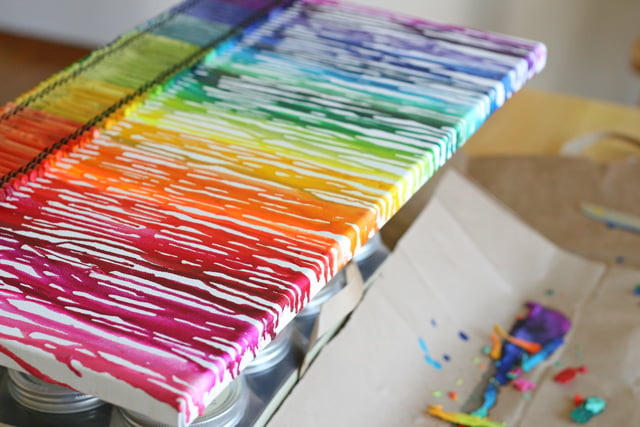
Step 4- Once all the crayons are glued on, cover your work area with paper, and lean the canvas up against a support (such as a case of canning jars) =)
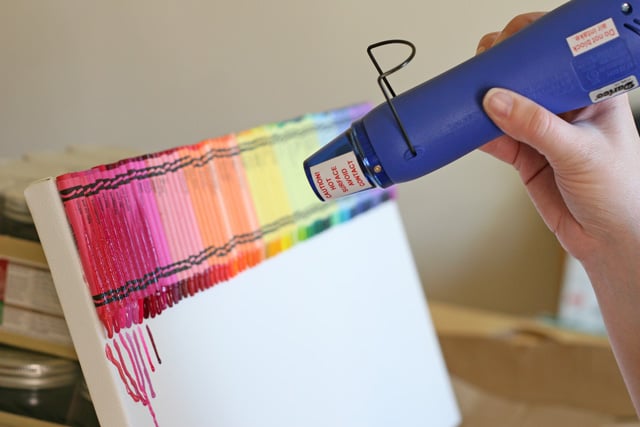
Step 5- Begin heating one section of the crayons with the heat gun. Hold the gun about 12 inches from the crayons. It will take a couple minutes for the crayons to begin to melt.
*A note about using a heat gun vs. a blow dryer. I have seen melted crayon projects using a blow dryer, but it is much more difficult to control the direction of the melted wax. With a blow dryer the wax tends to fly in all directions, not just drip down. A heat gun produces hotter heat, and blows the air with less force. Using a heat gun (instead of a blow dryer) seems to cut down the total time of the melting process by at least half. As is, it will take 45 minutes or so to melt the crayons (using a canvas of similar size). I think attempting this project with a blow dryer would be quite frustrating. As always, feel free to experiment… I’m just sharing my recommendations.
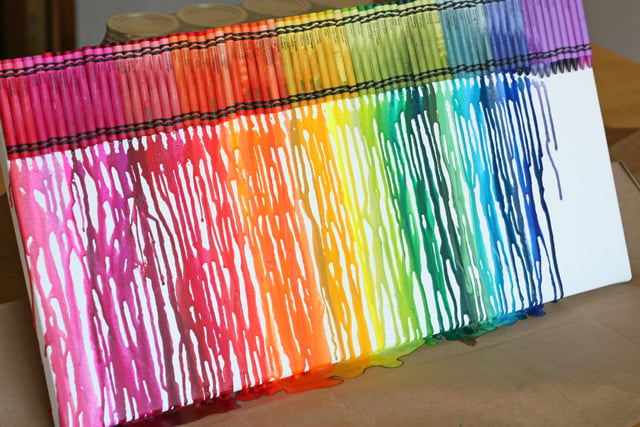
Step 6- Continue directing heat at a section of crayons, and use the air and heat as needed to direct the wax down the canvas.
Step 7- Continue working a section at a time. The total time for melting the crayons on this canvas (24″ wide) was about 45 minutes.
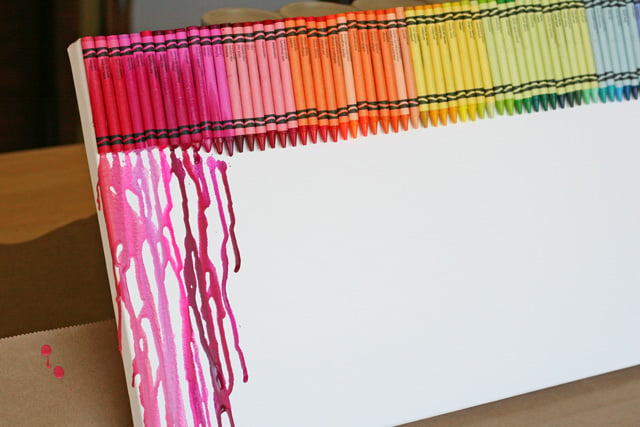
Step 8- When all the crayons have melted, and dripped down, pick up the canvas from your work area. Scrape off any excess wax from along the bottom edge of the canvas, then use the heat gun as needed to melt the wax along the edge of the canvas.
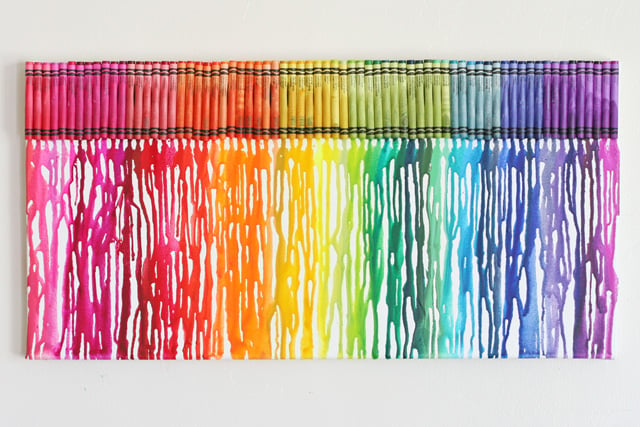
Step 9- Project is complete! Admire the beautiful art you just created =)
This project was a perfect addition to my daughter’s Rainbow Art Birthday Party, and would make a beautiful piece to hang in a child’s room, class room, or any place that could use a beautiful pop of color!
Can you tell me the order the of the shades you put them in?
Definitely going to try this
So I tried this with a few friends and we used smaller canvas to see how it worked and we failed. Yes we did use a hairdryer and it definitely was hot enough, however when the crayons melted they simply ran straight down on the canvas and we couldn’t get the wax to spread. If you have any tricks for us to try please let me know! the idea of doing crayon art but it just didn’t work out for us.
Hey!!
so beautiful !! I want to do a painting as you but i have a question, what heat of the heat gun did you use?
Just so everyone will know- I just attempted to begin melting crayons I attached with regular craft glue and it caused the glue to melt also. Use hot glue. Also, I hadn’t read the tutorial before started about the blow dryer so I guess I’ll need to invest in a cheap heat gun since I probably won’t do this project but maybe once more
Hello, I was wondering if heavy sketching paper would work and about how long does it take to do this
Hi Kendall, I’ve only done this project on canvases, and I would recommend to do the same. Feel free to experiment if you like. The amount of time the project takes will vary based on if you are using a heat gun or blow dryer, and how big the project is. It does take some time and patience. Happy crafting!
Thanks a lot!!! Perfect post and great explanation. It’s really marvellous, I’m gonna try it.
We are doing this in art, we can’t use a heat gun so we are using a hairdryer and it turns out fine
can you post a close up of the names
It’s so beautiful and your advice helped thanks