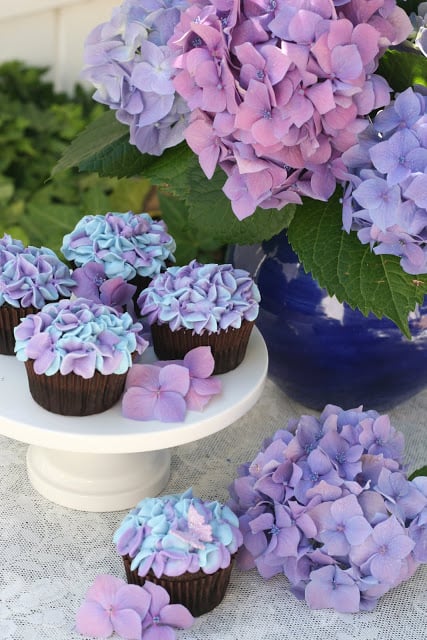
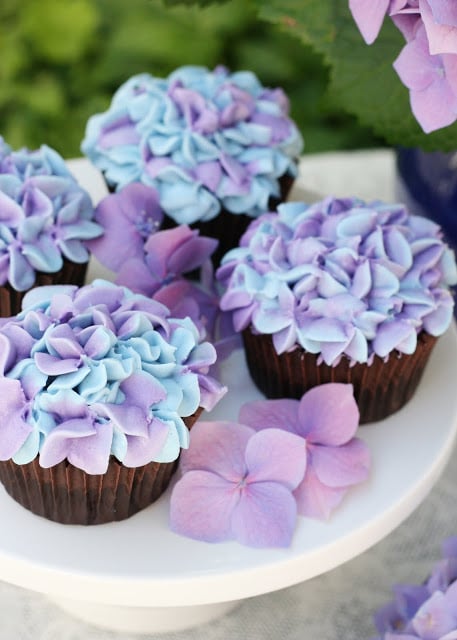
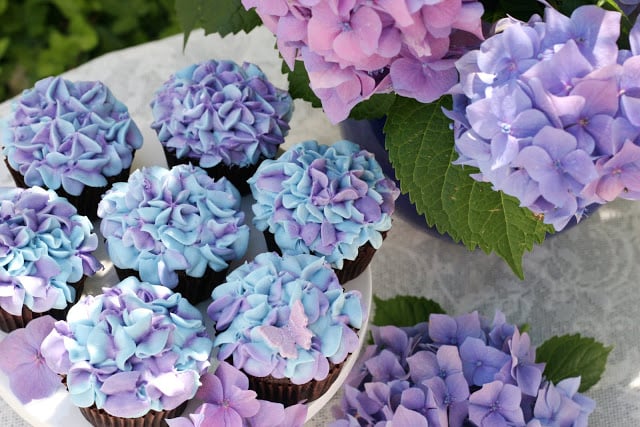
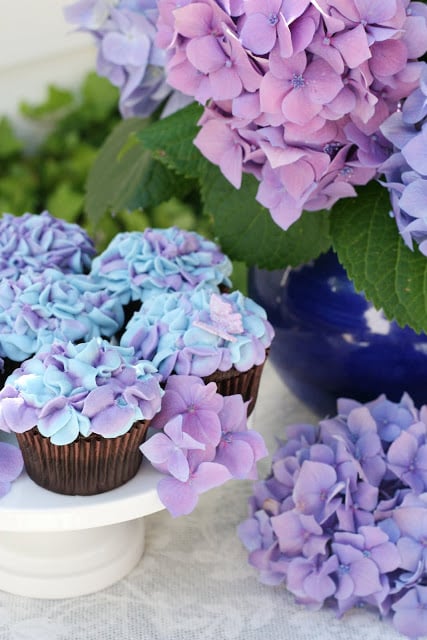
Hydrangea bushes are in full bloom all over my neighborhood right now. I love all varieties of hydrangeas, but my favorite is this traditional shaped, blue-purple color. I picked a few this weekend and brought them inside as inspiration for cupcakes. I’ve seen cupcakes that resembled hydrangea flowers before, but I’ve never given it a try. It was much easier than I’d imagined and I was very happy with the results!
Hydrangea Cupcakes
~ Directions ~
I made a batch of my favorite chocolate cupcakes and delicious vanilla cream cheese frosting. Then I colored half of the frosting blue, and half purple (mixing a few shades of blues and purples to get a good color match to the real hydrangeas). When making the frosting, use very little cream (less than 1 tablespoon), because the coloring will add some liquid, and you need the frosting to be pretty stiff to hold a nice shape.
If you’d like to match other hydrangeas, you could certainly use other color options, like light blue and medium blue, or two shades of pink. But I do think that frosting these with two colors (instead of just one) really added to the effect.
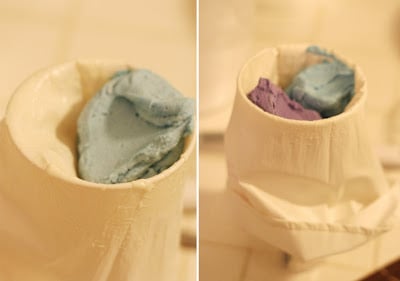
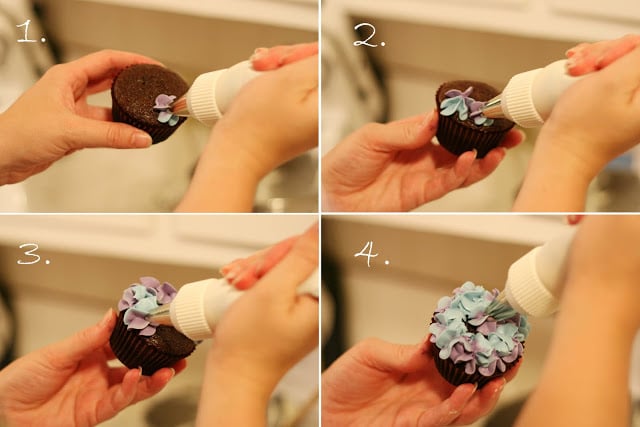
I filled my piping bag with the two colors of frosting, side by side. Once your bag is filled (1/2 to 2/3 full), you may want to just squeeze some frosting into a bowl, until you see both colors coming out.
Then, using a Wilton 2D tip (a large closed star tip), I piped large, loose star shapes around the edge of the cupcake, and then filled in the center. If the frosting starts getting too soft (no longer holds a nice shape), then put the whole bag of frosting in the fridge for 15-20 minutes to let the frosting to firm up a bit.
Now I want to plan a pretty tea party just so I can make these again!
How to Make Hydrangea Cupcakes
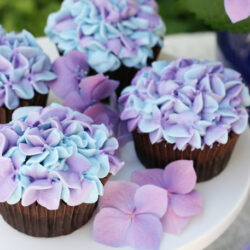
Hydrangea Cupcakes
Ingredients
Perfectly Chocolate Cupcakes
- 2 cups sugar
- 1 3/4 cups all purpose flour
- 3/4 cup unsweetened cocoa best quality available
- 1 1/2 teaspoons baking powder
- 1 1/2 teaspoons baking soda
- 1 teaspoon salt
- 2 eggs
- 1 cup whole milk
- 1/2 cup vegetable oil
- 2 teaspoons vanilla extract best quality available
- 1 cup boiling water
Vanilla Cream Cheese Frosting
- ½ cup unsalted butter 1 stick/8 Tablespoons, set at room temp about 10 minutes, but should still be cool
- 8 oz cream cheese directly from fridge
- 1 teaspoon vanilla extract always use pure vanilla extract if possible
- 4 cups powdered confectioners sugar
- 1 to 3 tablespoons heavy cream heavy whipping cream (or milk- although I do like the richness that cream adds)
Instructions
Perfectly Chocolate Cupcakes
- Line muffin tin with paper liners. Heat oven to 350*F.
- In a large mixing bowl, stir together sugar, flour, cocoa, baking powder, baking soda and salt.
- Add eggs, milk, oil and vanilla. Beat on medium speed for one minute.
- Stir in boiling water (the batter will be thin, don’t worry, this is right).
- Fill liners 2/3 full with batter. (I usually put the batter into a large measuring cup with a pour spout, and then pour the batter into the liners.)
- Bake cupcakes for approximately 18-22 minutes.
- Cool completely on wire rack before frosting.
Vanilla Cream Cheese Frosting
- Place butter in a large mixing bowl and beat until smooth. Add cream cheese and blend until fully combined and smooth, about 30 seconds.
- Add vanilla extract and powdered sugar and blend on low speed until combined. Increase to medium speed and beat until it begins to get fluffy.
- Slowly add the heavy cream, a little bit at a time until desired consistency is met. (Don’t add too much if you want the frosting to stay in place when piped on cupcakes.)
- Beat until fluffy, about 1 minute.
- Use at once or keep refrigerated. (This frosting will keep well in the refrigerator for several days, but you may need to re-beat it for the best texture.)
Frosting the Cupcakes
- Color half of the frosting blue, and half purple (mixing a few shades of blues and purples to get a good color match to the real hydrangeas). (When making the frosting, use very little cream (less than 1 tablespoon), because the coloring will add some liquid, and you need the frosting to be pretty stiff to hold a nice shape.)
- Fill your piping bag with the two colors of frosting, side by side. Once your bag is filled (1/2 to 2/3 full), you may want to just squeeze some frosting into a bowl, until you see both colors coming out.
- Then, using a Wilton 2D tip (a large closed star tip), pipe large, loose star shapes around the edge of the cupcake, and then fill in the center. Repeat for all cupcakes.
Oh my God.. I saw your work or maby bether to say art yesterday, but I didn't leave any comment becouse it would have been just some nonsens. I was so amazed by your work.. I was just sitting and admiring each cupcake and cookie I saw. They are amazing, made with such care, patience and love.
I think you got a new fan. 😀
Good luck with your work and keep posting it. Glory, you are a huge inspiration!
They are soooo pretty and easy to do. I tried them out following your instructions and was very happy with the results! Thank you for sharing this! Your blog is amazing!
I am just STUNNED! They are simply wonderful. Really nice idea. I absolutely have to improve my piping skills 😛 I posted cupcakes two days ago, but yours are far far away prettier. http://rosmarina90.blogspot.com/2010/08/torna-rosmarina-tiramisu-cupcakes.html
Stunning!!! Hydrangeas are one of my favorite flowers, I can't wait to try this for myself!!
To RA-
Yes, just pipe a star shape all the way around the edge and then fill in the center. If your cupcake has a slight dome to the top, you may only need one layer, but it's up to you if you want to add a bit extra.
Hi! My friend just sent me a link to this post — can't believe I hadn't known about your blog sooner. i LOVE this. the colors are beautiful and I've never seen anyone do something like this before! kudos!
How wonderful of you to share your frosting technique, including the numbered tip that you used, along with pictures of the frosting. That is very nice of you, and most bloggers don't share that.
I can't wait to give it a try! Like the numerous posts you've received, they are beautiful and your recipes are fantastic.
Question: You said to start at the outer and it seems to be just a piping of the star, side by side, and then into the middle. Do I then start to add another tier?
R
These are SO beautiful, I am a first timer to your blog but will definitley be back. Can't wait to make a batch of these myself 😉
Just stopping by to say hello. This is the first time I visit your blog and I love it. these cupcakes look amazing. I grew up in the Azores, where we're surrounded by hydrangeas and your cupcakes look amazingly real. Feel free to check out my blog, it's not a pretty as yours, it's still a work in progress. Also, could you tell me where to find the tags that you put on the candy jars for the candy tables, I just planned my son's first birthday party and printed out regular cards and cut out to give it a little shape, because I didn't know where to get the tags.
Hello, I found this post through Cupcakes Take the Cake and was blown away by these beautiful cupcakes! I love hydrangeas and will have to try these sometime. 🙂
Keep up the good work!