
When I was growing up, I always enjoyed making sugar cookies at Christmas time. Even at a very young age I would spend half an hour carefully decorating a cookie, adding one sprinkle at a time. My sisters would have a whole plate of cookies decorated in the time I would decorate one or two, but mine were little works of art. My mom never quite understood my need to seek perfection (especially on a cookie!), but she knew it was simply a part of who I was. Well, some things never change… I’m quite a few years older now, and a mother myself, but I still find such enjoyment in spending the late hours of the day hunched over a tray of cookies, adding sprinkles with the greatest of care.
One of the nice things about making sugar cookies is that they can be as simple or as detailed as you care to make them. Making sugar cookies with children can be a fun and special activity. Or taking the time to decorate sugar cookies with extra care can produce some really beautiful results, perfect for special gifts. Whatever the end goal, starting with a reliable recipe, and handling the dough with a bit of care will ensure delicious results every time.
Here is the recipe I use, and have made hundreds of times. Most recipes for sugar cookies are extremely similar to this. Some recipes call for almond extract or lemon zest in place of the vanilla extract. I’m sure those variations would produce delicious results as well.
Note (November 2017) – I’ve written an updated post as well as a printable version of this recipe in my post titled –> Perfect Sugar Cookie Recipe.
Rolled Sugar Cookies
3 cups all-purpose flour
1 teaspoon baking powder
1 cup (2 sticks) unsalted butter, room temperature
1 cup sugar
1 large egg
1 teaspoon good quality vanilla extract
Parchment paper
Directions:
-In a medium bowl, stir together the flour and baking powder and set aside.
-In the bowl of an electric mixer, using the paddle attachment, cream together the butter and sugar until light and fluffy. This should take about 3 minutes.
-Add the egg and vanilla and beat another minute or so.
-Add the flour mixture slowly. (Be careful not to add too much at a time or you will have a snowstorm of flour.)
-Blend until all of the flour is incorporated and the dough begins to pull away from the sides of the bowl.
-Take the dough out of the bowl and place it on a piece of parchment paper.
-Using your hands, knead the dough a few times.
-Place the dough in a large plastic (ziplock type) bag and refrigerate for about 2 hours. If you want to speed up the chilling process, place the bag of dough in the freezer for about 20-30 minutes. Just don’t forget it in the freezer, or it will become too firm to work with (and then you’ll have to wait for it to thaw).
-When it’s almost time to remove the dough from the refrigerator (or freezer), preheat oven to 350 degrees (F).
-When the dough has chilled and is firm, take out about half of the dough, leaving the rest in the refrigerator (until your ready to work with it).
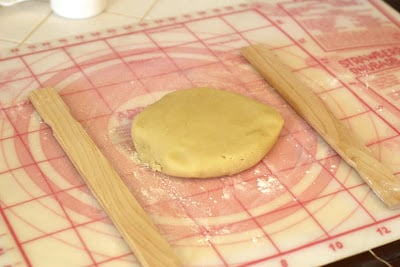
Place the dough on a lightly floured work surface. You’ll notice the sticks I have on either side of the dough. These are paint stir sticks (available for free from the paint department of any hardware store). There is a product on the market called Perfection sticks, which are sticks that usually come in a set of a couple different thicknesses. They are designed to help you roll out the dough in a nice even thickness. Since I don’t own Perfection sticks, I just glued two paint stir sticks together, which makes about the perfect thickness for sugar cookies. (So you need 4 sticks total, since you need a double thick stick for each side of your dough.) If I want the dough a bit thinner, I just roll out the dough to the thickness of the sticks, then remove the sticks and roll just a bit thinner.
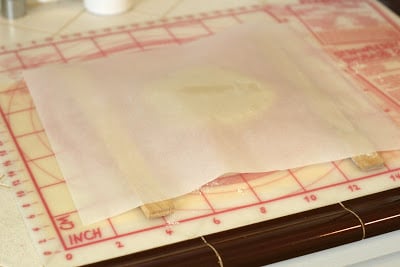
Place a piece of parchment paper on top of the dough. This helps you roll out the dough without adding additional flour (adding too much flour can make the dough a bit tough, and can create little pockets of flour in the dough that cause bumps to form on your cookies during baking, making it more difficult to decorate later).
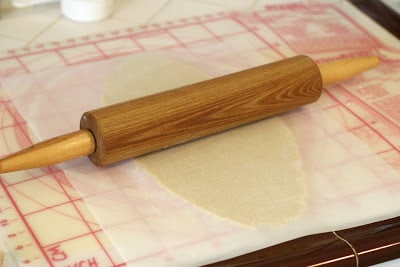
Roll out the dough to about 1/3 of an inch thick.
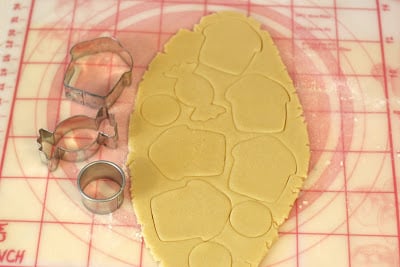
Cut the dough with your choice of cookie cutters. Try to make the best use of the dough you’ve rolled out. Every time you re-roll the dough you add a bit more flour, and can create the flour pockets I mentioned that can cause bumps to form in the cookies while baking.
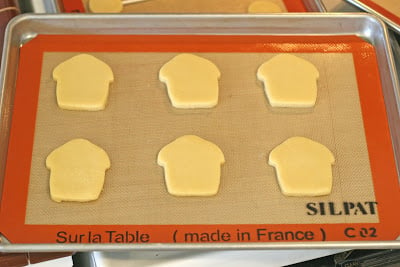
Place cookie shapes on a prepared baking sheet. I bake my cookies on heavy weight metal baking sheets, topped with Silpat
brand silicone liners. Silpat
liners are a bit of an investment, since you’ll probably want to have two (I have four) but they are such a great quality product and last a lifetime.
Make sure to only put cookies of similar size on each bake sheet. If you try to bake smaller cookies with larger ones the small ones will be over done before the large ones are baked.
Place entire baking sheet (with cookies on it) in the freezer or refrigerator for about 3-5 minutes. Chilling the cookies this way will help ensure they keep their shape while baking.
Bake cookies for 8-10 minutes depending on the size of the cookie. Bake until they are just barely beginning to take on a golden tone. They will continue to bake as long as then are on the pan, so don’t let then get too brown. Cool for just a minute or so on the pan, then carefully remove cookies from the baking sheet and place on a cooling rack.
This recipe yields about 30, 2 1/2 inch cookies or 16, 3 1/2 inch cookies.
Once cooled, the cookies can be decorated with frosting, royal icing or rolled fondant.
To get you started on the decorating, here are a couple posts,
Basic cookie decorating tutorial (the cookies in this post are mini cookies used as cupcake toppers, but the information can be used for any cookies).
How to make pretty Luau cookies (the same techniques could be used for cookies for any occasion).
I also highly recommend the book Cookie Craft. This is the best and most complete book I’ve found on decorating cookies. This book has gorgeous photos for inspiration, but also has every bit of information you need, including directions and recipes. Despite the thousands of cookies I’ve made over the years, I still come back to this book for ideas or to refresh my memory on a particular technique.
And once your cookies are decorated, take a look at my post HERE on pretty packaging for your cookies


I love this recipe. I left out the leavening in it and the cookies were fantastic!!
Hi, I was wondering if I use salted butter for this recipe, will I have to add in anything else to it? To maybe, even out the taste?
I have found that my dough is super crumbly and it looks like it needs more lliquid in it or something! I double checked all the ingredients and i added all of them in the appropriate measures, and in the right order. my dough has been chilling, and it still crumbled to the touch. What do you suggest i do?
Little Miss Baker- I’m guessing that maybe you don’t have a large stand mixer to mix the dough? It is much more difficult to mix the dough without a large mixer, but it is possible. If you are sure you’ve added all the ingredients, then after chilling your dough just a bit, kneed it by hand a while until the dough will hold together. Then you may want to put it back in the fridge before rolling it out.
Best of luck!
Thank you for sharing all this!!!I’m from Arentina! Buenos Aires!!!Loved chocolate muffins,incredible texture when tasting them!!!thanx for everything, I will try the cookies today!
Hi I live in the uk but am very keen to try your recipe, wondered if you able to convert cups to either grams or ounces? Thanks
Hello is all purpose flour self raising or plain flour?
I am anxious to try these cookies. I have to be your biggest fan. All your recipes are “on the money”. They are easy and fool-proof. Keep up the good work. We certainly appreciate it! Thank you so much!!
Hi Glory:
I have been eyeing your stuff all year and finally am going to try to bake these cookies! I have a baby shower next month but want to try a “practice batch”. How do you recommend I store the cookies? I plan on making them probably a day or two before the shower (so I’m not stressed). They will be favors so I will put them individually in cello bags. I’m afraid the frosting would melt so was wondering … room temp or fridge??
TIA!
Thank you so much for sharing your tips! Your work is awesome! I found your site through a Facebook post by sweet lulu.
This is such a simple baking question but one where I never know what to do. Do you sift your flour first before measuring?
So glad you found me! =) No, I don’t sift my flour, but I do store my flour in a large container (about 1 gallon size), and if the flour hasn’t been used recently (never a problem in my house), I might use a whisk to stir it and lighten it a bit. Then, just scoop in the measuring cup, and level off… don’t try to pack the flour in (any extra).
superb..i like sooooooooooooooooo much..!!thanks for shring.