Earlier this week I shared photos from my youngest daughter’s Rainbow Art Birthday Party. Today, I’ll share all the details of one of the main crafts the children completed at the party.
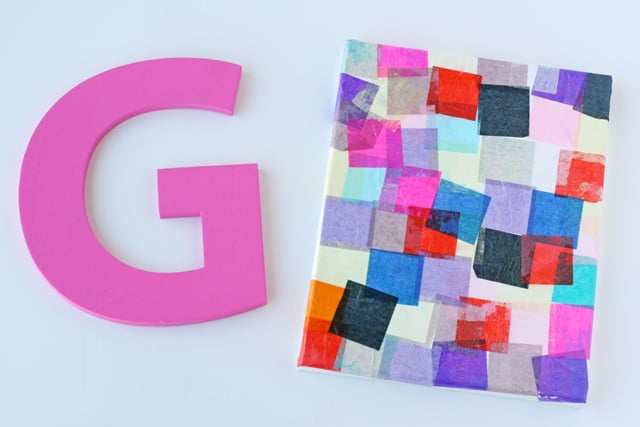
When thinking of craft ideas for the party, I wanted something that would take a little time to create, be personalized for each child, and result in a craft that would look great enough to save. I was quite happy with what I came up with, and this craft is very adaptable to a variety of occasions, and ages.
At our party, the children creating the crafts were all about 6 years old. They were able to enjoy the craft, and complete it with just a little bit of adult help. This project would be great for boys or girls ages 6+ (again, ages 6-7 may need a bit of help).
Here’s how we made them…
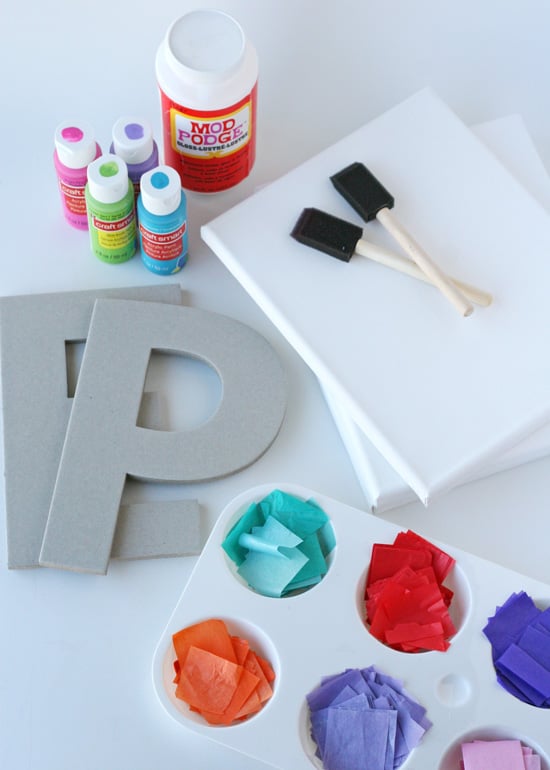
The supplies you’ll need are…
1- Bottle of Mod Podge (pictured above) – Sold near other glues in the craft store.
Sponge paint brushes (2 per child) – 1 brush will be used to paint the letter, one will be used to mod podge the tissue to the canvas, planning two brushes per child prevents you from having to wash the brushes between stages.
Cardboard (chipboard) letters (1 per child) – I bought the letters at Hobby Lobby, they are sold in the scrapbooking section. The letters pictured cost $1.95 each.
8″x10″ paint canvas (1 per child) – Use any size canvas you like, that is large enough to hold the letters you buy. I found the best price was at Michael’s, where I bought a 10 pack of canvases for $20.
Assorted craft paint (as shown above) – I find it’s best to limit the choices a bit, or children will spend too long making their selection. Provide 4-6 total color choices, making sure there are appropriate choices for boys and girls (if you have both boys and girls at the party).
Assorted colors of tissue paper, cut or torn into small pieces – I bought a box of pre-cut tissue paper squares from Lakeshore Learning Store. There are lots of alternatives here… you could cut your own tissue squares, have the children tear tissue for the project, or use assorted colored papers of any kind.
Hot glue gun (and glue)
The cost for each project was under $5 (this will vary of course based on your supplies). For me, the canvases were $2 each, the letters were $2 each, the paint less than $5 (for 6 bottles). I already had the bottle of mod podge, the tissue and the hot glue gun.
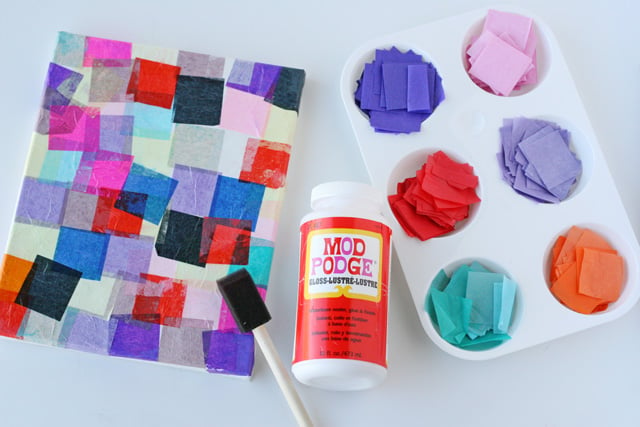
Note- It may be good to prepare a sample mosaic, so kids can see what the final project will look like. I had my older daugher prepare the example a few days before the party.
Getting started…
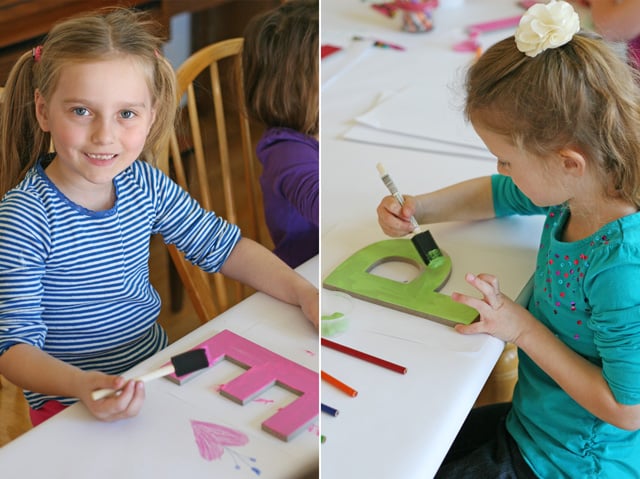
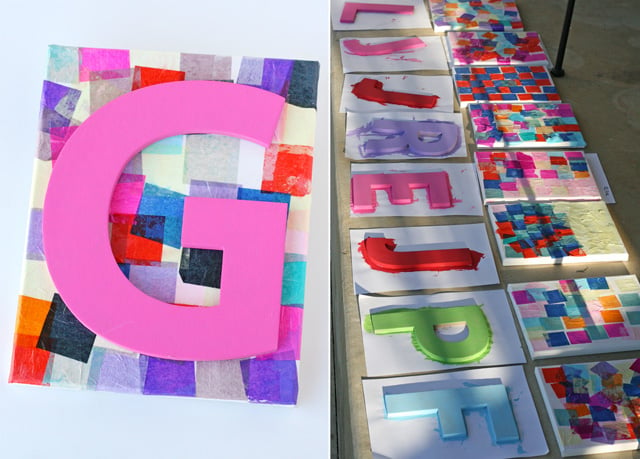
Allow the children to choose the paint color, and start painting their letter. I had each letter laying on a piece of paper, so that paint would not get on the table (at least not too much). Once the letters are painted, move them (with the paper underneath) to a place to dry (preferably outside, where they will dry the quickest).
Next, get started on the canvases. Provide each child with a small dish of mod podge glue, and allow them to chose a mix of colored tissue to cover their canvas. Using a sponge brush, apply mod modge to the canvas, in a small section, then lay a single layer of tissue paper squares (overlapping just a bit). Apply a second layer of mod podge glue on top of the tissue paper. Continue working in sections around the canvas. Make sure there is a good layer of mod podge BOTH below and on top of the tissue paper. The mod podge glue will dry clear.
Allow the mosaic canvases to dry. Our canvases were mostly dry after being outside about an hour (depending on the weather, they make take a longer).
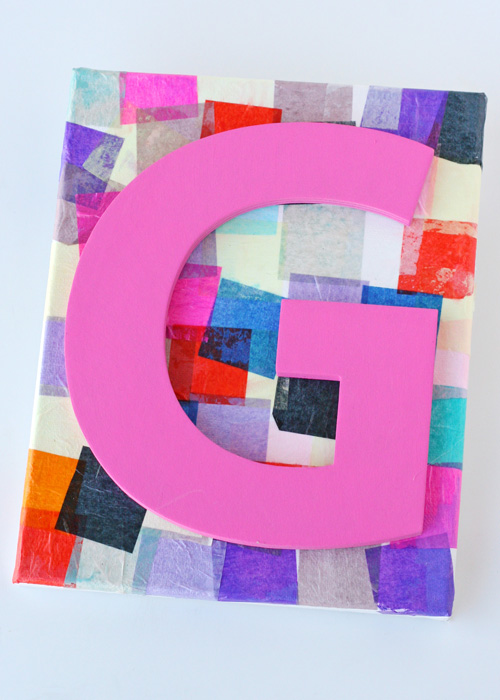
Once the letters and canvases are dry, attach the letters to the canvas using hot glue. Drying time will vary based on your weather and how thick the paint or mod podge was layered. If the projects are not quite dry at the end of your party, you could send the two pieces home separately, to be glued together (at home) once dry.
It was fun to see each child’s personality a bit, in the way they created their mosaics.
This would be a fun project for a birthday party, holiday craft party, school art project or church camp/Vacation Bible School.
Happy Crafting!
Thanks for the idea! I am going to try it for my daughter’s art party. How much Modge Podge do I need for 16 kids?
I think one large bottle should be plenty. Each canvas only needs a few thin layers of the mod podge.
Wondering which siE clipboard you used — 8 inch ??
I was just searching for craft ideas for my daughter’s 6th birthday, and I found this. Such a great idea! I think the kids are really going to enjoy it 🙂
Howdy I am so grateful I found your website, I really found you by accident, while I was searching on Yahoo for something
else, Regardless I am here now and would just like to say thanks
a lot for a marvelous post and a all round interesting
blog (I also love the theme/design), I don’t have time to read through it all at the moment but I have book-marked it and also added your RSS feeds, so when I have time I will be back to read a great deal more, Please do keep up the excellent job.
Thank you! Thank you!
This is such a fabulous idea for a birthday party craft. The kids did a wonderful job and I’m sure they each went home very proud of their creations. Such a nice memento of what was obviously a fantastic party 🙂
No children small enough to do crafts anymore. However, I did make your vanilla cupcakes and I actually have the second batch in the oven now. I have not test tasted any but I am as soon as these get out of the oven. They were so easy to make and look great. I can hardly wait to put my lips to one right out of the oven. I love warm cake. The reason I didn’t taste the first batch I decided to hurry and get another one ready for the oven. They were almost cool by then.
STOP!!!! My timer went off!!! They are wonderful!!!! I do think it is the best cupcake I have ever eaten. Thank you for going to all your trouble for this great recipe.
What child doesn’t love something with his/her own initial, right? This is a genius party craft activity! And I could even make one each for my grandchildren’s rooms. 🙂
What a fun idea!!!!!!!!!!!!! I am totally gifting these to all my kiddies next Christmas!
Very cute and very fun! I could see this in a shadow box hanging on a wall. Love your clever ideas!