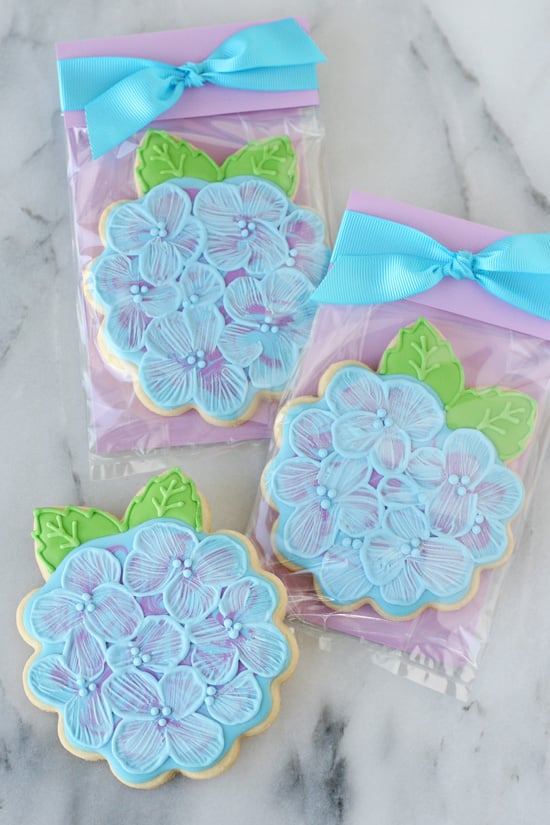
Oh how I love pretty packaging! Pretty cookie packaging can elevate even a simple cookie into a beautiful favor or gift!
Certainly there are LOTS of different ways to package cookies and treats! In fact, I’ve shared several different cookie packaging ideas over time HERE, HERE and HERE.
Although I have shown this general style of cookie packaging before, when I recently posted an image on my Instagram feed (read, please follow me on Instagram) of a pretty packaged hydrangea cookie, I had several requests to share my packaging technique. I thought it might be a good time to revisit the idea, and share a more in-depth step by step.
So I “whipped up” another batch of hydrangea cookies and I have all the step by step packaging directions for you!
Certainly, this packaging style could be used for most any cookie or treat.
If you’d like the directions for decorating the Hydrangea Cookies shown, hop over HERE.
Let’s get started…
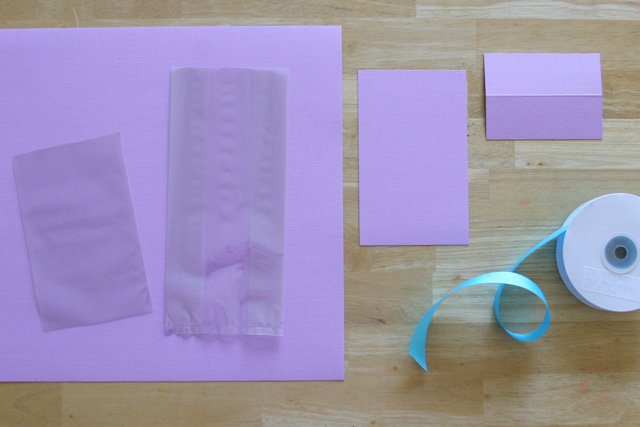
Step 1- Assemble your supplies. For each finished cookie package you’ll need…
1- 4″ x 9″ gusseted cookie bag (such as this)
1- 4″ x 6″ flat cookie bag (such as this)
1- piece of cardstock (in your choice of color) 3.75″ x 6″
1- piece of cardstock 4″ (wide) x 3″ (tall), folded in half lenghtwise (using a bone folder if available).
Ribbon (of your choice)
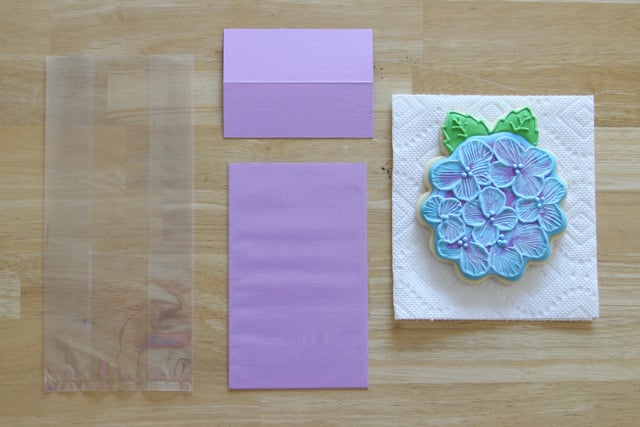
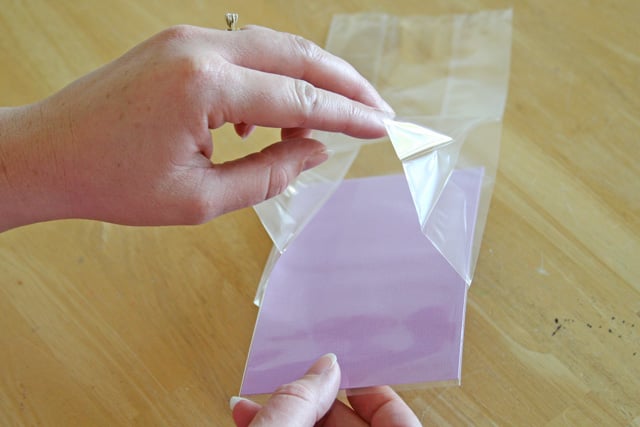
Step 2- Place the 3.75″ x 6″ piece of cardstock inside the smaller bag. It’s hard to see from the photo above, but this has been done.
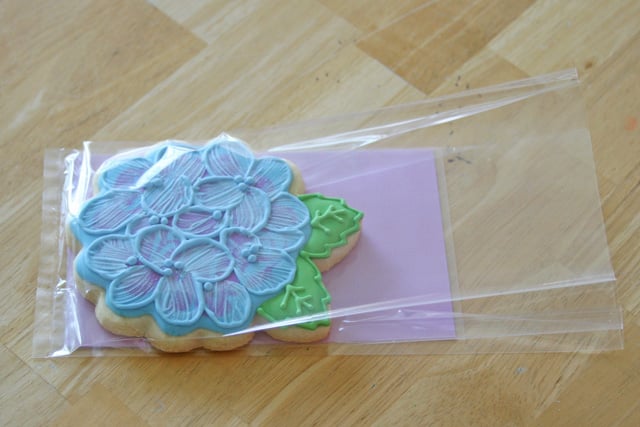
Step 3- Place the bag with the cardstock INSIDE the larger, gusseted bag.
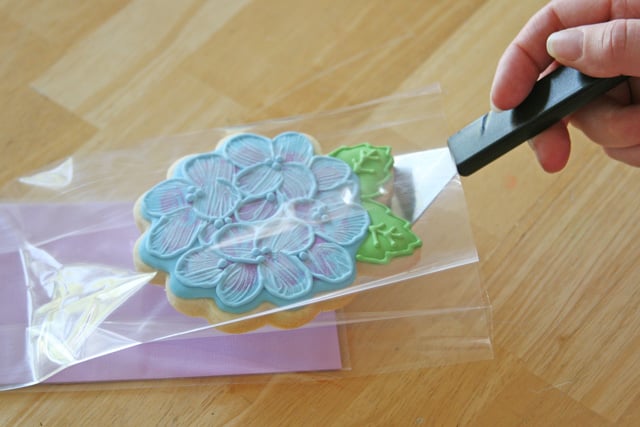
Step 4- Place your cookie inside the gusseted bag. I like to use a spatula to avoid getting oil (from the cookie) on the bag or my hands. If you notice, the bag that has the cardstock in it is inside one of the gussets (folds) of the bag, and the cookie is in the other fold.
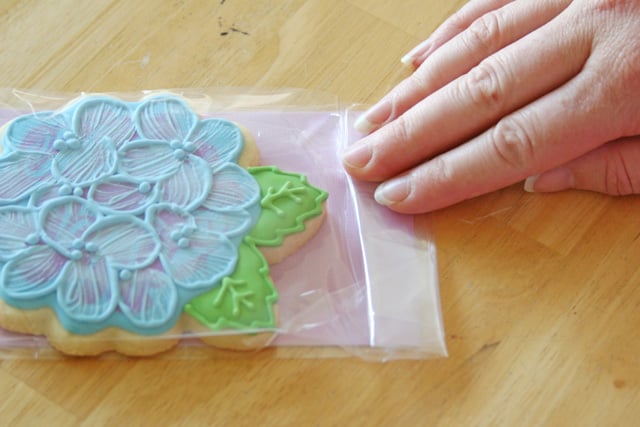
Step 5- Fold over the larger bag until it meets the top of the cardstock, and/or the top of the cookie.
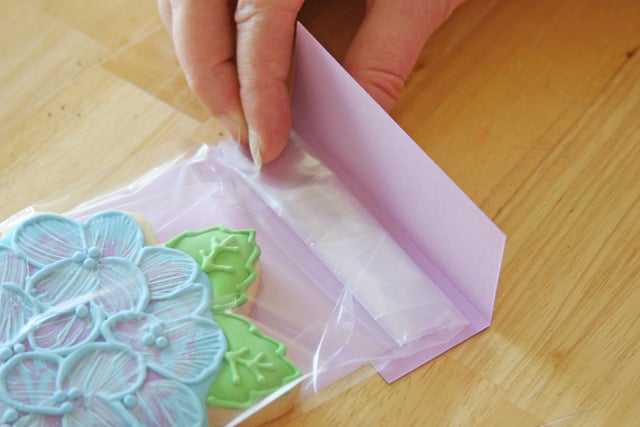
Step 6- Grab your pre-folded piece of cardstock and use it to enclose the folded bag (as shown).
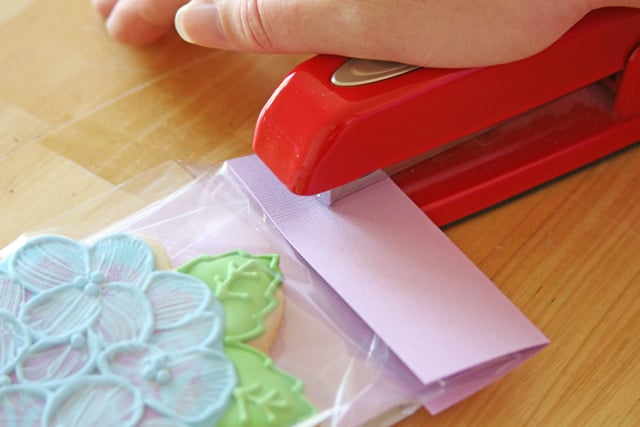
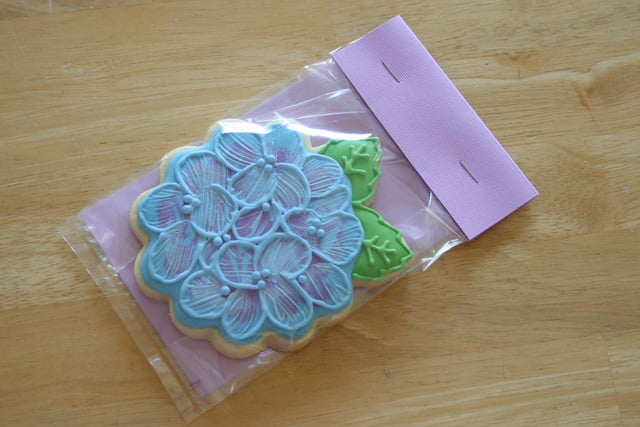
Step 7 – Staple the folded bag and folded cardstock all together. I usually do two staples, one on each side (as shown below). If you do not want the staples to show, you can staple the folded bag only, then use double sided tape to hold down the folded cardstock.
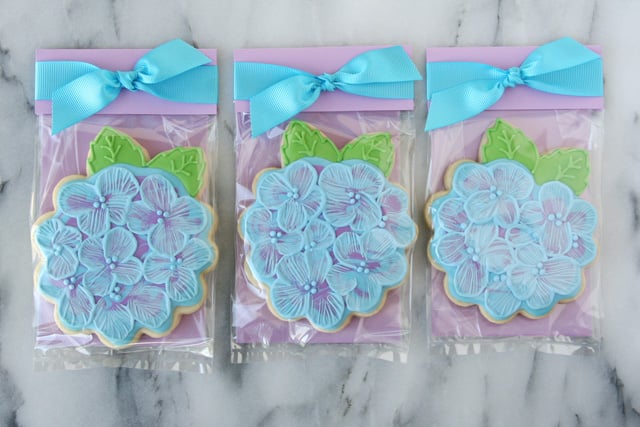
Step 8 – The packaged cookie is almost complete, simply add ribbon to cover the staples and complete the look.
Now you have a beautifully packaged cookie, and the oils from the cookie will not stain the paper backing. Feel free to mix and match different paper and ribbon to coordinate with your cookies.
Certainly this packaging technique is a bit more time consuming and costly than the standard cookie bag tied with a piece of ribbon. I do not package my cookies like this for every occasion, but I do find it’s perfect for a special little gift, or extra pretty favor.
Love hydrangeas? In additional to my hydrangea cookie tutorial, I have a pretty post on hydrangea cupcakes.
Happy baking, decorating and packaging!

hii Glory,
i love it, are amazing u r talented!
i ll make im my business why is great idea
so good thank you
I think you are extremely talented. These are gorgeous as are a lot of the cookies, cakes, bars, cupcakes etc. that you post about. So so beautiful, the colours, precision of your work is utterly amazing! Thank you for sharing.
BEAUTIFUL….So creative!
Thanks for sharing ^^