In my opinion, it doesn’t matter what the question is…. the answer is chocolate!
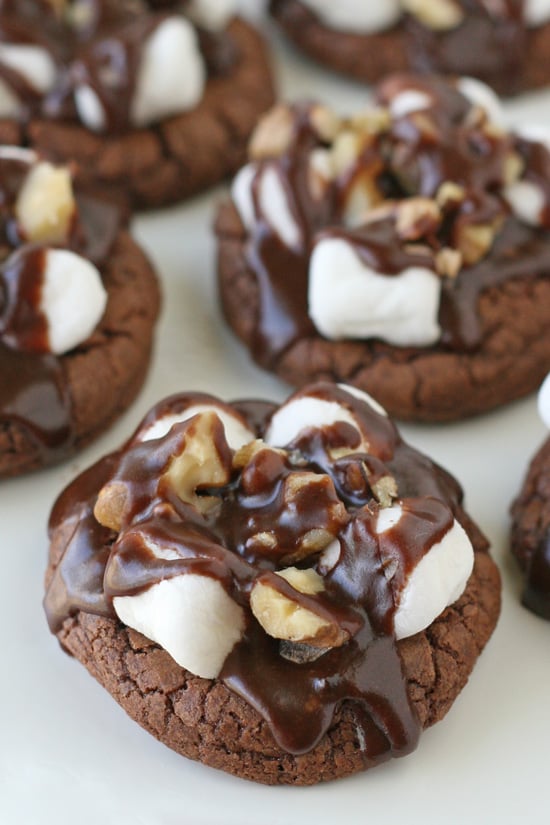
If you love chocolate like I do, I think you’re going to really love these Rocky Road Cookies! This recipe starts with a rich and chewy chocolate cookie, then tops it with marshmallows, walnuts and a chocolate glaze… they are oh so good!!
These Rocky Road Cookies are just a little variation of the delicious (and popular!) Hot Cocoa Cookies I shared last December. I loved the Hot Cocoa Cookies so much (I think I made them at least 5 times last December!) and I’ve been wanting to play with the recipe and make a version perfect for any time of year!
I’m so happy with the results, and I think you will be too!
Let’s bake!
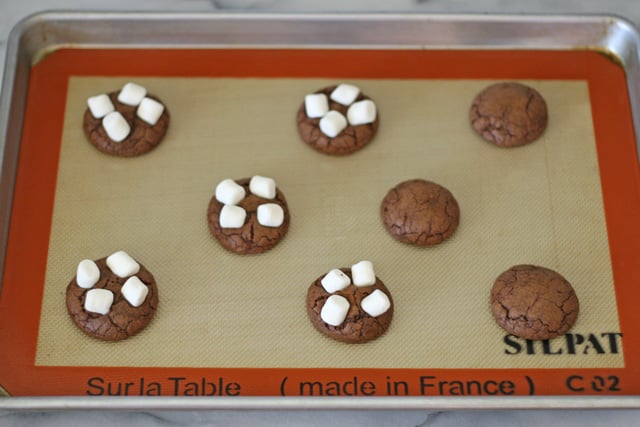
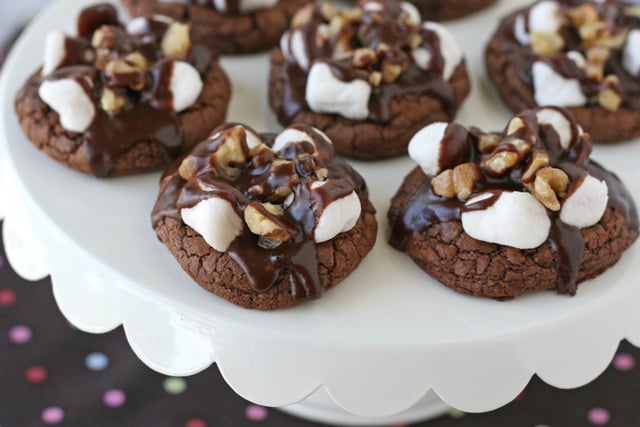
Bake the cookies as directed (using the recipe below). Once the cookies have baked, top with 3-4 mini marshmallow (press them into the cookies slightly) and return to the oven for an additional 2-3 minutes.
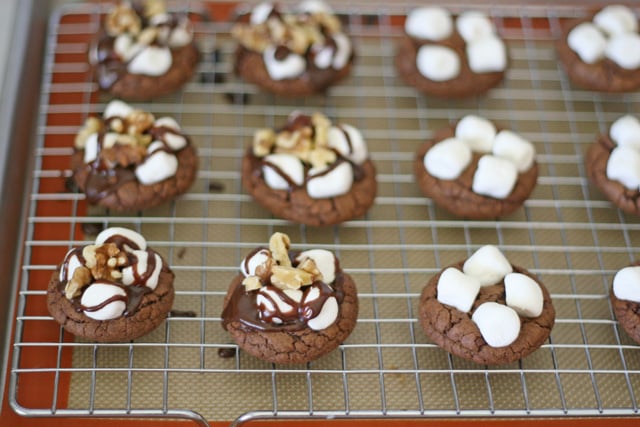
Once baked and slightly cooled, top marshmallows with a drizzle of chocolate glaze. Add walnuts, then add a second layer of glaze (as shown below).
Now who wants a cookie? =)
How to Make Rocky Road Cookies

Rocky Road Cookies
Ingredients
For the cookies
- 1/2 cup unsalted butter 1 stick
- 12 oz semi-sweet chocolate
- 1 1/2 cups flour
- 1/4 cup unsweetened cocoa powder
- 1 1/2 teaspoons baking powder
- 1/4 teaspoon salt
- 1 1/4 cups brown sugar
- 3 eggs
- 1 1/2 teaspoons vanilla extract
- 1 cup chopped walnuts apx. 1 cup
- 2 cups mini marshmallows apx. 2 cups
For the icing
- 2 cups powdered sugar
- 4 tablespoons unsalted butter 1/2 stick, melted
- 1/4 cup unsweetened cocoa powder
- 1/4 cup hot water
- 1/2 teaspoon vanilla extract
Instructions
Toast the walnuts
- Preheat oven to 325*F. Chop nuts, then spread onto a baking sheet and bake 5-7 minutes until hot and fragrant. Remove from oven and set aside to cool.
Make the cookies
- In a medium saucepan (or in a microwave safe bowl, using 50% power), melt the butter and chocolate, stirring frequently. Once melted, set aside to cool slightly.
- In a medium bowl, whisk together the flour, cocoa powder, baking powder and salt.
- In the bowl of an electric mixer, beat the sugar, eggs and vanilla on low speed until well combined.
- Add the cooled chocolate mixture and blend until just combined.
- While mixing, add the flour mixture slowly and blend until just combined.
- Scrape down the sides of the bowl, then cover the dough and refrigerate about 1 hour. If making the dough a day ahead, let sit at room temperature for 30 minutes before shaping.
- Preheat oven to 325*F and line 2 baking sheets with parchment paper or a silpat type liner. Use a tablespoon (or a tablespoon sized cookie scoop) to scoop the dough, then roll the dough in your hands to create balls. Arrange the balls about 2 inches apart on your baking sheets, then flatten slightly.
- Bake cookies about 10 minutes.
- When the cookies have baked, remove from oven and press 3-4 mini marshmallows into each cookie (as pictured above).
- Return the cookies to the oven and bake another 2-3 minutes. Allow the pan of cookies to cool a few minutes, then transfer cookies to cooling rack.
Prepare cookie icing
- Prepare cookie icing by combining all ingredients in a medium bowl and mixing together with a whisk. Place wire cooling rack (with cookies on it) over a baking sheet (to catch any excess icing). Drizzle a bit of icing over the marshmallows, then place a few chopped walnuts on top. Do only 5-6 cookies at a time so the icing does not set up before adding the nuts.
- 9.) Once each cookie has marshmallows, icing and nuts, drizzle a second layer of icing over the nuts.
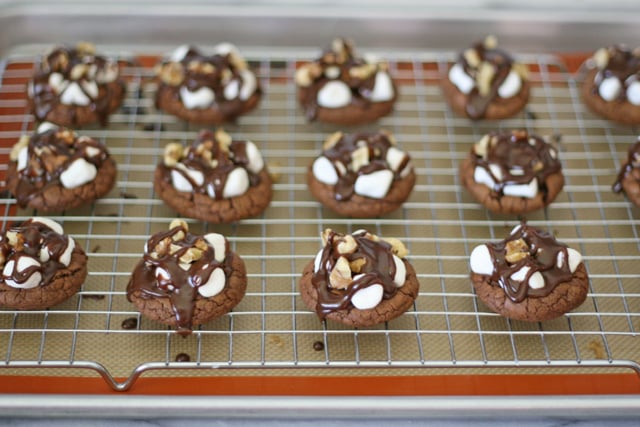
- Allow icing to set up about 30 minutes before serving.


Please change my email address to the above. Thank you
Hey! I saw that you uploaded a tutorial to make a rainbow art painting with crayons, I was wondering what heat did you use on teh heat gun? 🙂
Oh my goodness these look so good!
I totally agree with you ! Chocolate is ALWAYS the answer.
These look amazing! Such a great idea for a cookie!