How about some pretty Chocolate cupcakes to get you through the week?
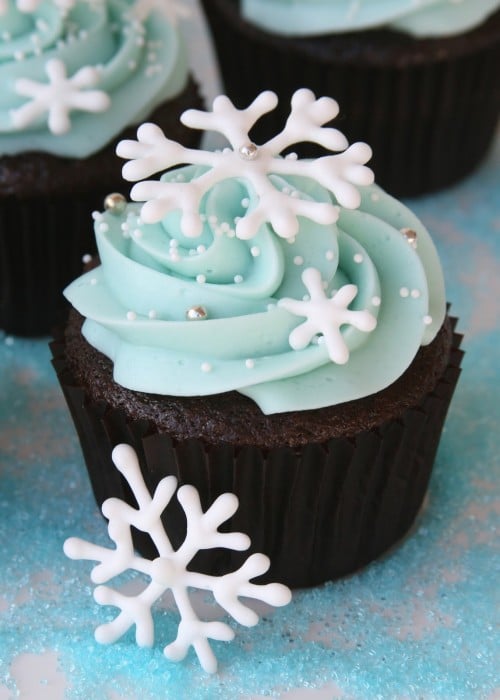
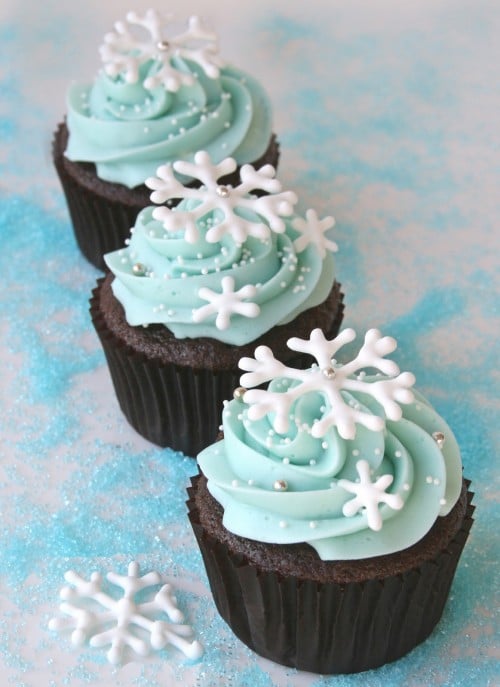
These are Chocolate cupcakes (recipe HERE) with Vanilla Cream Cheese frosting (recipe HERE), made extra special with some royal icing snowflakes. I piped on the frosting with a Wilton 1M tip (the tip I use the most often) and added some pretty sprinkles (white non-pareils and silver dragees). I colored the frosting with Americolor brand coloring, in sky blue.
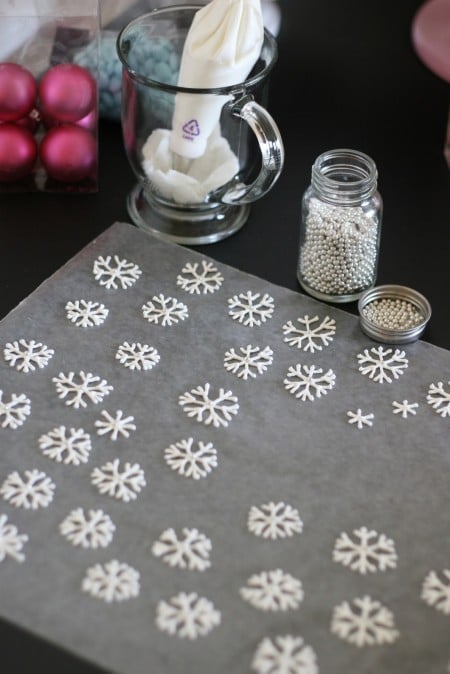
The roayl icing snowflakes are pretty easy to make, and will last a very long time (stored in a airtight container). Make a nice stiff consistency batch of royal icing (recipe HERE) and pipe a snowflake shape onto a piece of parchment paper. Allow to dry completely (this will take about 1 day) before trying to remove from the paper. Be prepared… many WILL break as you try to move them from the parchment paper, so you need to make at least twice as many snowflakes as you think you want. The thicker the line of royal icing you make, and the longer you let them dry, the better your chances of avoiding breakage, but they are still very delicate, and you are bound to have some break.
Happy Cupcake Decorating!
How to Make Snowflake Cupcakes
Snowflake Cupcakes
Ingredients
Perfectly Chocolate Cupcakes
- 2 cups sugar
- 1 3/4 cups all purpose flour
- 3/4 cup unsweetened cocoa best quality available
- 1 1/2 teaspoons baking powder
- 1 1/2 teaspoons baking soda
- 1 teaspoon salt
- 2 eggs
- 1 cup whole milk
- 1/2 cup vegetable oil
- 2 teaspoons vanilla extract best quality available
- 1 cup boiling water
Vanilla Cream Cheese Frosting
- ½ cup unsalted butter 1 stick/8 tablespoons, set at room temp about 10 minutes, but should still be cool
- 8 oz cream cheese directly from fridge
- 1 teaspoon vanilla extract always use pure vanilla extract if possible
- 4 cups powdered confectioners sugar
- 1 to 4 tablespoons heavy cream heavy whipping cream (or milk- although I do like the richness that cream adds)
Royal Icing
- 4 tablespoons meringue powder
- 4 cups powdered sugar about 1 pound
- 6 tablespoons warm water to start
Instructions
Perfectly Chocolate Cupcakes
- Line muffin tin with paper liners. Heat oven to 350*F.
- In a large mixing bowl, stir together sugar, flour, cocoa, baking powder, baking soda and salt.
- Add eggs, milk, oil and vanilla. Beat on medium speed for one minute.
- Stir in boiling water (the batter will be thin, don’t worry, this is right).
- Fill liners 2/3 full with batter. (I usually put the batter into a large measuring cup with a pour spout, and then pour the batter into the liners.)
- Bake cupcakes for approximately 18-22 minutes.
- Cool completely on wire rack before frosting.
Vanilla Cream Cheese Frosting
- Place butter in a large mixing bowl and beat until smooth. Add cream cheese and blend until fully combined and smooth, about 30 seconds.
- Add vanilla extract and powdered sugar and blend on low speed until combined. Increase to medium speed and beat until it begins to get fluffy.
- Slowly add the heavy cream, a little bit at a time until desired consistency is met. (Don’t add too much if you want the frosting to stay in place when piped on cupcakes.)
- Beat until fluffy, about 1 minute.
- Use at once or keep refrigerated. (This frosting will keep well in the refrigerator for several days, but you may need to re-beat it for the best texture.)
Royal Icing
- Beat all ingredients until stiff peaks form.
- Spoon some of the thick white icing into individual bowls and add coloring .
- Add additional water, about 1 teaspoon at a time until you’ve reached the consistency you need.
what color you used for these cupcakes???
Leyla, I used Americolor brand coloring, in sky blue.
How did you get that blue color for the frosting?
I used sky blue Americolor gel coloring.
These are just stunning! Dumb question: Would greasing the parchment paper for good measure help with snowflake removal? I may try that . . .
No, do not grease the paper. Oil is the enemy of royal icing, and I don’t think it would set up properly. I have discovered that waxed paper works a bit better than parchment… I’ll go update this post =)
I´m speechless… Most beautiful cupcakes I´ve ever seen indeed
Your cupcakes look AMAZING! I tried these, and sadly mine didn't turn out quite the same….well the snow flakes at least. I used a slightly larger tip, to make them more sturdy, which worked, but regardless of the tip, I could NOT get mine to look as tidy as yours. You could see so much texture, they weren't smooth like yours. Any suggestions for how to get them to look flawless like yours? Thanks so much, and happy new year!
Question:
Could you share how you achieved that color? It is the exact color of my daughter's sweet sixteen party and I want to make these, but I am nervous about getting the right color.
Thanks!
Thanks for sharing so many wonderful ideas and tutorials. I pinned the cupcake yesterday but didnt know where it originated … it was a hit yesterday so I repinned today so it linked back to you Merry Christmas to you and yours
I just made these and they came out great! What a cool idea! But it might be helpful if you mention exactly how long it takes for the snowflakes to dry. It took 2 full days for me. I tried removing them after one day and broke every single one. After 2 days, they came out great!
Love your site! I've bookmarked it!
Oh these look lovely. Thank you Glory. Yet another wonderful post. Thank you so much, and merry christmas to you are your family.
I wonder if these could be done on non stick foil. Nothing sticks to it and maybe they could then be removed without breakage.