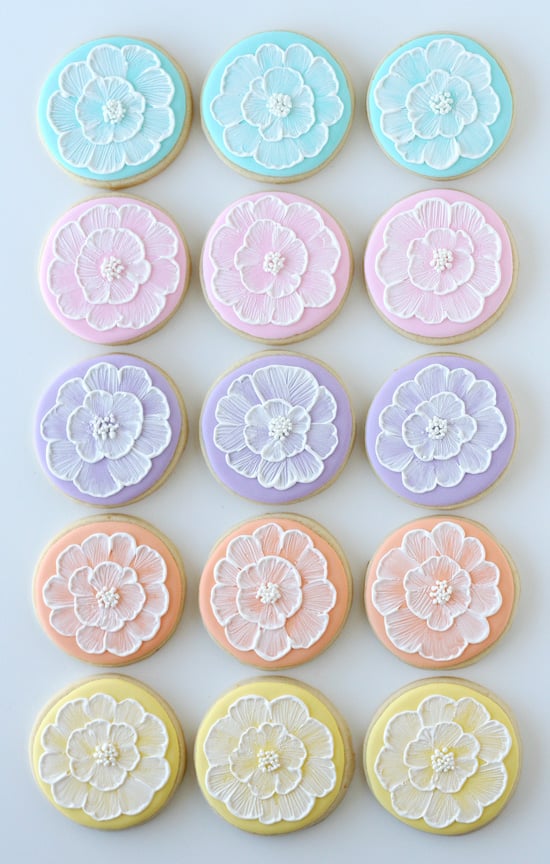
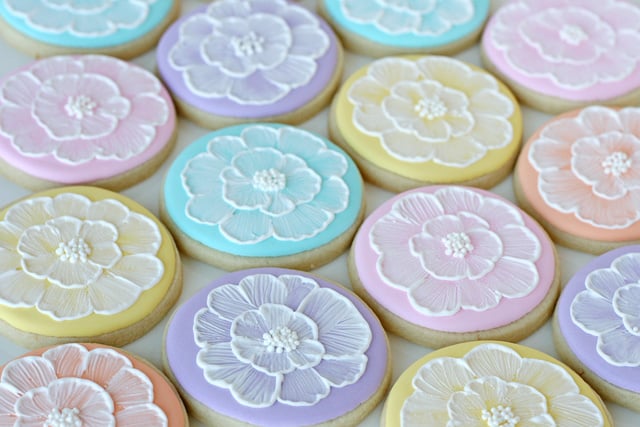
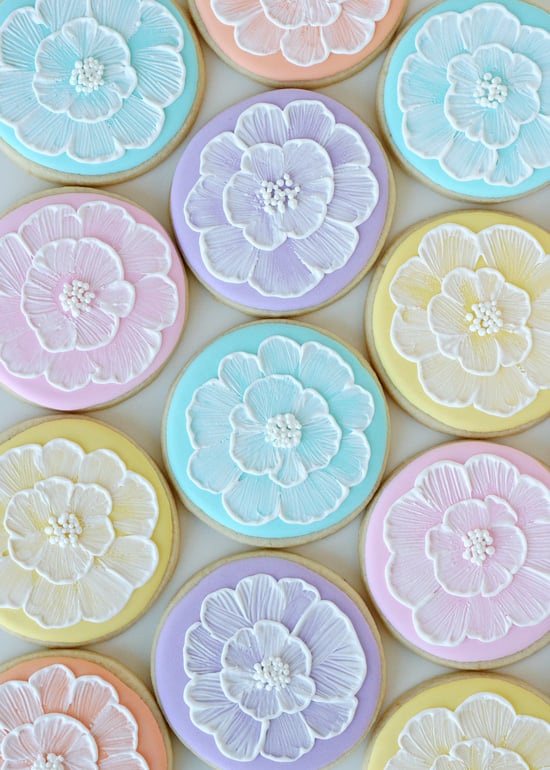
Spring flowers, and cookie decorating… two of my favorite things! I’m combining these two loves with these Spring Brush Embroidery Cookies.
I’m often drawn to pastel colors, and when I wanted to share the beautiful and delicate technique of brush embroidery, this seemed the fitting color palette.
Brush embroidery was a cookie decorating technique I was intimidated to try for a long time. When I finally gave it a try a few years ago I realized how truly simple it is! Although it does take a bit of time, and it’s important to have the correct icing consistency, one you get going I think you’ll find it a relaxing and rewarding technique!
Let’s decorate!
How to decorate cookies with brush embroidery…
First, you’ll need a batch of cookies made from my Sugar Cookie Recipe (or your favorite).
You’ll also need a batch of Royal Icing and a small, flat (new/clean) paintbrush. You’ll see the size and shape I used in the images below. Each decorator may have their own brush preference.
I outlined and flooded the cookies shown with the same consistency of icing, a medium consistency (and a #2 tip). Mix up a batch of icing (using the recipe listed above) and then add some icing to a bowl. Add your color, and a bit of (slightly warm) water (1/2 teaspoon at a time) until you’ve reached a consistency similar to shampoo or corn syrup. It should be just thin enough that after 15-20 seconds a spoonful of icing drizzled into the bowl disappears into the rest of the icing.
Outline and fill in the cookies, then allow that icing to dry fully overnight.
The next day, prepare a bag of white piping consistency (stiff) icing (with a #2 tip). The icing should be about the consistency of toothpaste. It should not be so stiff that it hurts your hand to squeeze the bag, but when piped onto a surface (cookie) the line stays in place.
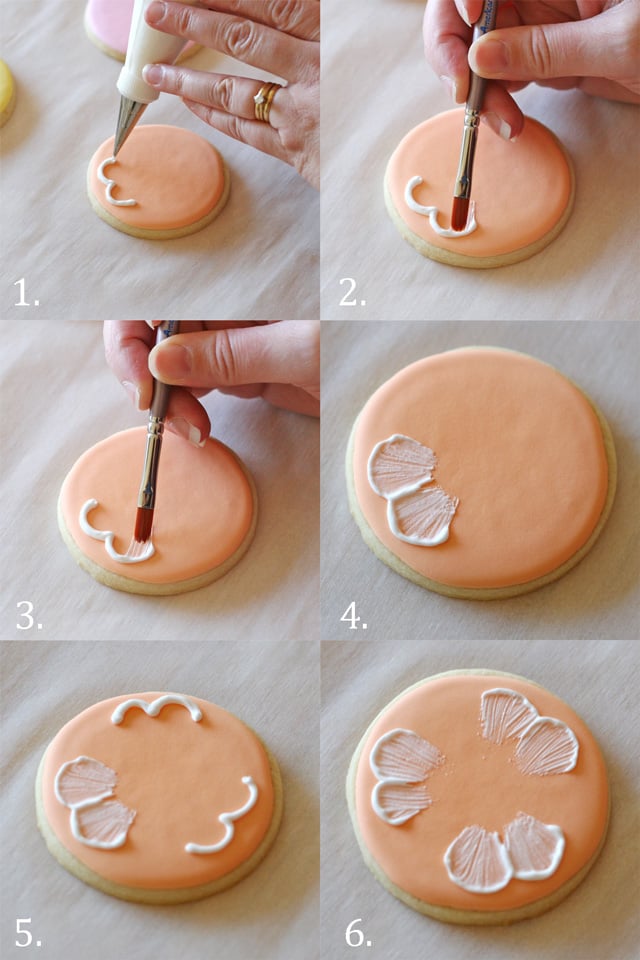
Step by step brush embroidery (as pictured above).
1. Pipe the outline of two flower petals (as shown).
2.-4. Using a slightly moist brush, pull some of the icing from the edge you’ve created, in toward the center of the cookie. The brush should be slightly moist as you work. I keep a small bowl of water at my work area, dip the brush into the water, then dap the brush onto a paper towel to absorb much of the water. This is something you will have to experiment with. If you begin to “brush” the icing the brush is too wet, you will lose any definition in the petals. As you’ll see in the photos (both above and below), you want to be creating some texture in each petal (from the brush bristles) to represent the veining in real flower petals.
5. Pipe the start of a few more petals, as shown.
6. As before, brush the icing from the edge, toward the center of the cookie. You can experiment with how thick or thin you want to leave the outside edge of each petal.
(continued below…)
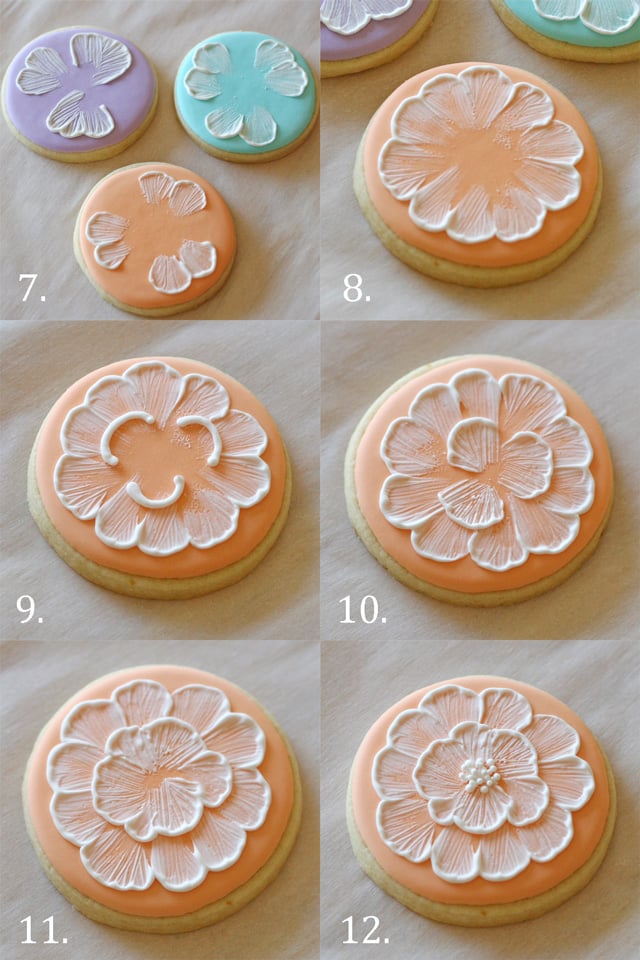
7. Allow this set of petals to dry just a bit before moving to step 8. If you are working on several cookies, but the time you’ve done the first set of steps (1.-6. listed above), the petals should be plenty dry enough to move forward.
8. Add petals to complete the outside row of petals (as shown). Allow to dry (about 1 hour).
9.-10. When the outside row of petals has set up, add new a row of petals (as shown).
11. Complete this inner set of petals by filling in with some small petals.
12. Add some small dots of icing to create a flower center, then add a few white non-pareils (sprinkles) for added dimension.
Your cookie is complete! =)
Allow to dry fully (several hours) before packaging.
Happy decorating!
I hope you give this technique a try! As always, please feel free to share your results on the Glorious Treats Facebook page.
These look amazing, i would have thought they’d be really difficult to decorate but you make it rather simple!
http://abigailalicex.blogspot.com
Those are absolutely stunning. Thank you for sharing your creations and the instructions! I can’t wait to give them a try!
These are spectacular! I just learned how to do this at CookieCon and cannot wait to practice! Glory, it was such a pleasure to meet you in person. Because I have absolutely no self control and I bought so many adorable things at CookieCon, I had to ship a box (huge) home to myself, and your gorgeous book is in that box! I’m pacing waiting for it to arrive!
Everyone, you need to buy her book. Beautiful!! I already marked a few recipes that I’ll be trying out in the next week or so.
Hi Colleen, Thanks! It was so great to meet you as well!! I do hope you enjoy the book!
Beautiful springtime cookies. Love that the tutorial is easy to forllow
Wow – such gloriously beautiful cookies! Thanks for sharing that decorating tip!
Those are beautiful! They would be perfect for a spring tea party… Love you!
~Cecilia
Thanks Cecilia! I agree… these would be super sweet for a tea party, I hope I can find the time to host one this year!
Beautiful!!
Is there any way I could order a couple dozen from you? Im not a baker or Maybe I could pass this recipe to my Mom.
Thanks Sharde, but I do not take orders for any of my projects. I have a few suggestions of shops that do make custom cookies here, https://www.glorioustreats.com/faq
Gorgeous! And I love the colors!
Thanks so much Robin!
These are breathtaking! Thank you so much for your detailed instructions – they’re so easy to follow. I can’t wait to make these for upcoming bridal showers. 🙂
Thanks Janice!! If you do give them a try please feel free to share on the Glorious Treats facebook page!