Some of you may have seen this coming…
After my 3-D Pumpkin Cookies, and 3-D Christmas Drums, I was bound to have a few more cookie treasure box ideas!
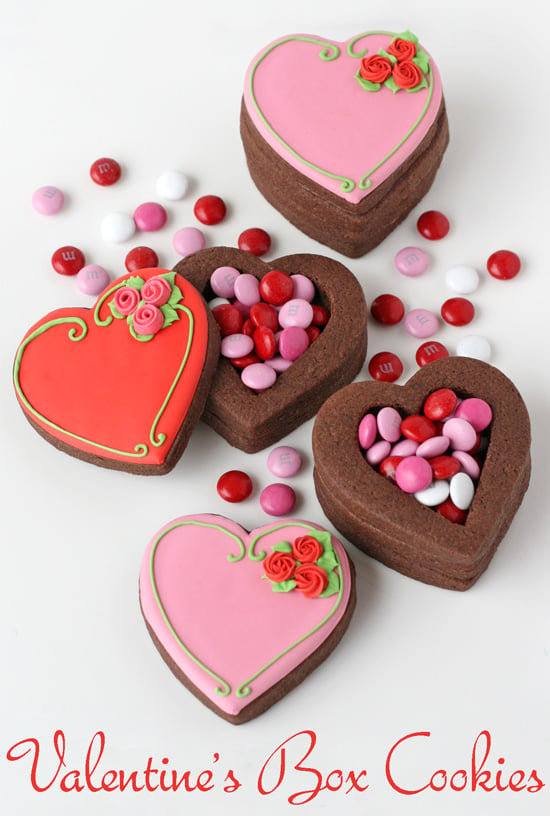
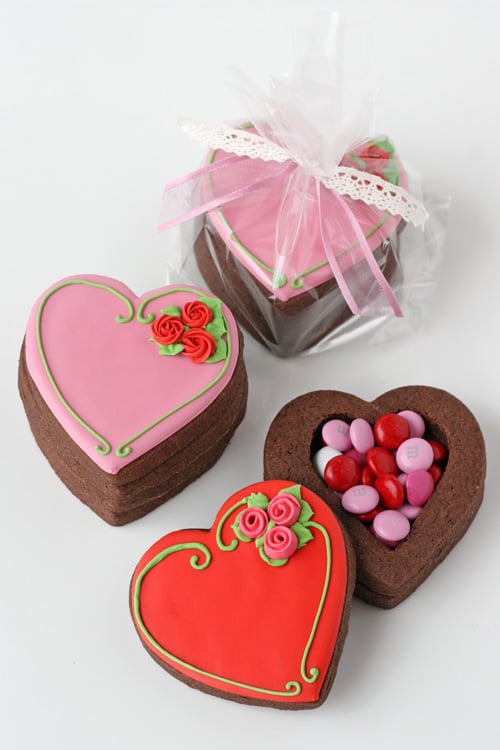
I’ve been looking forward to doing a Valentine’s Day version since the original Pumpkin Surprise Cookies, and the time has finally rolled around. In some ways, I like this design the best, because you can customize the top of the box any way you want.
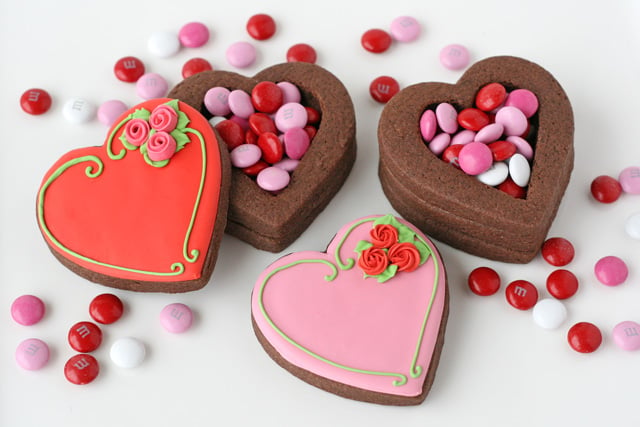
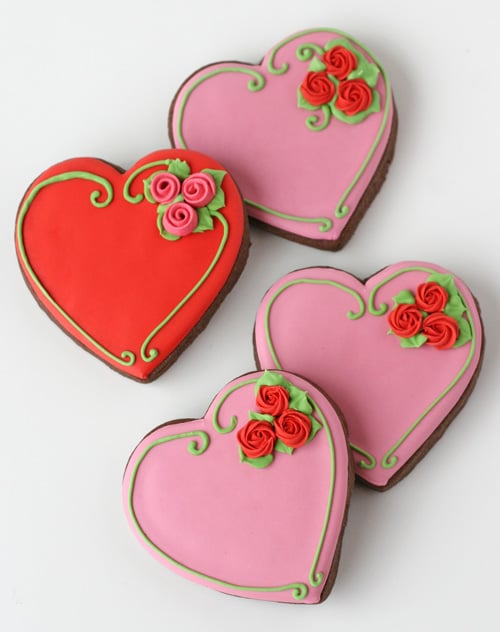
I chose a pretty classic design for the top, but the sky’s the limit for the colors and design! These would be extra special personalized with a name, or maybe lovers initials (J+G).
Here’s how I made them…
I started with a batch of my Chocolate Roll Out Cookies. You could certainly use a traditional Sugar Cookie Recipe, or any flavor of your choice.
Bake 3 or 4 heart cookies (of the same size) for each finished box. If you use only 3 total cookies, the space inside for a treasure will be quite small (the depth of one cookie), appropriate for small candies (such as mini M&M’s, or just a note). You can see in the finished photos, I made one box using 3 cookies, and the others using 4.
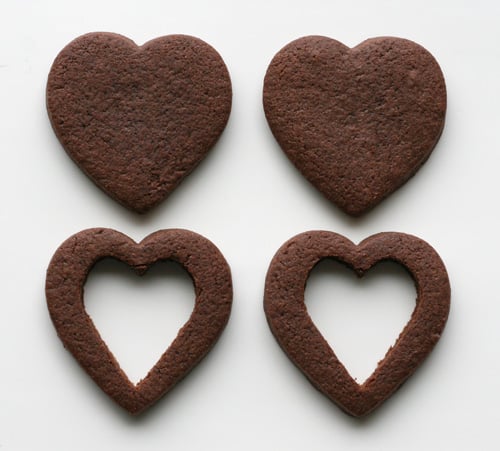
Bake full cookies (with no cut-outs). After the cookies are baked and have cooled slightly, use a small heart cutter to cut out the centers of the cookies you’ll be using between the top and bottom cookie (either one or two cookies per set, depending on what you’ve decided you want to do).
Allow the cookies to fully cool. Decorate one of the full heart cookies (for each set), which will be your top cookie. You can find some decorating inspiration in my past Valentine’s cookie posts, here, here and here.
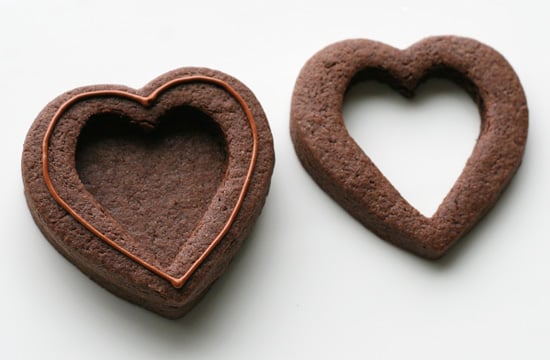
While the top cookies are drying, assemble your cookie boxes. I used brown royal icing to hold together each layer. If you use a thin line of icing (as shown below), it probably doesn’t matter what color you use, because it wont show.
Once the decorated cookie tops are dry (after several hours or overnight) add goodies of your choice (small candies, a special note, jewelry) to the box, and set the top on.
(above) 4 cookies ready for one box (a top, a bottom, and two center cookies)
(below) Use royal icing to adhere center cookie (or cookies) to the bottom cookie.
Fill the pretty cookie boxes with goodies of your choice (small candies, a special note, or jewelry), and share with people you love.
Oh yes, Glory, I rechristen these “YUM-in-a-BOX”! So lovely & not only for V-day. Thanks!
This really is a superb idea, Glory! So cute and unique and the whole idea of a Valentine box is perfect! Lovely design too!
While there are oh-so-many Valentine cookies out there, I think these have moved to the very tip-top of my list of favorites and love that this technique works for so many occasions. Encore, Encore!!!
These are so pretty! Wish I had the talent and patience to do them!
I love your 3-D cookies. These are beautiful!
Hi Glory! These are beautiful and I would love to make these! Do you know how far in advance I can make them? Thanks
Lili, With this chocolate cookie recipe, or my regular sugar cookie recipe, the cookies remain fresh at least 5-7 days after baking, if kept covered while not being decorated (or drying).
What if I cut – out the heart – shaped center before baking the cookies?
Are baked cookies so soft that can be cutted?
Thank you!
If you cut out the heart shape before you bake the cookies, they will likely spread a bit more than baking the full cookies, and will not line up nicely with the full cookies.
These are so pretty, and I really love they way they look all packaged up witht he ribbon and lace. Great work! Love you!
~Cecilia
Love these so much. These are my favorate out of all of your 3-D box cookies.
These are awesome! I”ll be making these for sure! Thanks you yet again. 🙂