Some of you may have seen this coming…
After my 3-D Pumpkin Cookies, and 3-D Christmas Drums, I was bound to have a few more cookie treasure box ideas!
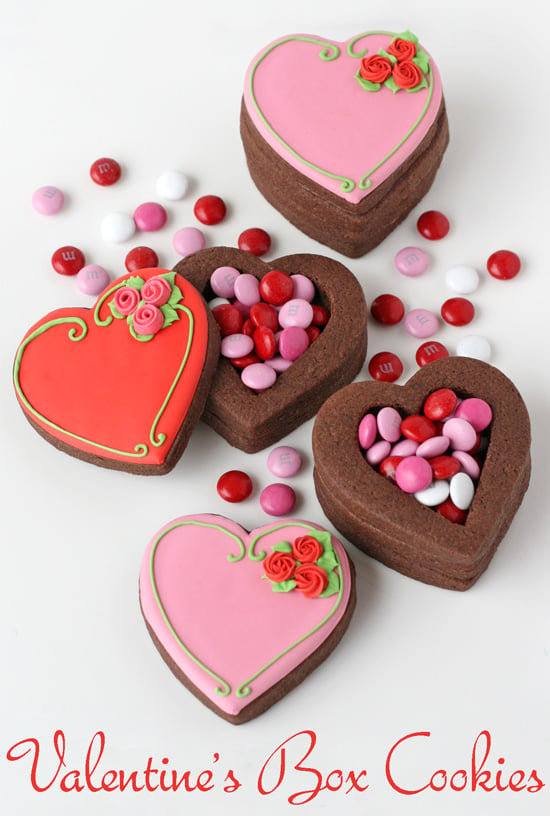
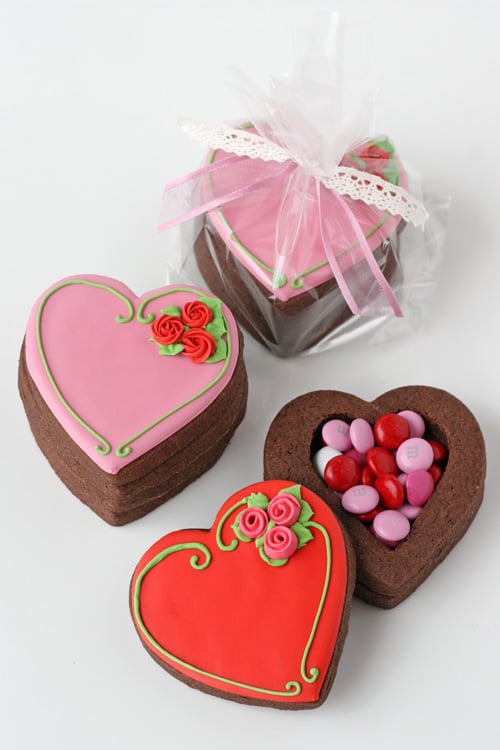
I’ve been looking forward to doing a Valentine’s Day version since the original Pumpkin Surprise Cookies, and the time has finally rolled around. In some ways, I like this design the best, because you can customize the top of the box any way you want.
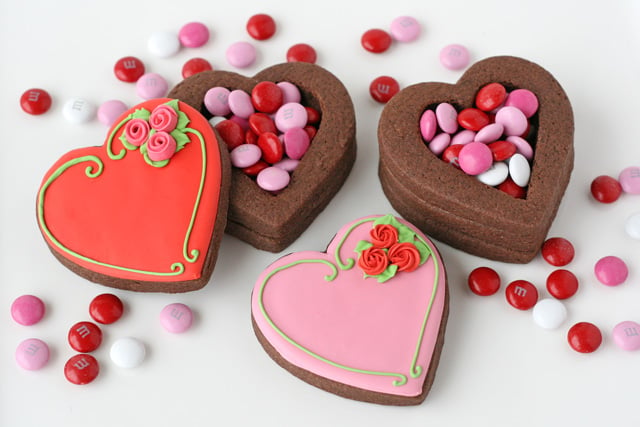
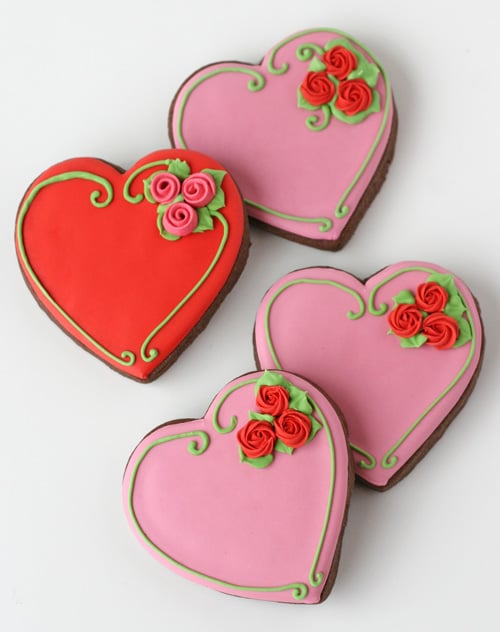
I chose a pretty classic design for the top, but the sky’s the limit for the colors and design! These would be extra special personalized with a name, or maybe lovers initials (J+G).
Here’s how I made them…
I started with a batch of my Chocolate Roll Out Cookies. You could certainly use a traditional Sugar Cookie Recipe, or any flavor of your choice.
Bake 3 or 4 heart cookies (of the same size) for each finished box. If you use only 3 total cookies, the space inside for a treasure will be quite small (the depth of one cookie), appropriate for small candies (such as mini M&M’s, or just a note). You can see in the finished photos, I made one box using 3 cookies, and the others using 4.
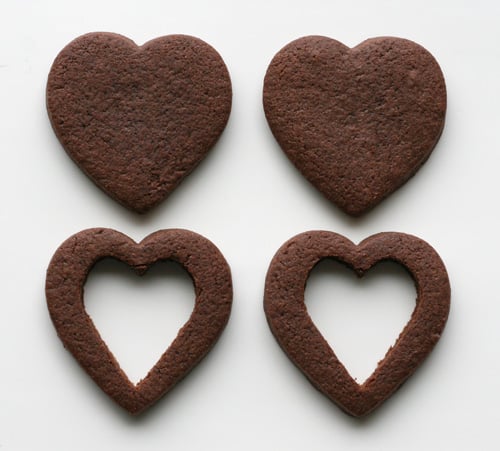
Bake full cookies (with no cut-outs). After the cookies are baked and have cooled slightly, use a small heart cutter to cut out the centers of the cookies you’ll be using between the top and bottom cookie (either one or two cookies per set, depending on what you’ve decided you want to do).
Allow the cookies to fully cool. Decorate one of the full heart cookies (for each set), which will be your top cookie. You can find some decorating inspiration in my past Valentine’s cookie posts, here, here and here.
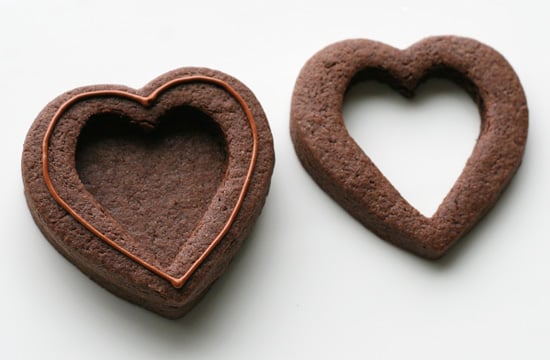
While the top cookies are drying, assemble your cookie boxes. I used brown royal icing to hold together each layer. If you use a thin line of icing (as shown below), it probably doesn’t matter what color you use, because it wont show.
Once the decorated cookie tops are dry (after several hours or overnight) add goodies of your choice (small candies, a special note, jewelry) to the box, and set the top on.
(above) 4 cookies ready for one box (a top, a bottom, and two center cookies)
(below) Use royal icing to adhere center cookie (or cookies) to the bottom cookie.
Fill the pretty cookie boxes with goodies of your choice (small candies, a special note, or jewelry), and share with people you love.

You make it look so easy. Yours are so pretty. I love them
This is a good and cute project to do for valentines day
I was excited to discover this site. I want to to thank you
for your time for this particularly fantastic read!!
I definitely liked every bit of it and i also have you book marked to look at new things on your web
site.
You actually make it appear really easy along with your presentation however I find this topic to be actually
one thing that I feel I might never understand. It seems too complicated and extremely vast for me.
I am having a look forward on your subsequent publish,
I’ll try to get the grasp of it!
I’m curious to find out what blog platform you happen to be working with?
I’m having some minor security problems with my latest website and I would like to find something more secure.
Do you have any recommendations?
Great beat ! I wish to apprentice while you amend your web site, how can i subscribe for a blog
web site? The account aided me a acceptable deal.
I had been tiny bit acquainted of this your broadcast provided bright clear idea
i just found these cookie boxes and am going to make them this week. My question is how thick is each layer of cookie. And how many inches high is the finished box. So excited to give them a try. Thanks Kathy
I will never forget these cookies, they inspired me and got me making cookies something I needed more than I knew for so many reasons.
just adorable!!
I linked to your recipe on my blog – thanks for sharing!
♥, doro von Hand zu Hand
These are so cute! =)
What a wonderful Valentines gift!