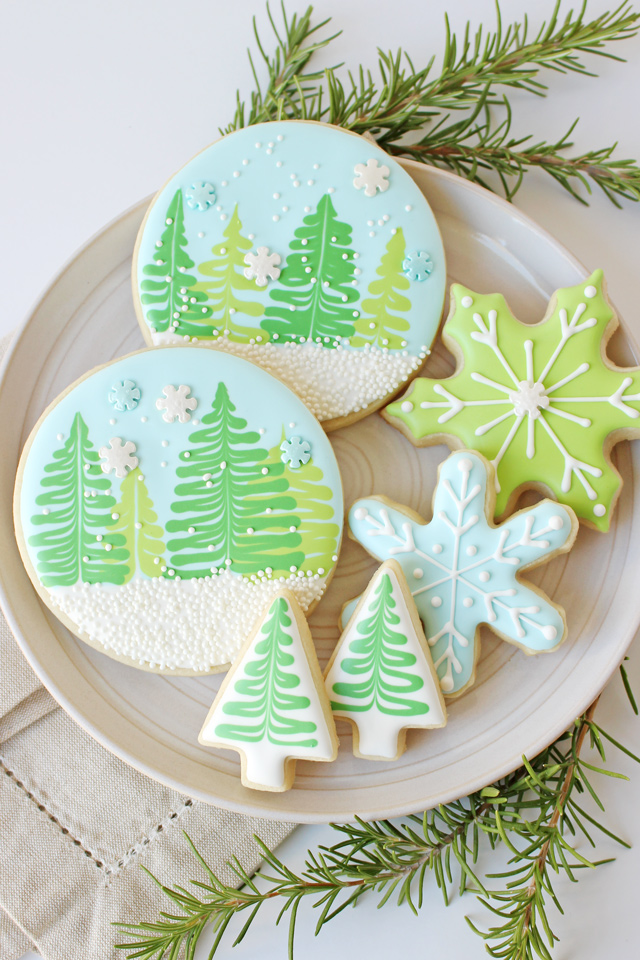
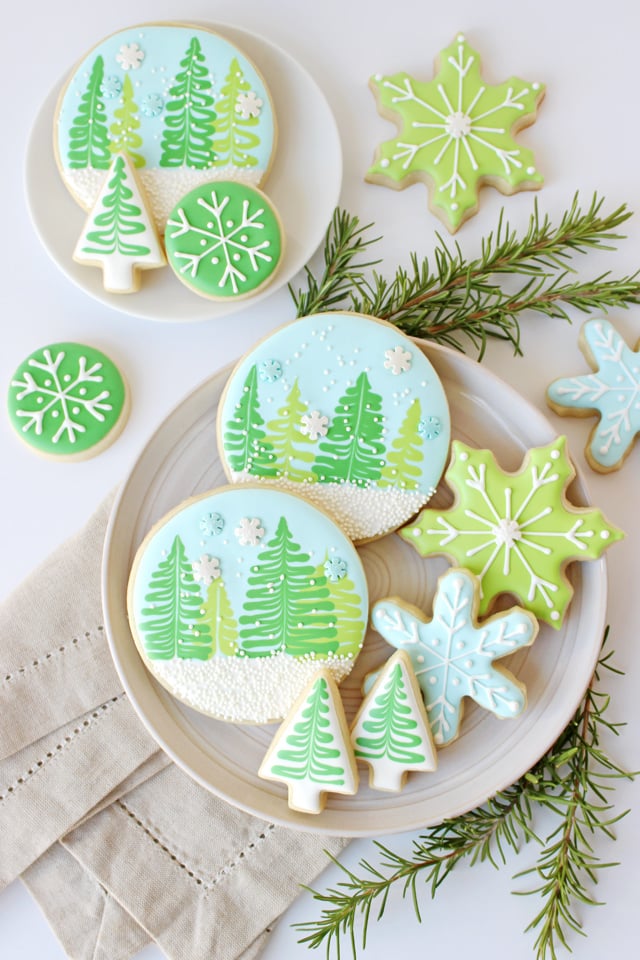
These simple and beautiful Winter Wonderland Cookies are perfect for any winter holiday or party!
Here in California we still have lots of sunshine… but I can dream of snow with these cute cookies!
One of my favorite things about this set of cookies is that it only requires a few icing colors and some very simple techniques to create a fun and engaging collection!
And although these cookies would be adorable for Christmas, they’d also be perfect for any winter holiday or party… all the way into January.
Let’s decorate and dream of snow together!
PIN IT NOW to save for later!
Winter Wonderland Cookies Decorating Instructions –
Start with a batch of my Perfect Sugar Cookies.
For this set you’ll need some round cookies (large and mini), some snowflakes and a simple tree (I used a mini tree cutter from Ecrandal, but I do not see it on their site currently).
Prepare a batch of Royal Icing.
For this set, I made…
Pale blue icing with a #2 tip, medium/flood consistency
Lime green icing with a #2 tip, medium/flood consistency
Medium-dark green icing with a #2 tip, medium/flood consistency
White icing with a #1.5 tip, piping consistency
White icing with a #2 tip, medium/flood consistency
You’ll also need white non-pareils sprinkles and white and/or light blue snowflake sprinkles (optional)
I’m trying something new and sharing the decorating process with a video, in place of step-by-step photos.
I’d love your feedback as to which you prefer (photos or video). Please don’t say “both”… I’m only human! =)
Enjoy this short video for the step-by-step decorating tutorial…
A few additional decorating notes…
For the large round cookies (the tree scene), the trees should be added immediately after the cookie has been “flooded” with the white and blue icing.
For the mini trees, (pictured in this post, but not show in the video) the same technique (called “wet-on-wet”) should be used.
For the snowflakes, outline and flood the cookies, then allow to dry (1-4 hours) before adding the white details.
How to Make Sugar Cookies and Royal Icing

Sugar Cookies and Royal Icing
Ingredients
Perfect Sugar Cookies
- 3 cups all-purpose flour
- 1 teaspoon baking powder
- 1/4 teaspoon salt good quality
- 1 cup unsalted butter 2 sticks, room temperature
- 1 cup sugar
- 1 egg large
- 1 teaspoon vanilla extract good quality, see flavor options in notes
Royal Icing
- 4 tablespoons meringue powder
- 4 cups powdered sugar about 1 pound
- 6 tablespoons warm water to start
Instructions
Perfect Sugar Cookies
- In a medium bowl, stir together the flour, baking powder and salt, and set aside.
- In the bowl of an electric mixer, using the paddle attachment, cream together the butter and sugar until light and fluffy. This should take 2-3 minutes.
- Add the egg and vanilla and beat another minute or so.
- Add the flour mixture slowly. (Be careful not to add too much at a time or you will have a snowstorm of flour.)
- Blend until all of the flour is incorporated. The mixture will look crumbly at first but just keep blending until the dough begins to pull away from the sides of the bowl.
- Remove about half of the dough from the bowl and knead by hand just a bit to form a smooth ball. Roll out dough onto a lightly floured work surface, or onto a piece of plastic wrap (as described in detail in the blog post above).
- Cut out cookies into desired shapes and place entire baking sheet of unbaked cookies into the freezer for 5 minutes.
- Preheat oven to 350°F and bake cookies in preheated oven for 9-11 minutes, depending on the size and thickness of your cookies.
- The cookies are baked when then are no longer shinny on top, but they will not show much of any change in color.
- Cool on baking sheet just a minute or so, then carefully move to a wire cooling rack and allow to cool fully before decorating.
Royal Icing
- Beat all ingredients until stiff peaks form.
- Spoon some of the thick white icing into individual bowls and add coloring .
- Add additional water, about 1 teaspoon at a time until you’ve reached the consistency you need.
Notes
Nutrition
PIN IT NOW to save for later!
Happy winter cookie decorating!
Disclosure – Amazon links provided for your convenience. I may receive a small commission when you shop using the links in this post.



LOVE these!!
This set is beautiful, thanks for sharing.
Can you tell us more about flow? Mine always seem to run off the sides of my cookies. Your icing flow is something I can’t seem to figure out. Hints? Your cookies are beautiful.
Thanks so much Deb. Yes, icing consistency is something that takes some practice… and each cookie decorator has things they prefer sightly differently. If your icing is running off your cookies, then it’s just a little too thin. The solution is to make two bags of icing of each color, one thick and one thin. The thick icing should be about the thickness of toothpaste… thick enough to stay in place, but it should not hurt your hands to squeeze the bag. This thicker icing (I call piping consistency) should be used for outlining the cookies (to create a dam) and for final details. Then make a second bag of thinner icing, about the consistency of thick shampoo or corn syrup. This will be used to “flood” the cookies. It should be just thin enough to fill in mostly on it’s own. Keep practicing!
Incredible cookies – so accurate and just beautiful!
Love the video and the cookies. Thank you for sharing.
These look great and I’d love to give them a try do you have to let the first round of icing harden before adding the Christmas trees? As you can tell I am new to this.
Hi! Beginners are welcome! =) No, you do not need (or want) the white icing to dry at all before adding the trees. This design is using a technique called “wet-on-wet” meaning the design elements are added immediately, while the base coat is still “wet”. I’m not sure if you’ve watched the video in this post yet, but that might help too. Happy decorating!
They look super cute!!
These are awesome! You’re so incredibly talented! I love the videos
Thanks so much!
I love the videos…they help me see just how to do things 🙂
These are SO cute, and doable!
Yay! So glad you enjoyed it! Thanks for the feedback.
Oh my gosh, these look incredible! Your decorating skills are always on point and you’ve inspired me to give them a try. So festive!
Awe, thanks so much for your sweet comment! I hope you do give them a try!